1
Set up new Mage project
Read the setup guide to initialize a new project and
start the Mage tool locally.For the rest of this tutorial, we’ll use the project name
demo_project.2
Set up dbt project
- Open Mage and go to the terminal page: http://localhost:6789/terminal
- Initiate your dbt project using the
initcommand (for this tutorial, we’ll use the dbt project namedemo):
3
Create standard pipeline
- Go to the Mage dashboard and click the button
+ New pipelineand select the option labeledStandard (batch). - Click the
Pipeline settingsicon in the left pane, and change its name todbt demo pipeline, then click theSave pipeline settingsbutton.
4
Create dbt profile for database connections
- On the left side of the page in the file browser, expand the folder
demo_project/dbt/demo/. - Click the file named
profiles.yml. - Paste the following credentials in that file:
- Save the
profiles.ymlfile by pressingCommand (⌘)+S. - Close the file by pressing the
Xbutton on the right side of the file namedbt/demo/profiles.yml.
5
Add data loader block to pipeline
-
Click the
+ Data loaderbutton, selectPython, then clickAPI. -
In the popup dialog
Data loader block name, change its name toload data, then click theSave and add blockbutton. -
Paste the following code in that block:
6
Add dbt model block to pipeline
-
Under the data loader block you just added, click the button
dbt model, then click the optionSingle model. -
In the file browser that pops up, click the file named
my_second_dbt_model.sqlunder the foldersdemo/models/example/. -
This will add 2 dbt blocks to your pipeline: 1 for the dbt model named
my_first_dbt_modeland the 2nd for the dbt model namedmy_second_dbt_model. -
The model named
my_first_dbt_modelwas added to the pipeline becausemy_second_dbt_modelreferences it.
7
Edit my_first_dbt_model
- In the dbt block named
my_first_dbt_model, next to the labelTargetat the top, choosedevin the dropdown list. You can also checkManually enter target, and enterdevin the input field. - Paste the following SQL into the dbt model named
my_first_dbt_model:
- Run the dbt model block by pressing the play button on the top right of the
block or by pressing
Command+Enter. - You should see a preview of the query execution logs. To see the query results,
click the
Expand tablelink at the bottom right corner.
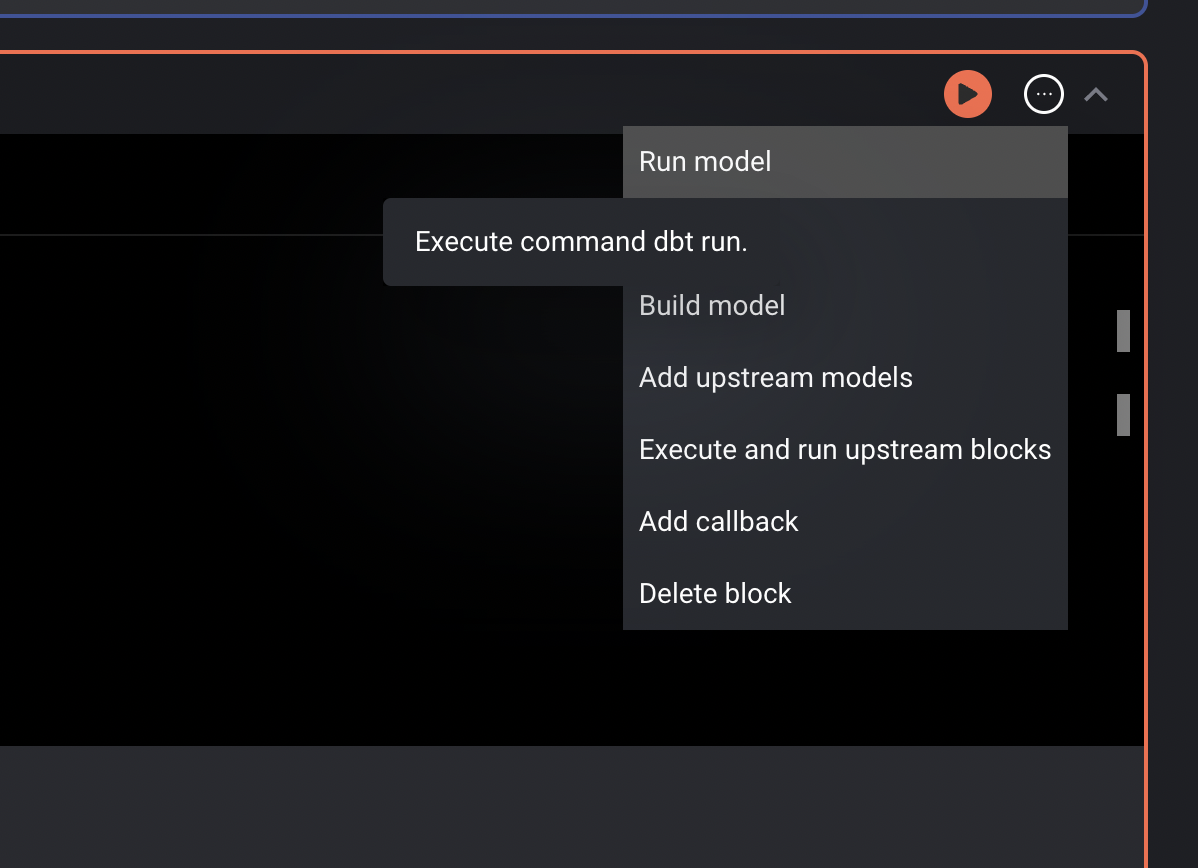
- After previewing the results, in the top right corner of the block, click on the triple dots to reveal a dropdown menu.
- Under the dropdown menu, click the option Run model. This command
will execute the
dbt runcommand and create the table in your data source.
8
Edit my_second_dbt_model
-
In the dbt block named
my_second_dbt_model, next to the labelTargetat the top, choosedevin the dropdown list. You can also checkManually enter target, and enterdevin the input field. -
Paste the following SQL into the dbt model named
my_second_dbt_model:dbt sources When a dbt model depends on an upstream block that isn’t a dbt model, a source for that block is automatically added to the
demo_project/dbt/demo/models/mage_sources.ymlfile. Read more about dbt sources in their documentation. -
Run the dbt model block by pressing the play button on the top right of the
block or by pressing
Command+Enter. -
You should see a preview of the query execution logs. To see the query results,
click the
Expand tablelink at the bottom right corner.
9
Add test for dbt model
- On the right side of the screen, click the tab labeled
Terminal. - Create a new dbt test file by running the following command:
- On the left side of the page in the file browser, expand the folder
demo_project/dbt/demo/tests/and click the file namedtest_my_second_dbt_model.sql. If you don’t see it, refresh the page. - Paste the following SQL in the file:
- Read more about dbt tests in their documentation.
10
Execute pipeline end-to-end
- Click the name of the pipeline in the header breadcrumbs to go back to the detail page.
-
Create a new trigger with a type
Scheduleand a Frequencyonce. For more details, follow these steps. -
After your trigger is created, click the
Start triggerbutton at the top of the page. - The pipeline will eventually fail because a dbt test failed. This means everything is working as expected.
-
Open the file
demo_project/dbt/demo/models/example/schema.ymland remove the tests nameduniqueunder both models. Your file should look like this: -
Click on the
Failedbutton next to the pipeline run and clickRetry run. It should complete running successfully after a few minutes.