Overview
Define roles with 1 or more permissions. Each permission can grant or deny read and write operations on specific resources (e.g. API endpoints). One or more roles can be assigned to 1 or multiple users.Why is this important?
Control which user can perform specific actions at a granular level.Features
Only in Mage Pro.Try our fully managed solution to access this advanced feature.
- Define roles.
- Define permissions.
- Add permissions to 1 or more roles.
- Add roles to 1 or more users.
How to use
Create roles
You must be the owner or have a role that grants permissions to read and write on the following
entities:
PermissionRoleRolePermissionUserRoleUser
- Go the the Mage project settings and click on the navigation row labeled Roles.
-
On the roles list page, there is a button labeled Create default roles and permissions.
If you click this button, 6 roles and a few hundred permissions will be created.
The roles are:
- Admin default permissions
- Editor default permissions
- Editor with notebook edit access
- Editor with pipeline edit access
- Owner default permissions
- Viewer default permissions
- Alternatively, click the button Add new role to create a single new role.
- Enter in a unique name for the role.
- Click the button Create new role to save the role.
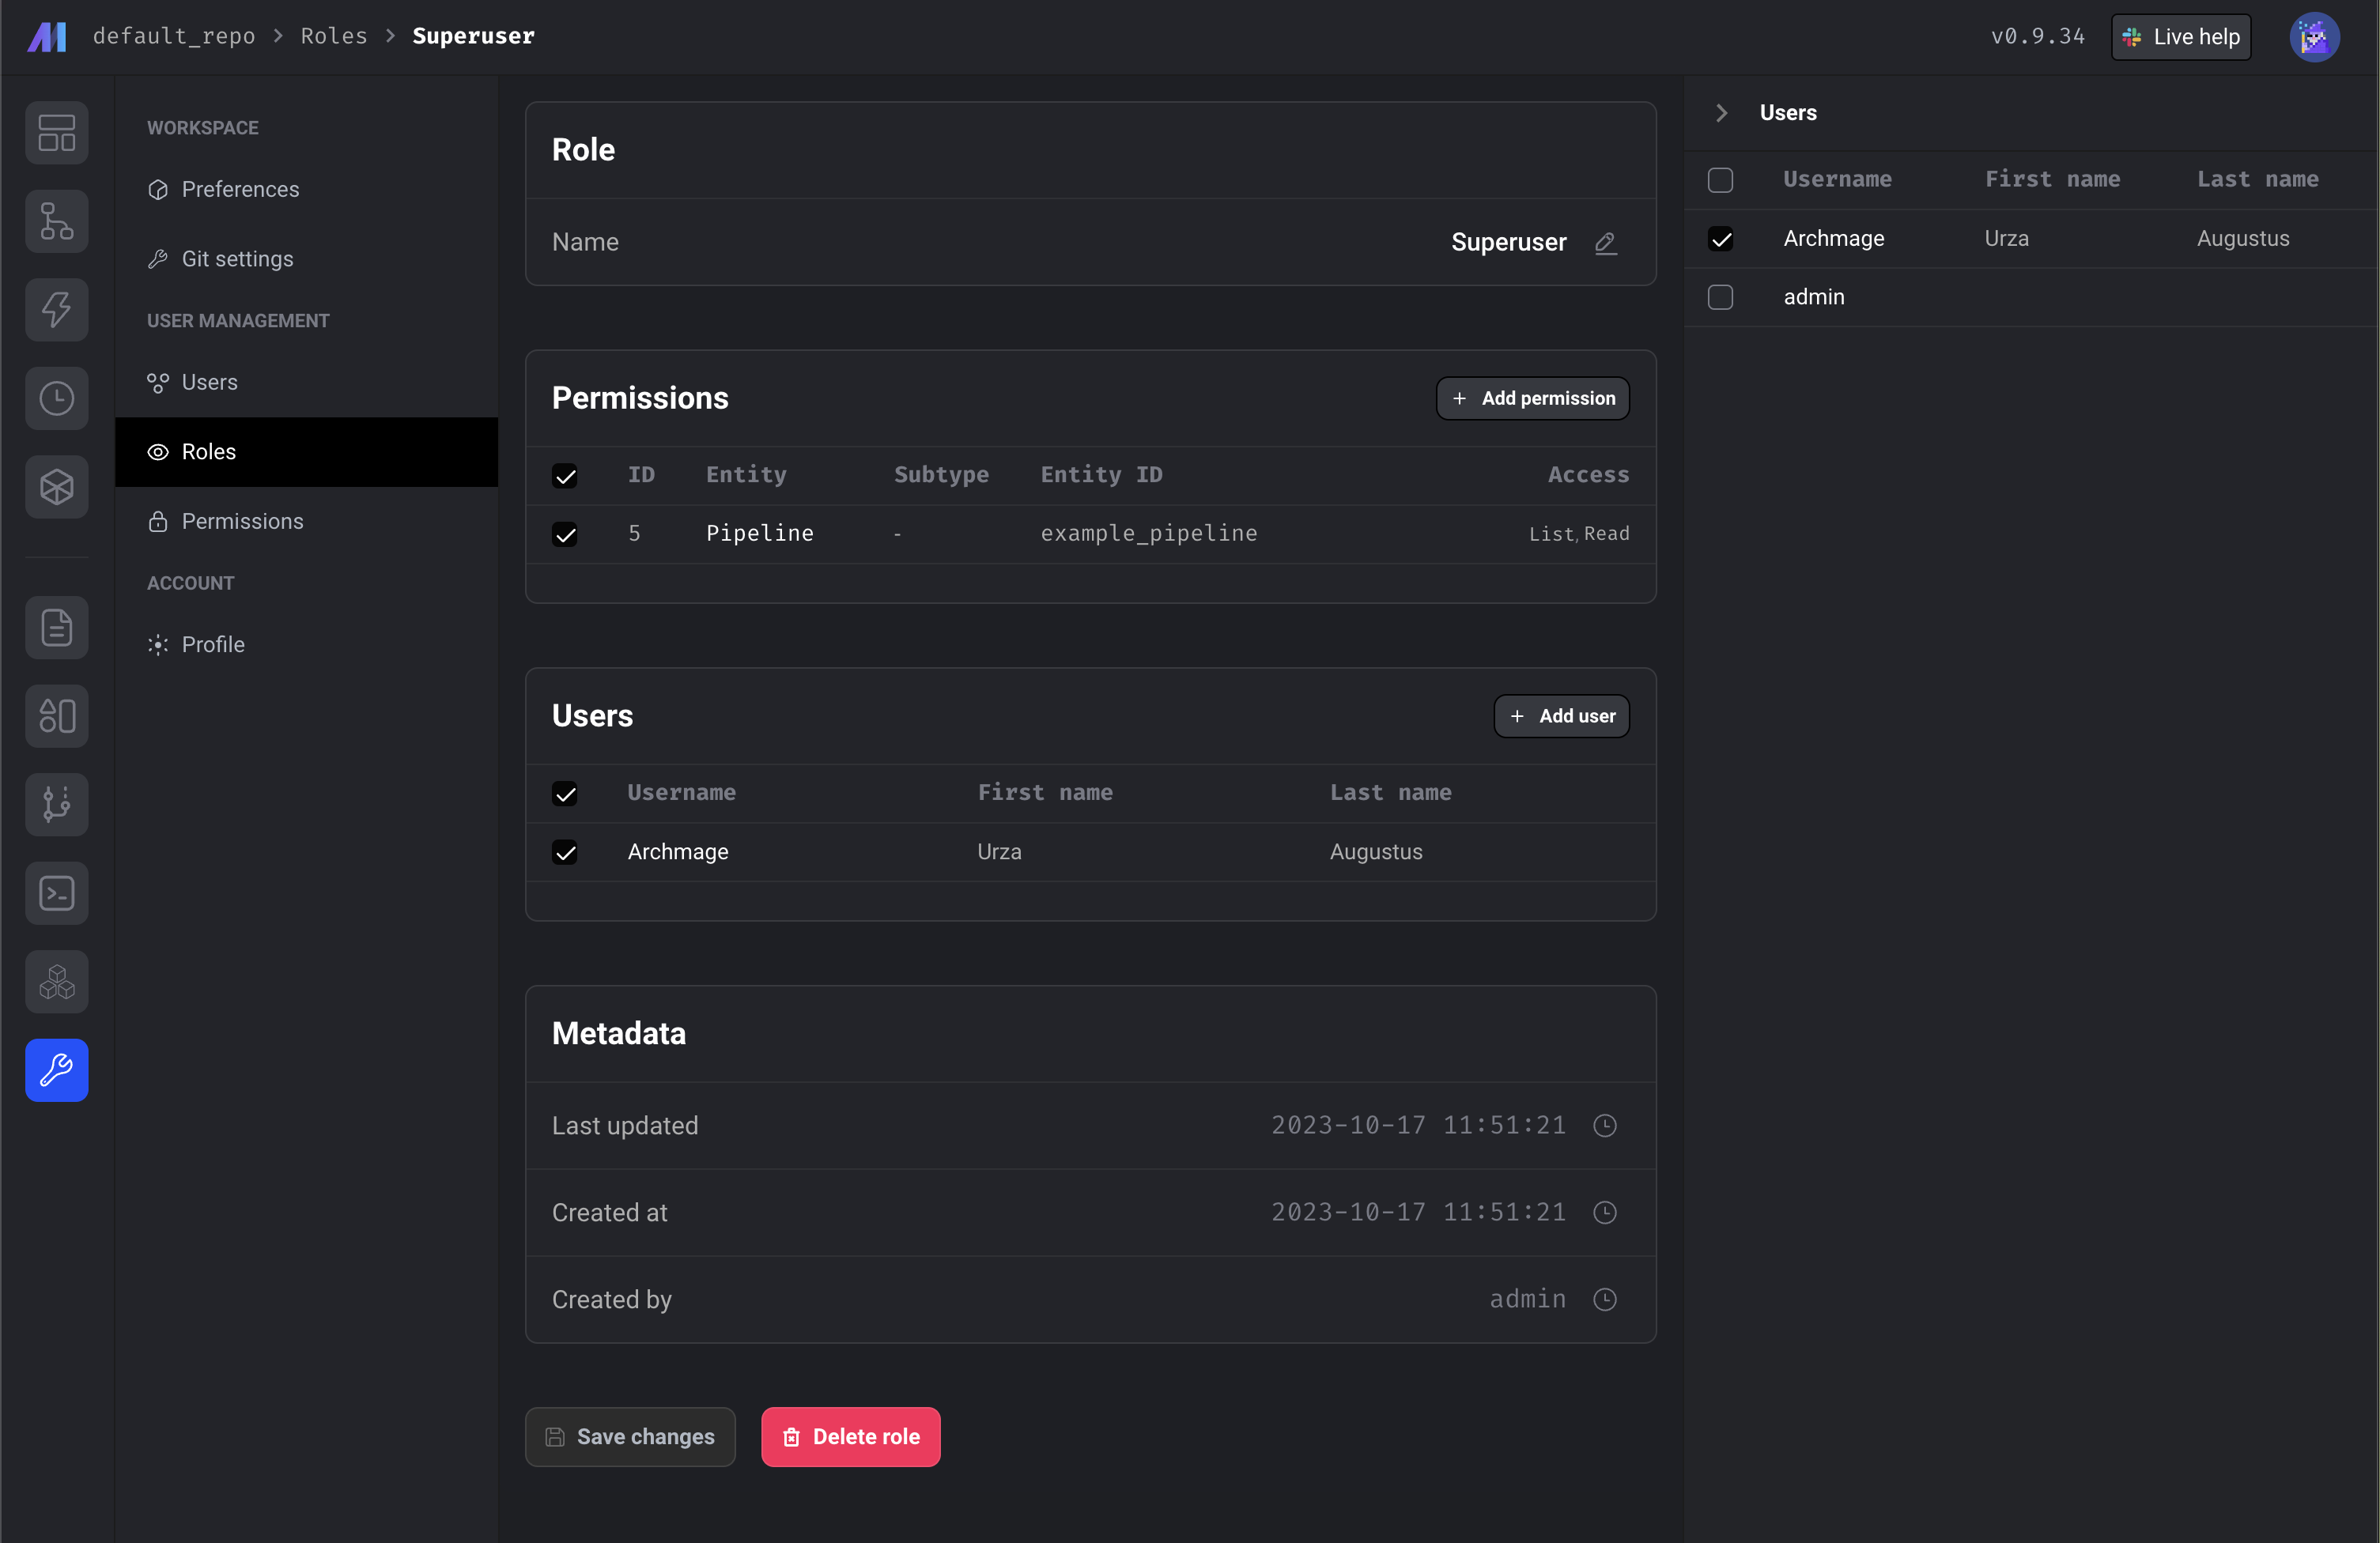
- Once you create the role, you’ll be taken to the role detail page.
- From here, you can add existing permissions to the role.
- From here, you can add existing users to the role. This will grant permissions or deny operations for user.

Create permissions
- Go the the Mage project settings and click on the navigation row labeled Permissions.
- Click the button Add new permission to create a new permission.
-
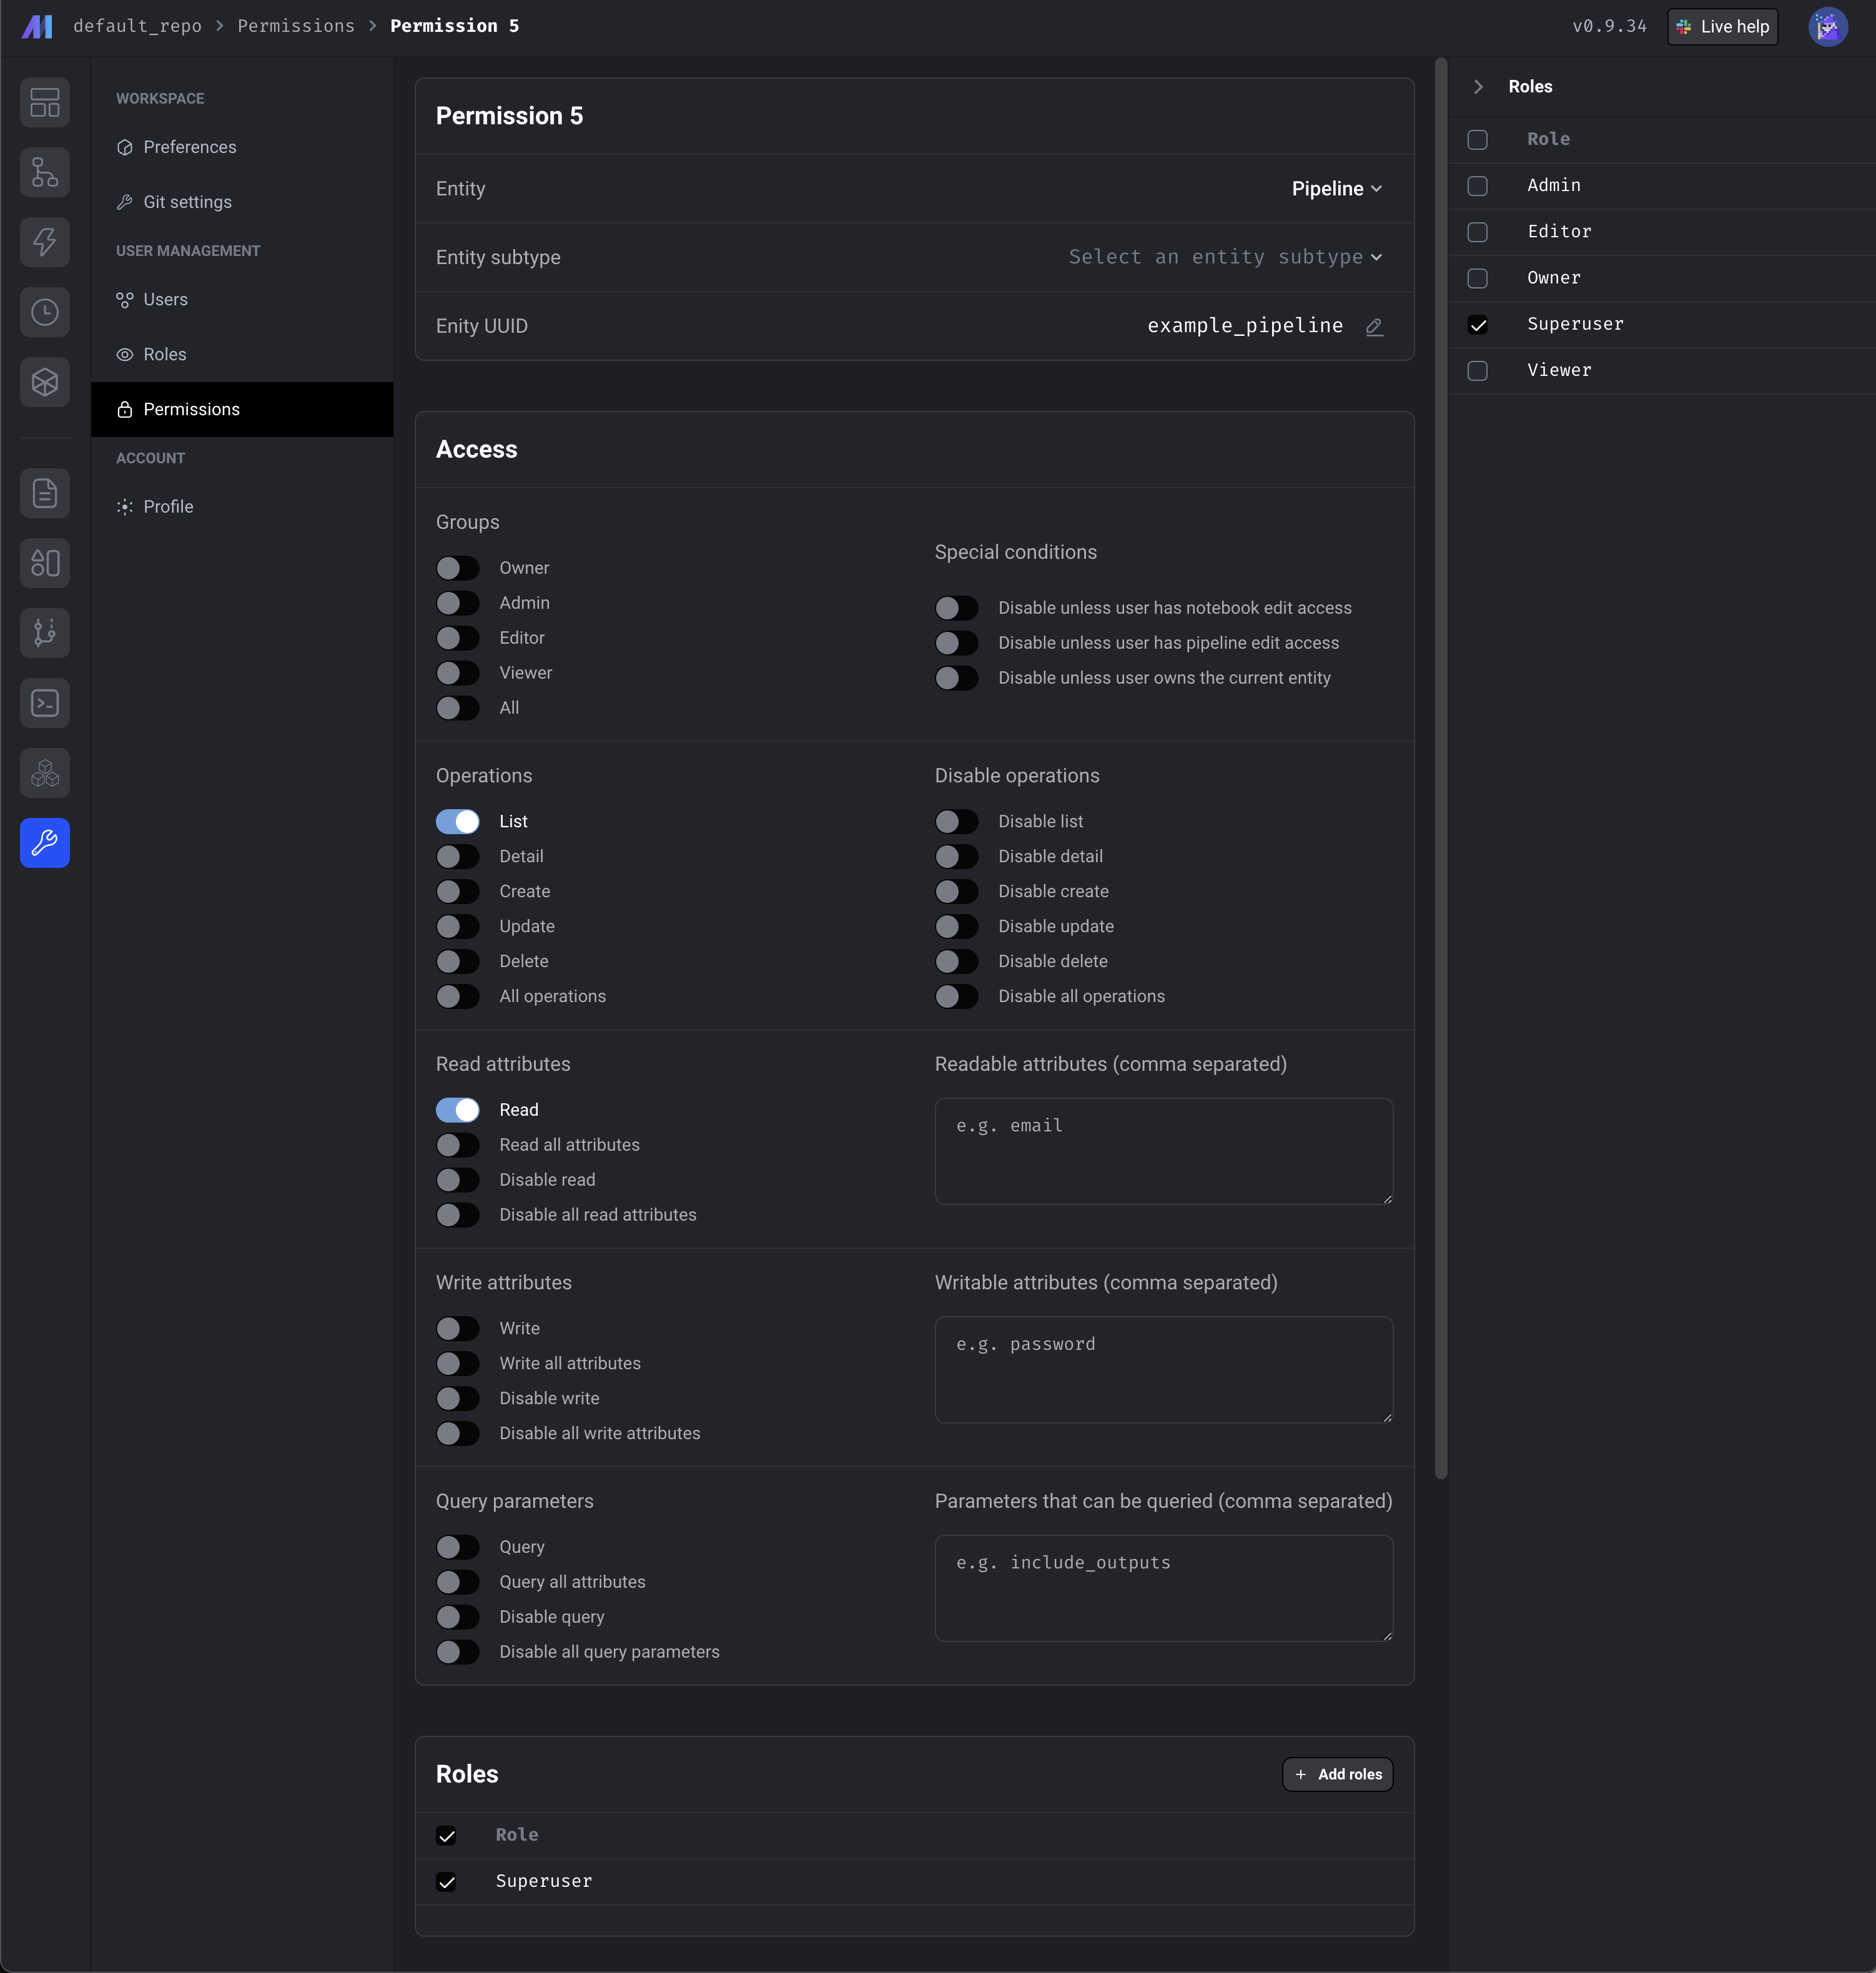
Select an entity that these permissions will be applied to.
An entity refers to a defined API endpoint that currently exists in the Mage application.
For example, the entity
Pipelineapplies to the API endpoints/pipelines. -
Optionally enter an entity UUID that these permissions are applied to.
For example, you can grant or deny permissions to a specific pipeline by selecting the entity
Pipelineand entering the entityUUIDexample_pipeline. This permission will only be applied to the pipeline with the UUIDexample_pipeline. - Under the section labeled Access, toggle 1 or more accesses to grant. For more information on what each access grants or denies, read the permissions documentation.
- Click the button Create new permission to save the permission.
- Once you create the role, you’ll be taken to the role detail page.
- From here, you can edit the permission.
- From here, you can add this permission to existing roles.

Assign roles to users
- Go the the Mage project settings and click on the navigation row labeled Users.
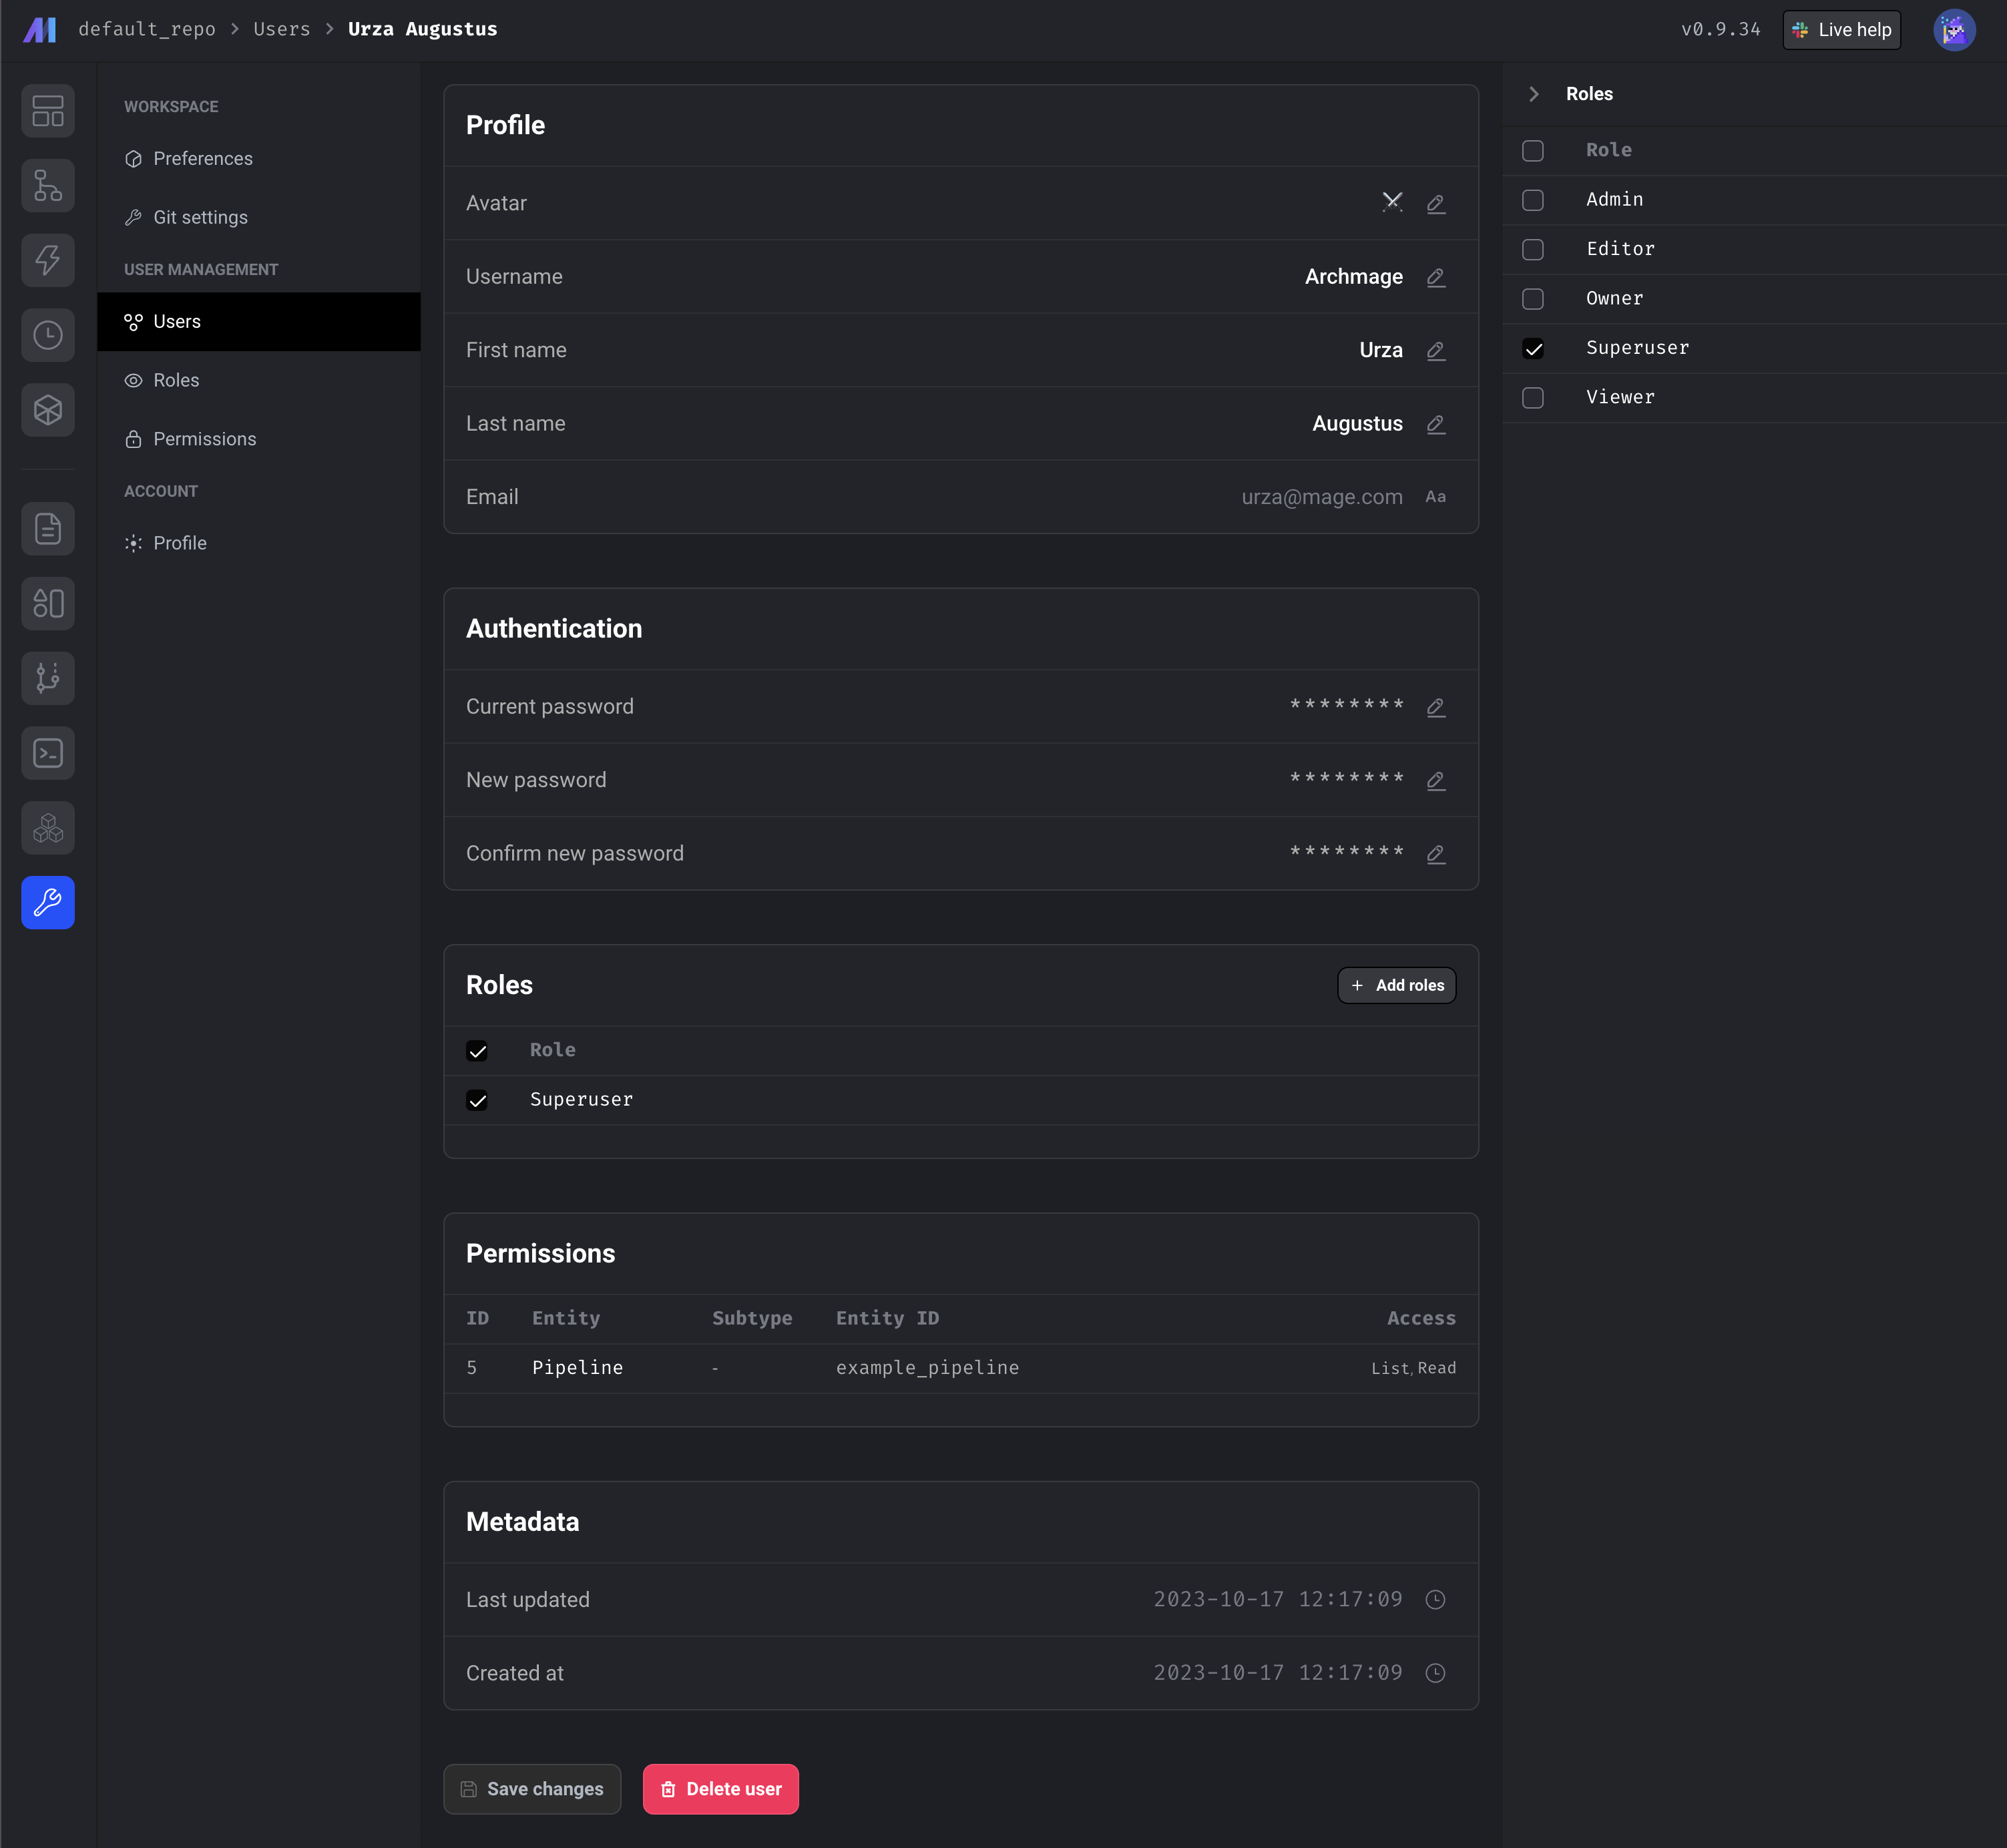
- Click on a row for an existing user.
- From here, you can assign existing roles to the user.
- Alternatively, you can add a user to a role by following these steps:
- Go to the roles list page.
- Click on a row for an existing role.
- Click the button labeled +Add user.
- Select 1 or more users to assign this role to.
