- Continuous Execution: Maintains persistent pipeline runs for real-time data processing scenarios
- Interval-Based Execution: Configures pipelines to run at specified intervals (hourly, daily, weekly, etc.)
- One-Time Execution: Schedules pipelines for single execution at a designated time
- Custom Timeline Configuration: Enables complex scheduling patterns with custom cron expressions
- Deadline Management: Sets completion time constraints to ensure pipelines finish within specified windows
- RESTful Integration: Exposes pipeline execution through standardized POST requests
- External System Integration: Allows third-party applications to trigger pipeline runs
- Programmatic Control: Enables dynamic pipeline orchestration through application logic
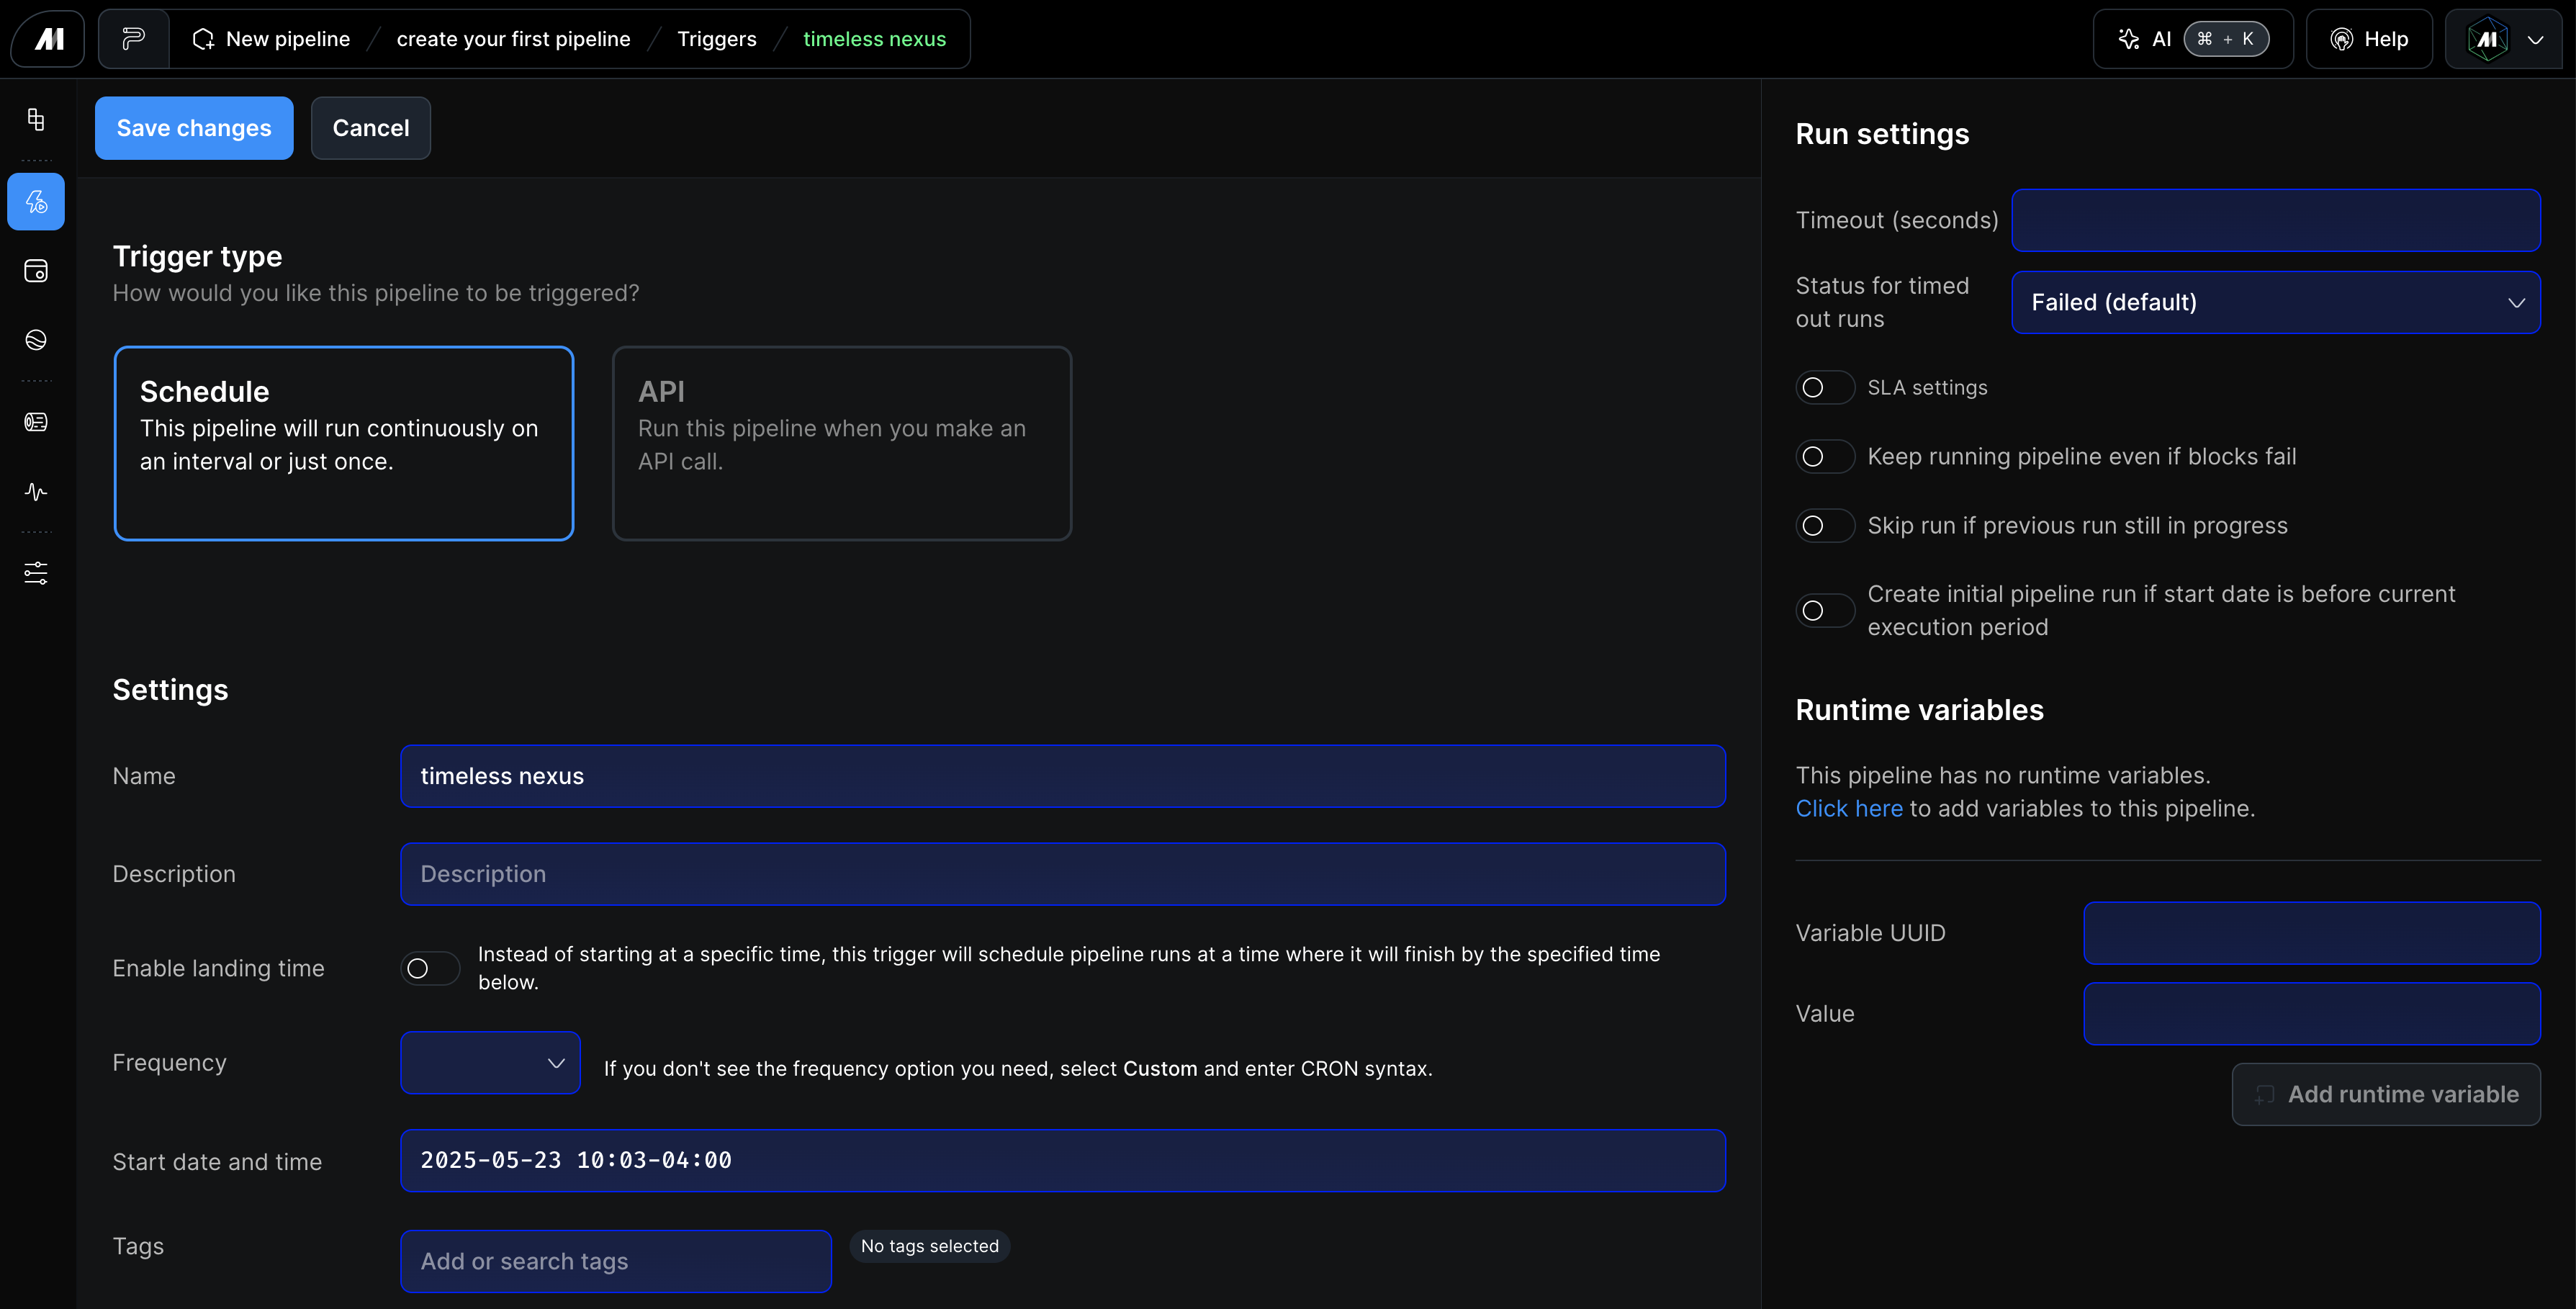
 Step 3: After clicking “New Trigger,” you will be taken to a screen where you can create a trigger. Select the “Schedule” option and the UI pictured below ill populate.
Step 4: Complete the text fields below to configure your trigger based on the workflows requirements. You can also configure Run settings, SLA requirements, and Runtime variables in this UI.
Step 5: Click Save changes to save your trigger.
Step 3: After clicking “New Trigger,” you will be taken to a screen where you can create a trigger. Select the “Schedule” option and the UI pictured below ill populate.
Step 4: Complete the text fields below to configure your trigger based on the workflows requirements. You can also configure Run settings, SLA requirements, and Runtime variables in this UI.
Step 5: Click Save changes to save your trigger.
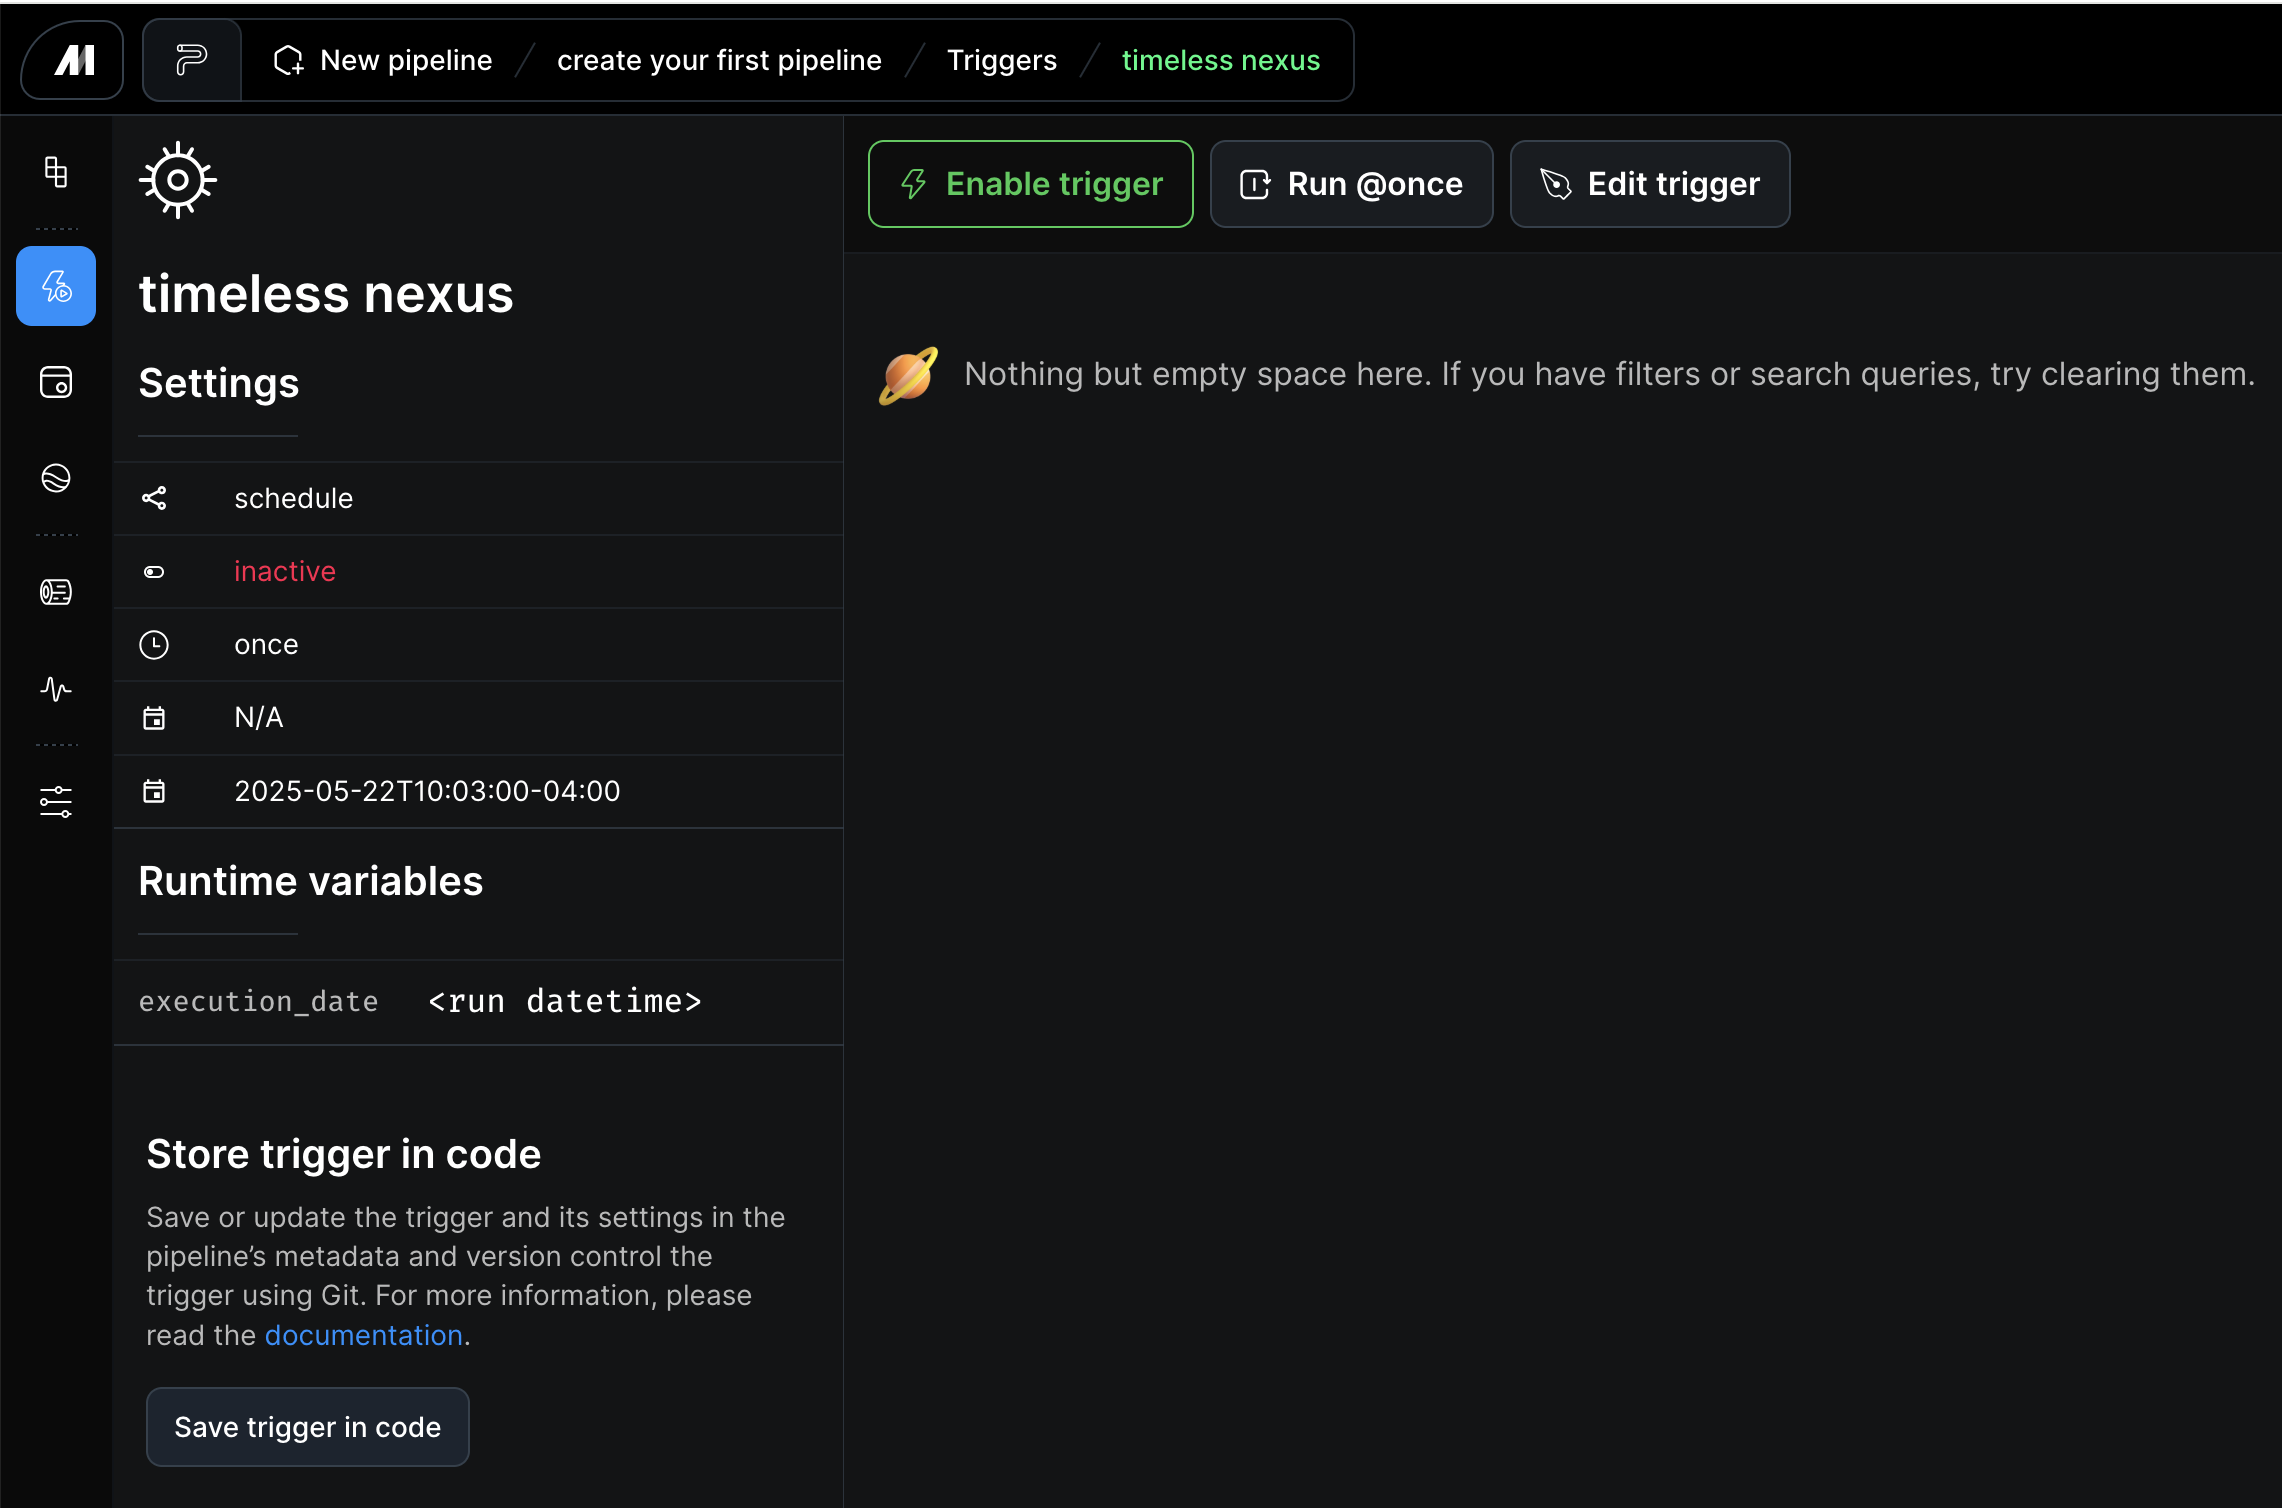
 Step 6: After saving your changes you will be taken to a new screen where you can enable your trigger. Once enabled, the trigger will begin to run based on your previous configuration.
Step 7: Click the “Save trigger in code” button to save your trigger to a YAML file.
Step 6: After saving your changes you will be taken to a new screen where you can enable your trigger. Once enabled, the trigger will begin to run based on your previous configuration.
Step 7: Click the “Save trigger in code” button to save your trigger to a YAML file.
 Once your trigger is enabled, if you set a past date in the “Start date and time” field your trigger will automatically run the pipeline. If you chose a date further out it will start to run on the schedule you provided in the Frequency and Start date and time fields.
You have successfully automated your first Mage pipeline. This foundational automation capability enables consistent, reliable data processing without manual intervention. You can now apply these same principles to build additional automated workflows for your data infrastructure.
Once your trigger is enabled, if you set a past date in the “Start date and time” field your trigger will automatically run the pipeline. If you chose a date further out it will start to run on the schedule you provided in the Frequency and Start date and time fields.
You have successfully automated your first Mage pipeline. This foundational automation capability enables consistent, reliable data processing without manual intervention. You can now apply these same principles to build additional automated workflows for your data infrastructure.