


- Load data from an online endpoint
- Select columns and fill in missing values
- Train a model to predict which passengers will survive
1. Setup
1a. Add Python packages to project
In the left sidebar (aka file browser), click on therequirements.txt file
under the demo_project/ folder.
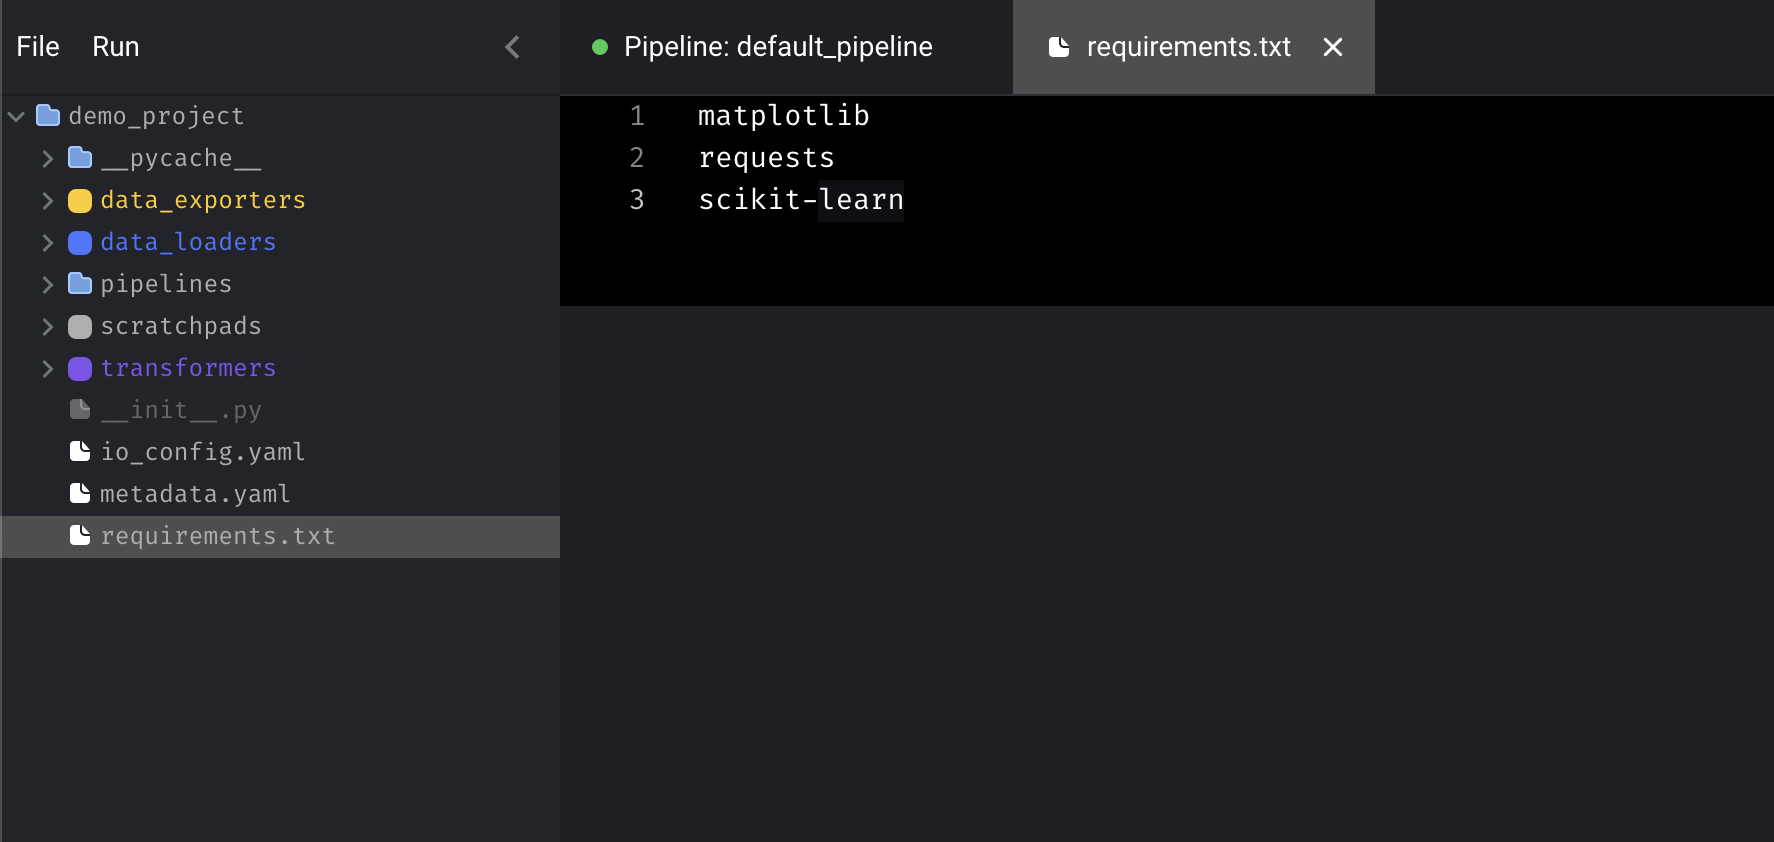 Then add the following dependencies to that file:
⌘ + S.
2a. Install dependencies
The simplest way is to run pip install from the tool. Add a scratchpad block by pressing the+ Scratchpad button. Then run the
following command:
Docker
Get the name of the container that is running the tool:Sample output
mage-ai_server_run_6f8d367ac405.
Then run this command to install Python packages in the
demo_project/requirements.txt file:
pip
If you aren’t using Docker, just run the following command in your terminal:2. Create new pipeline
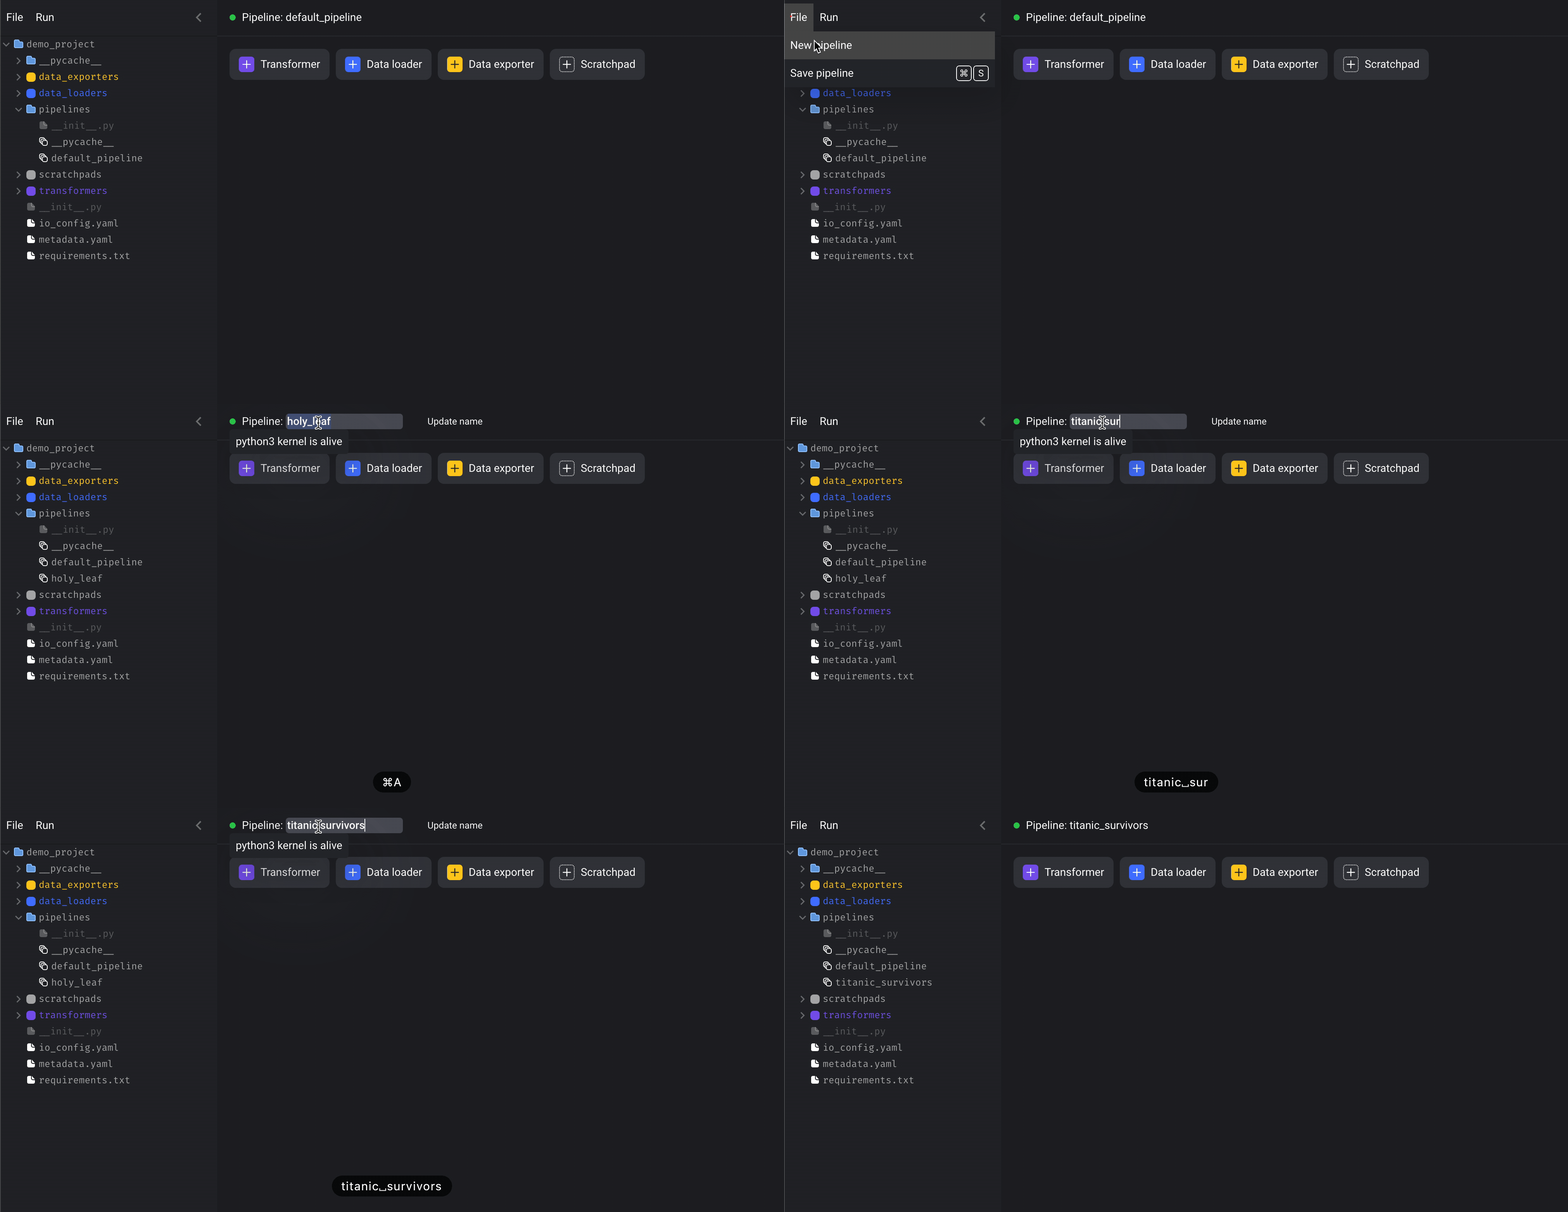
In the top left corner, clickFile > New pipeline. Then, click the name of the
pipeline next to the green dot to rename it to titanic survivors.
3. Play around with scratchpad
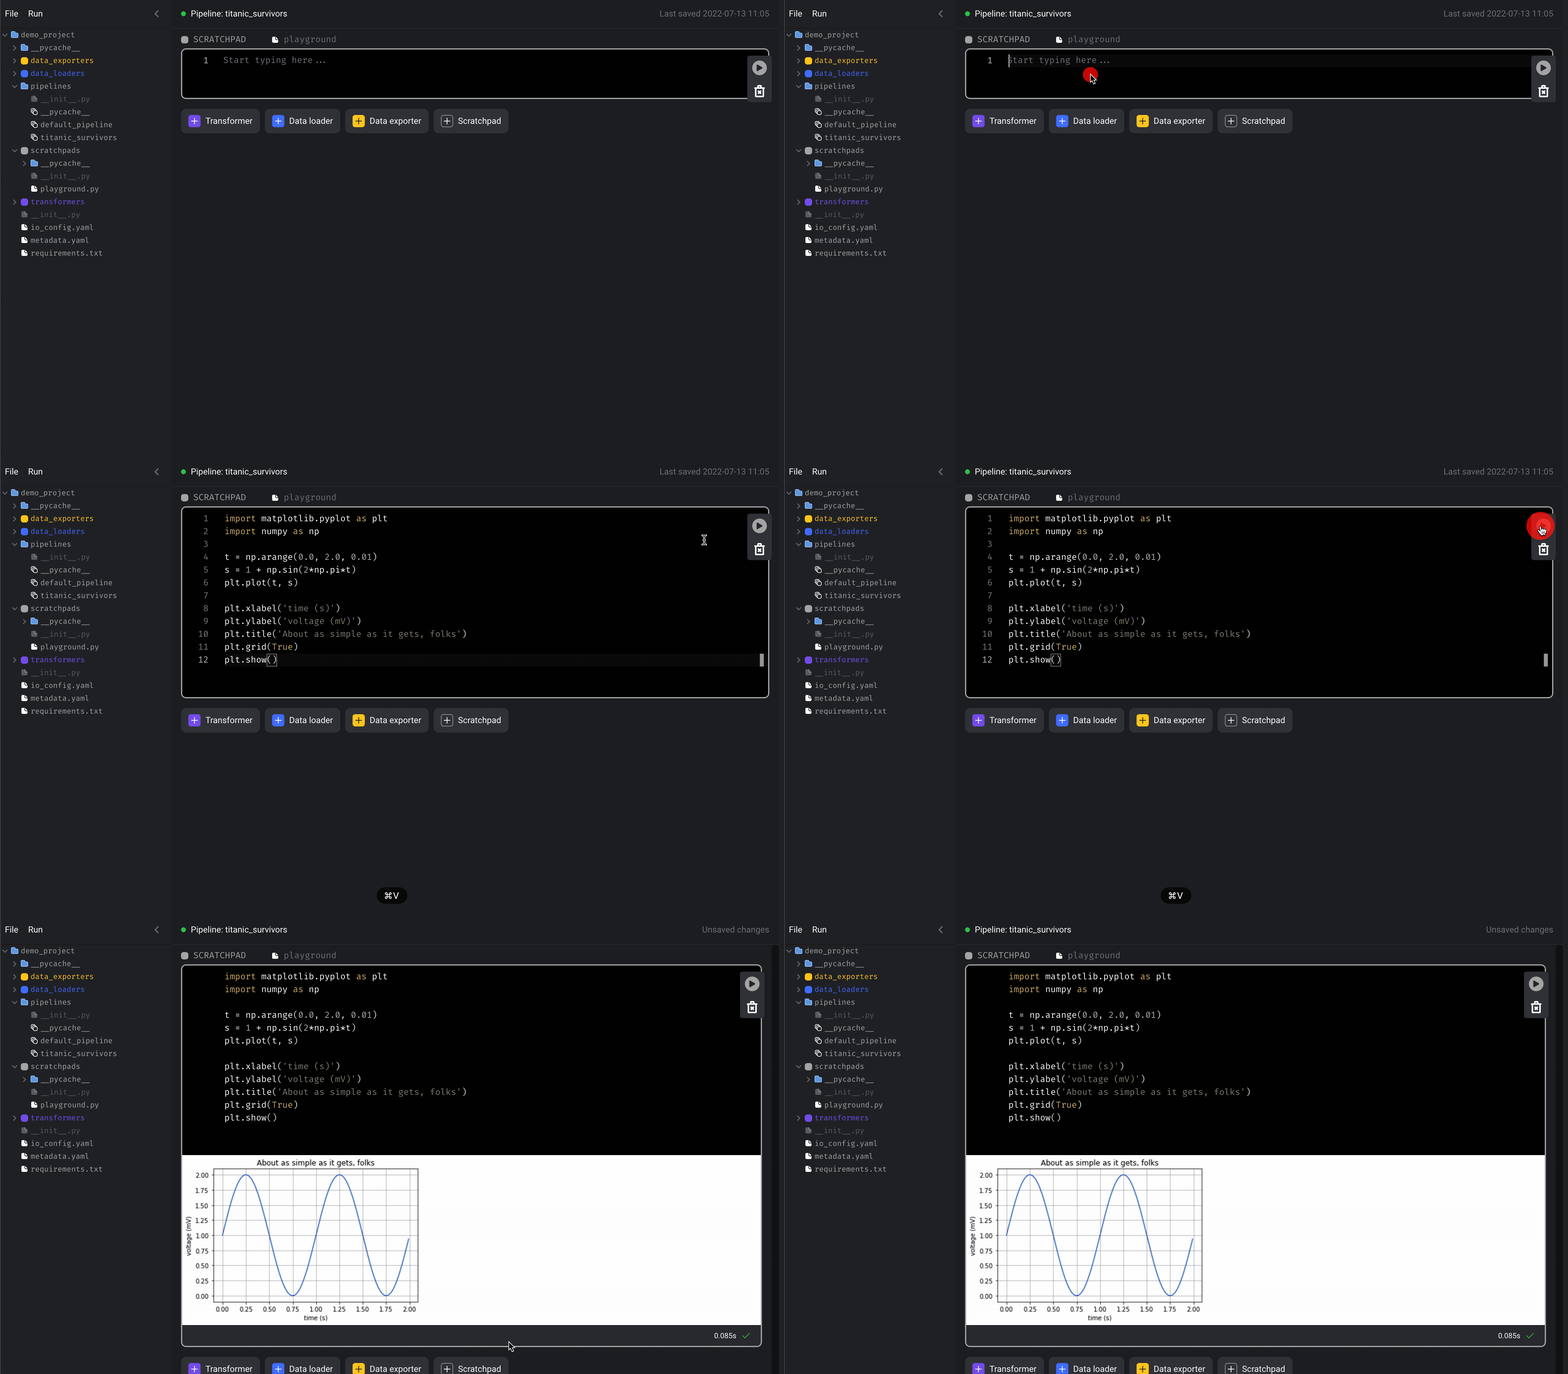
There are 4 buttons, click on the+ Scratchpad button to add a block.
Paste the following sample code in the block:
Play button on the right side of the block to run the code.
Alternatively, you can use the following keyboard shortcuts to execute code in
the block:
- ⌘ + Enter
- Control + Enter
- Shift + Enter (run code and add a new block)
 Now that we’re done with the scratchpad, we can leave it there or delete it. To
delete a block, click the trash can icon on the right side or use the keyboard
shortcut by typing the letter D and then D again.
Now that we’re done with the scratchpad, we can leave it there or delete it. To
delete a block, click the trash can icon on the right side or use the keyboard
shortcut by typing the letter D and then D again.
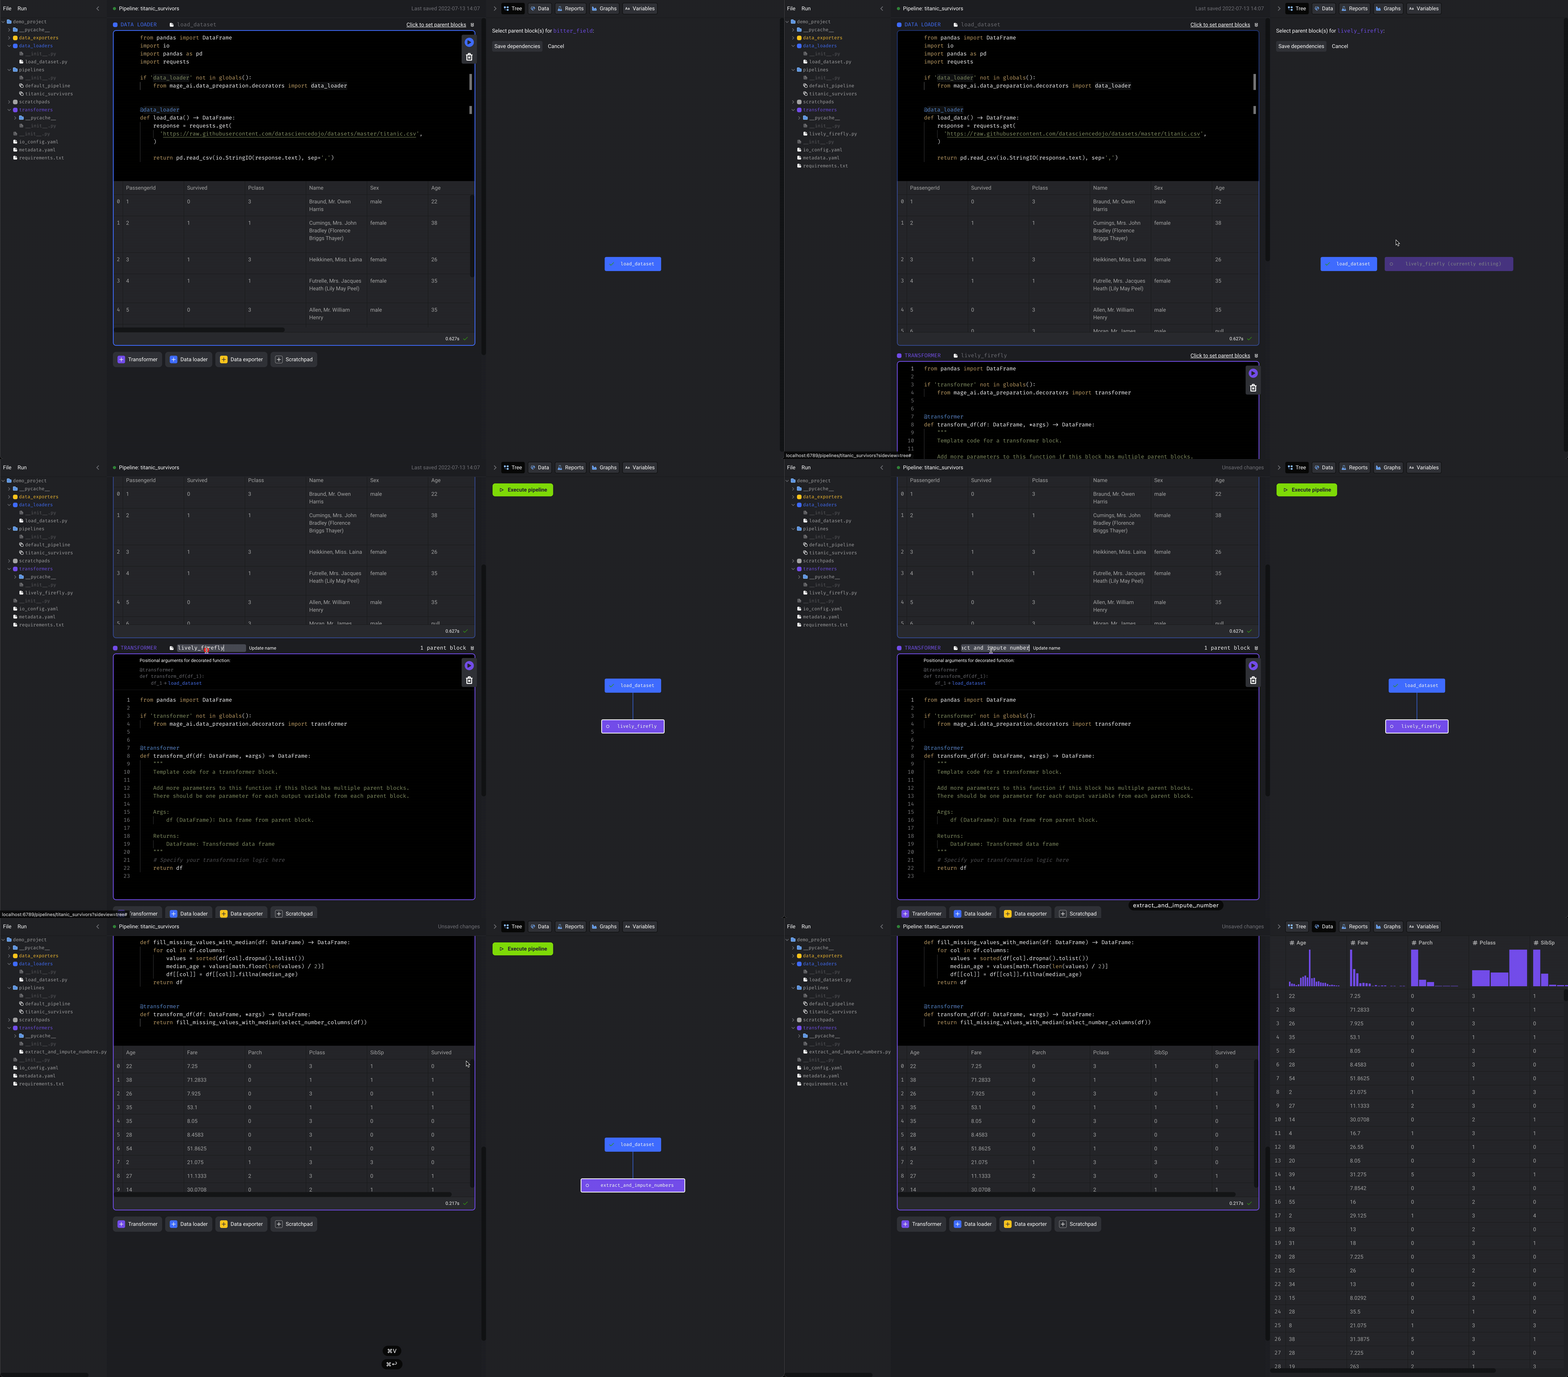
4. Load data
- Click the
+ Data loaderbutton, selectPython, then click the template calledAPI. - Rename the block to
load dataset. - In the function named
load_data_from_api, set theurlvariable to:https://raw.githubusercontent.com/datasciencedojo/datasets/master/titanic.csv. - Run the block by clicking the play icon button or using the keyboard
shortcuts
⌘ + Enter,Control + Enter, orShift + Enter.
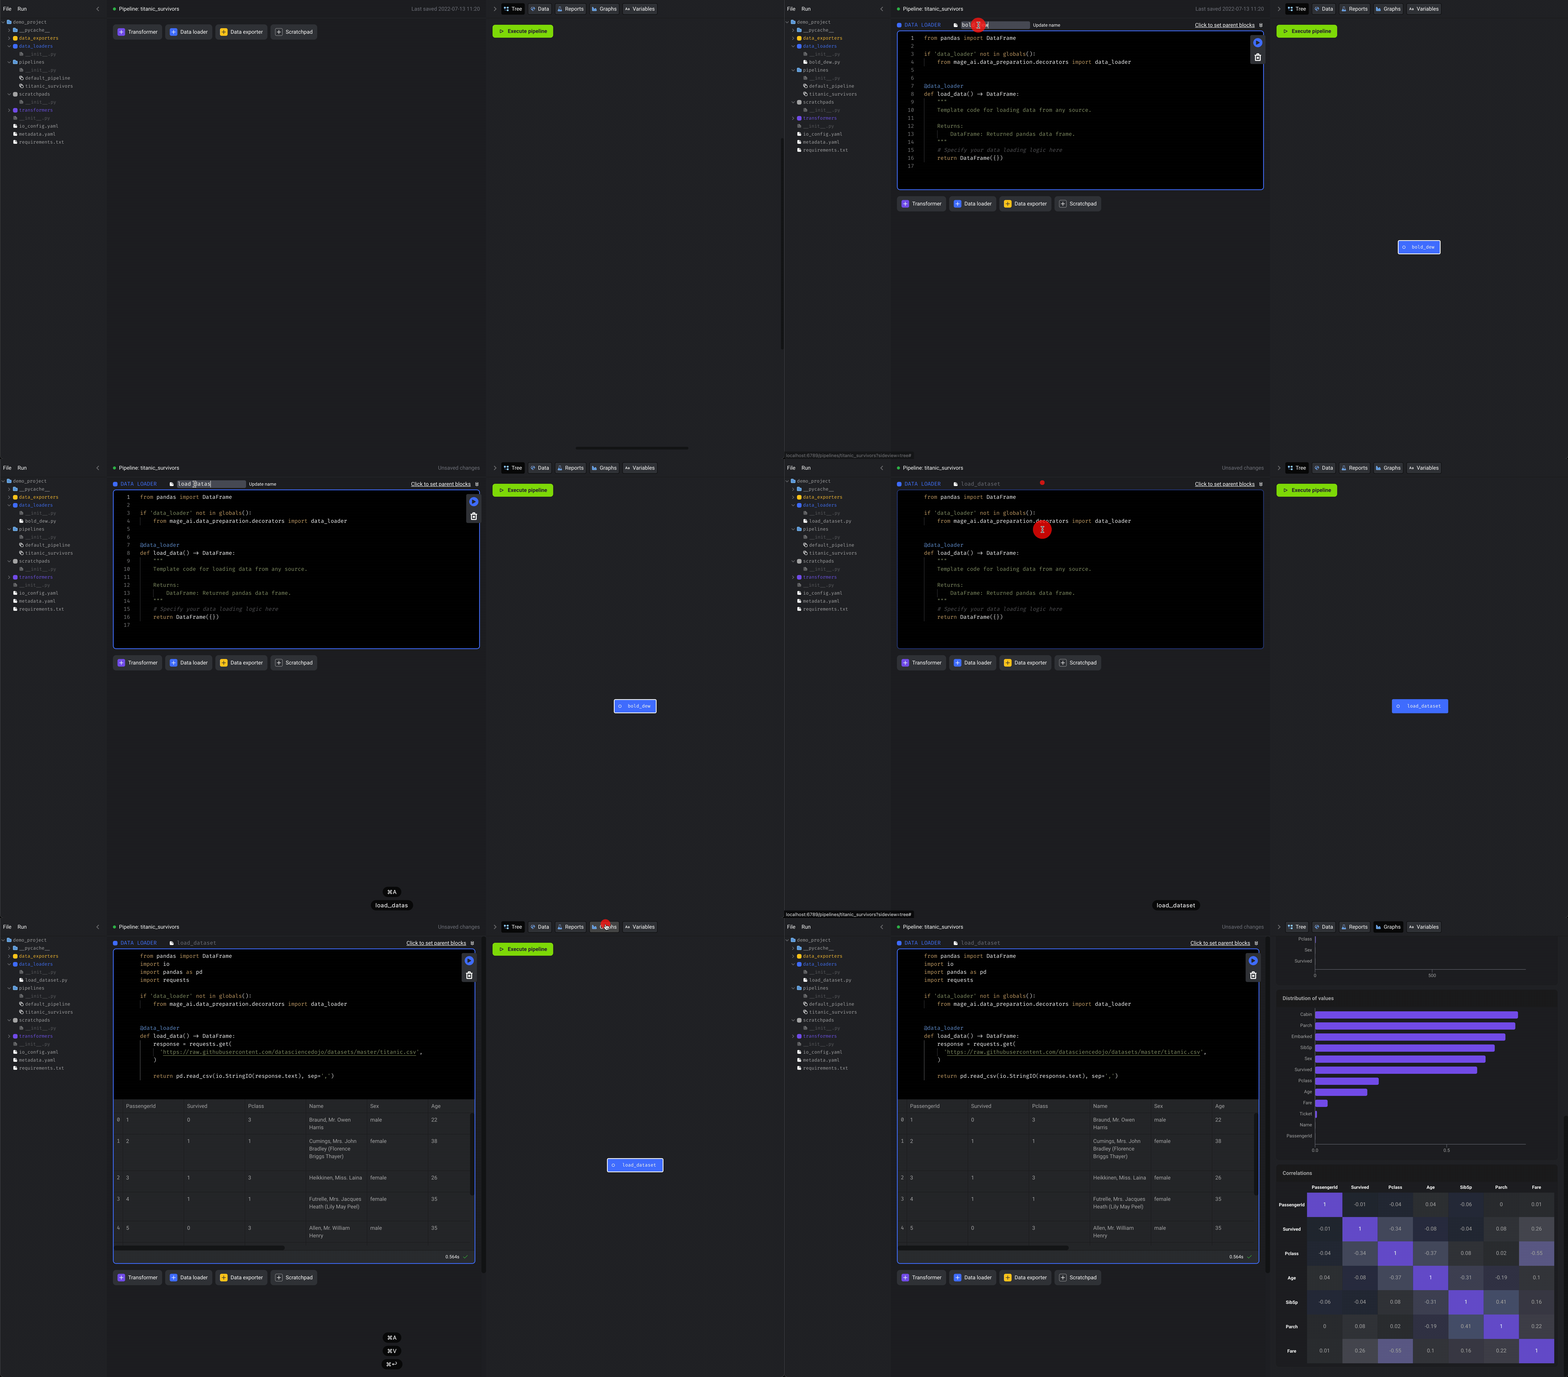 Here is what the code should look like:
5. Transform data
We’re going to select numerical columns from the original dataset, then fill in missing values for those columns (aka impute).- Click the
+ Transformerbutton, selectPython, then clickGeneric (no template). - Rename the block to
extract and impute numbers. - Paste the following code in the block:
6. Train model
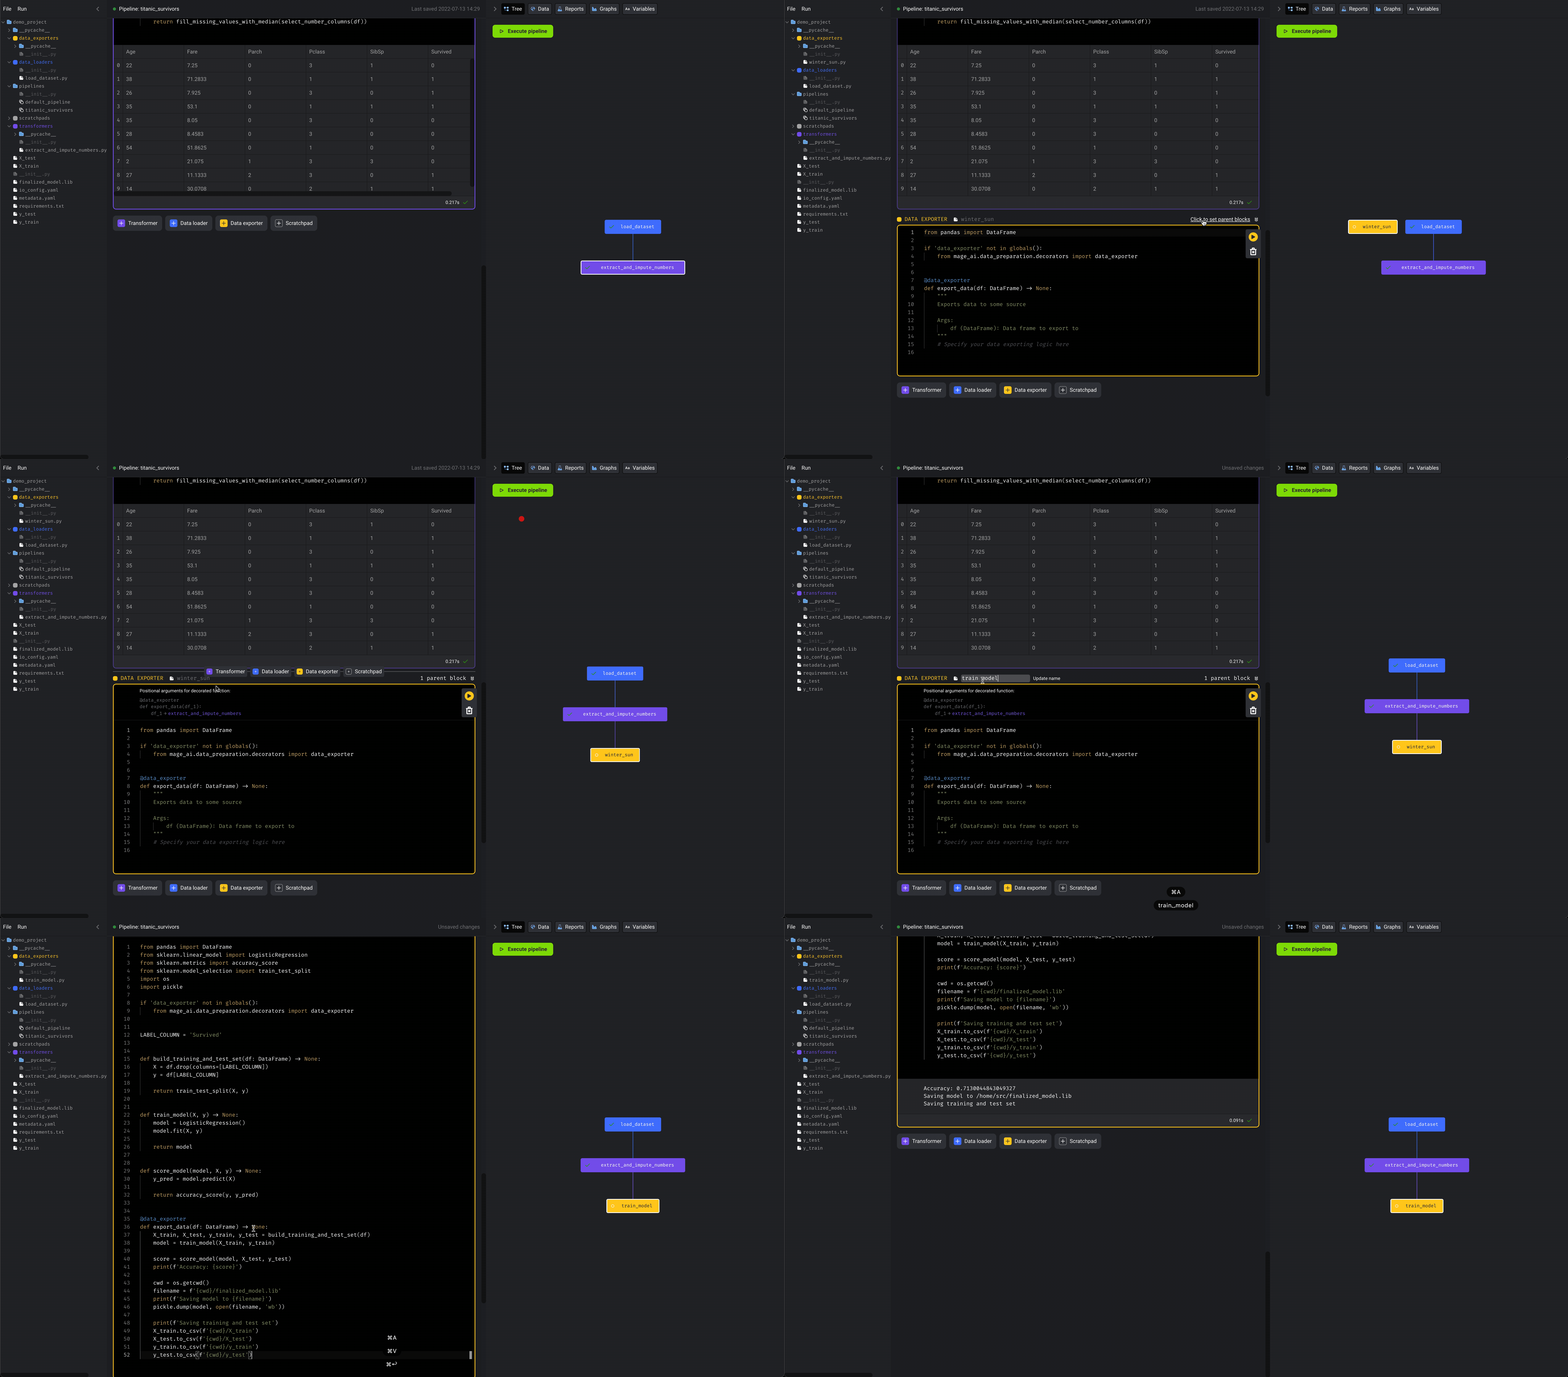
In this part, we’re going to accomplish the following:- Split the dataset into a training set and a test set.
- Train logistic regression model.
- Calculate the model’s accuracy score.
- Save the training set, test set, and model artifact to disk.
- Add a new data exporter block by clicking
+ Data exporterbutton, selectPython, then clickGeneric (no template). - Rename the block to
train model. - Paste the following code in the block:
7. Run pipeline
We can now run the entire pipeline end-to-end. In your terminal, execute the following command: Your output should look something like this: