> ## Documentation Index
> Fetch the complete documentation index at: https://docs.mage.ai/llms.txt
> Use this file to discover all available pages before exploring further.
# Integrate Mage into an existing Airflow project
> In this tutorial, we’ll create a DAG in Airflow for scheduling and running a data pipeline; all from the Mage UI.
 This tutorial requires that you already have Airflow setup and running
locally.
Open the `requirements.txt` file in the root directory of your Airflow project,
and add the `mage-ai` library:
```
mage-ai
```
You can install and run Mage using Docker or using pip.
### Using Docker
```bash theme={"system"}
docker pull mageai/mageai:latest
```
### Using pip
```bash theme={"system"}
pip install mage-ai
```
Change directory into your Airflow’s DAGs folder. This is typically in the
folder `dags/`.
```bash theme={"system"}
cd dags
```
Then, initialize a new Mage project in the `dags/` folder.
If you’re using Docker, run the following command in the `dags/` folder:
```bash theme={"system"}
docker run -it -p 6789:6789 -v $(pwd):/home/src \
mageai/mageai /app/run_app.sh mage init demo_project
```
If you used pip to install Mage, run the following command in the `dags/`
folder:
```bash theme={"system"}
mage init demo_project
```
Once finished, you should have a folder named `demo_project` inside your `dags/`
folder.
Your current folder structure should look like this:
```
airflow_root_directory/
| -- dags/
| -- | -- demo_project/
```
In the `dags/` folder, create a new file named `create_mage_pipelines.py`.
Then, add the following code:
```python theme={"system"}
from airflow import DAG
from airflow.operators.python_operator import PythonOperator
from datetime import datetime
from mage_ai.orchestration.airflow import create_dags
import os
ABSOLUTE_PATH = os.path.abspath(os.path.dirname(__file__))
project_path = os.path.join(ABSOLUTE_PATH, 'demo_project')
create_dags(
project_path,
DAG,
PythonOperator,
dag_settings=dict(
start_date=datetime(2022, 8, 5), # Change this to any start date you want
),
globals_dict=globals(),
)
```
### Start Mage
In the `dags/` folder, start the Mage tool.
If you’re using Docker, run the following command in the `dags/` folder:
```bash theme={"system"}
docker run -it -p 6789:6789 -v $(pwd):/home/src \
mageai/mageai /app/run_app.sh mage start demo_project
```
If you used pip to install Mage, run the following command in the `dags/`
folder:
```bash theme={"system"}
mage start demo_project
```
Open [http://localhost:6789](http://localhost:6789) in your browser.
Follow steps 1, 2, and 4 in this [tutorial](/guides/load-api-data) to create
a new pipeline, add 1 data loader block, and add 1 transformer block.
1. Open the Airflow webserver UI at
[http://localhost:8080](http://localhost:8080) in your browser.
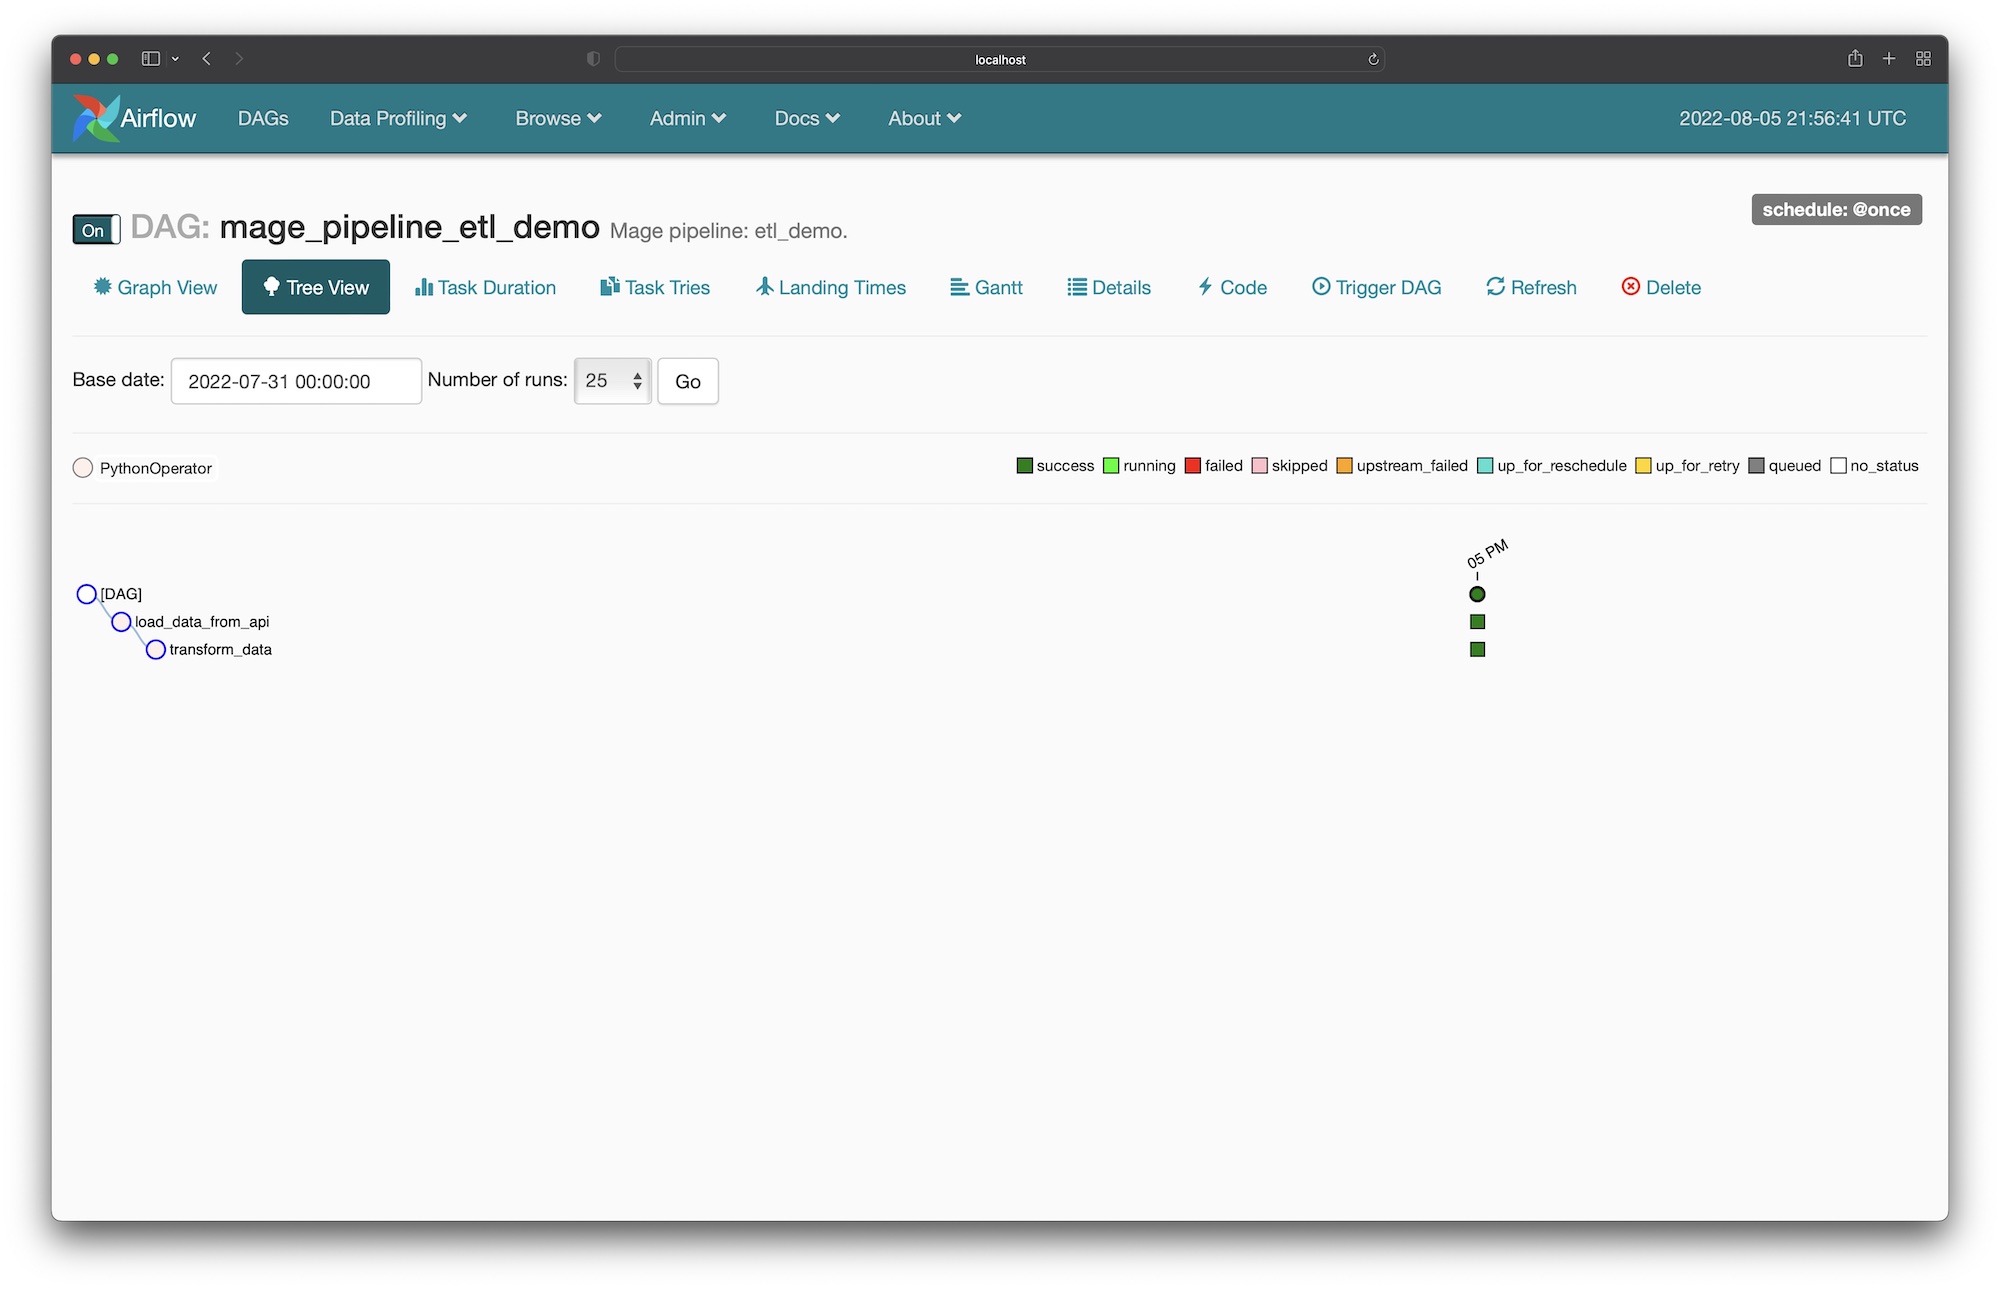
2. If you named your pipeline `etl demo` based on the tutorial from the previous
step, then find a DAG named `mage_pipeline_etl_demo`. If you named it
something else, find a DAG with the prefix `mage_pipeline_`.
3. Click on the DAG to view the detail page. The URL could typically be this:
[http://localhost:8080/admin/airflow/tree?dag\_id=mage\_pipeline\_etl\_demo](http://localhost:8080/admin/airflow/tree?dag_id=mage_pipeline_etl_demo).
4. Turn that DAG on if its currently off.
5. Trigger a new DAG run.
6. Watch the DAG as it runs each task according to the pipeline you created in
Mage.
This tutorial requires that you already have Airflow setup and running
locally.
Open the `requirements.txt` file in the root directory of your Airflow project,
and add the `mage-ai` library:
```
mage-ai
```
You can install and run Mage using Docker or using pip.
### Using Docker
```bash theme={"system"}
docker pull mageai/mageai:latest
```
### Using pip
```bash theme={"system"}
pip install mage-ai
```
Change directory into your Airflow’s DAGs folder. This is typically in the
folder `dags/`.
```bash theme={"system"}
cd dags
```
Then, initialize a new Mage project in the `dags/` folder.
If you’re using Docker, run the following command in the `dags/` folder:
```bash theme={"system"}
docker run -it -p 6789:6789 -v $(pwd):/home/src \
mageai/mageai /app/run_app.sh mage init demo_project
```
If you used pip to install Mage, run the following command in the `dags/`
folder:
```bash theme={"system"}
mage init demo_project
```
Once finished, you should have a folder named `demo_project` inside your `dags/`
folder.
Your current folder structure should look like this:
```
airflow_root_directory/
| -- dags/
| -- | -- demo_project/
```
In the `dags/` folder, create a new file named `create_mage_pipelines.py`.
Then, add the following code:
```python theme={"system"}
from airflow import DAG
from airflow.operators.python_operator import PythonOperator
from datetime import datetime
from mage_ai.orchestration.airflow import create_dags
import os
ABSOLUTE_PATH = os.path.abspath(os.path.dirname(__file__))
project_path = os.path.join(ABSOLUTE_PATH, 'demo_project')
create_dags(
project_path,
DAG,
PythonOperator,
dag_settings=dict(
start_date=datetime(2022, 8, 5), # Change this to any start date you want
),
globals_dict=globals(),
)
```
### Start Mage
In the `dags/` folder, start the Mage tool.
If you’re using Docker, run the following command in the `dags/` folder:
```bash theme={"system"}
docker run -it -p 6789:6789 -v $(pwd):/home/src \
mageai/mageai /app/run_app.sh mage start demo_project
```
If you used pip to install Mage, run the following command in the `dags/`
folder:
```bash theme={"system"}
mage start demo_project
```
Open [http://localhost:6789](http://localhost:6789) in your browser.
Follow steps 1, 2, and 4 in this [tutorial](/guides/load-api-data) to create
a new pipeline, add 1 data loader block, and add 1 transformer block.
1. Open the Airflow webserver UI at
[http://localhost:8080](http://localhost:8080) in your browser.
2. If you named your pipeline `etl demo` based on the tutorial from the previous
step, then find a DAG named `mage_pipeline_etl_demo`. If you named it
something else, find a DAG with the prefix `mage_pipeline_`.
3. Click on the DAG to view the detail page. The URL could typically be this:
[http://localhost:8080/admin/airflow/tree?dag\_id=mage\_pipeline\_etl\_demo](http://localhost:8080/admin/airflow/tree?dag_id=mage_pipeline_etl_demo).
4. Turn that DAG on if its currently off.
5. Trigger a new DAG run.
6. Watch the DAG as it runs each task according to the pipeline you created in
Mage.