> ## Documentation Index
> Fetch the complete documentation index at: https://docs.mage.ai/llms.txt
> Use this file to discover all available pages before exploring further.
# Develop dbt in Mage
> Learn how to develop your favorite dbt models in Mage.
dbt integration is currently only supported when using Mage in
[Docker](/getting-started/setup#using-docker) or in [Mage Pro](https://cloud.mage.ai/sign-up).
If you get stuck, run into problems, or just want someone to walk you through
these steps, please join our [Slack](https://www.mage.ai/chat).
Read the [setup guide](/getting-started/setup) to initialize a new project and
start the Mage tool locally.
For the rest of this tutorial, we’ll use the project name `demo_project`.
* Open Mage and go to the terminal page: [http://localhost:6789/terminal](http://localhost:6789/terminal)
* Initiate your dbt project using the `init` command (for this tutorial, we’ll
use the dbt project name `demo`):
```bash theme={"system"}
cd demo_project/dbt
dbt init -s demo
touch demo/profiles.yml
```
For more information on creating a dbt project, read their
[documentation](https://docs.getdbt.com/reference/commands/init).
* Go to the Mage dashboard and click the button
**`+ New pipeline`** and select the option labeled `Standard (batch)`.
* Click the `Pipeline settings` icon in the left pane, and change its name
to `dbt demo pipeline`, then click the `Save pipeline settings` button.
* On the left side of the page in the file browser, expand the folder
`demo_project/dbt/demo/`.
* Click the file named `profiles.yml`.
* Paste the following credentials in that file:
```yaml theme={"system"}
demo:
target: dev
outputs:
dev:
dbname: xyleviup
host: queenie.db.elephantsql.com
password: edSrMWH7Mww-lTKpp-jPHX9sYSNLy7LG
port: 5432
schema: dbt_demo
type: postgres
user: xyleviup
```
* Save the `profiles.yml` file by pressing `Command (⌘)` + `S`.
* Close the file by pressing the **`X`** button on the right side of the file
name `dbt/demo/profiles.yml`.
* Click the **`+ Data loader`** button, select `Python`, then click `API`.
* In the popup dialog `Data loader block name`, change its name to `load data`,
then click the `Save and add block` button.
* Paste the following code in that block:
```python theme={"system"}
import io
import pandas as pd
import requests
from pandas import DataFrame
@data_loader
def load_data_from_api(**kwargs) -> DataFrame:
url = 'https://raw.githubusercontent.com/mage-ai/datasets/master/restaurant_user_transactions.csv'
response = requests.get(url)
df = pd.read_csv(io.StringIO(response.text), sep=',')
df.columns = ['_'.join(col.split(' ')) for col in df.columns]
return df
```
* Under the data loader block you just added, click the button **`dbt model`**,
then click the option `Single model`.
* In the file browser that pops up, click the file named
`my_second_dbt_model.sql` under the folders `demo/models/example/`.
* This will add 2 dbt blocks to your pipeline: 1 for the dbt model named
`my_first_dbt_model` and the 2nd for the dbt model named `my_second_dbt_model`.
* The model named `my_first_dbt_model` was added to
the pipeline because `my_second_dbt_model` references it.
* In the dbt block named `my_first_dbt_model`, next to the label
`Target` at the top, choose `dev` in the dropdown list. You can also
check `Manually enter target`, and enter `dev` in the input field.
* Paste the following SQL into the dbt model named `my_first_dbt_model`:
```sql theme={"system"}
WITH source_data AS (
SELECT 1 AS id
UNION ALL
SELECT 2 AS id
)
SELECT *
FROM source_data
```
* Run the dbt model block by pressing the play button on the top right of the
block or by pressing `Command` + `Enter`.
* You should see a preview of the query execution logs. To see the query results,
click the `Expand table` link at the bottom right corner.
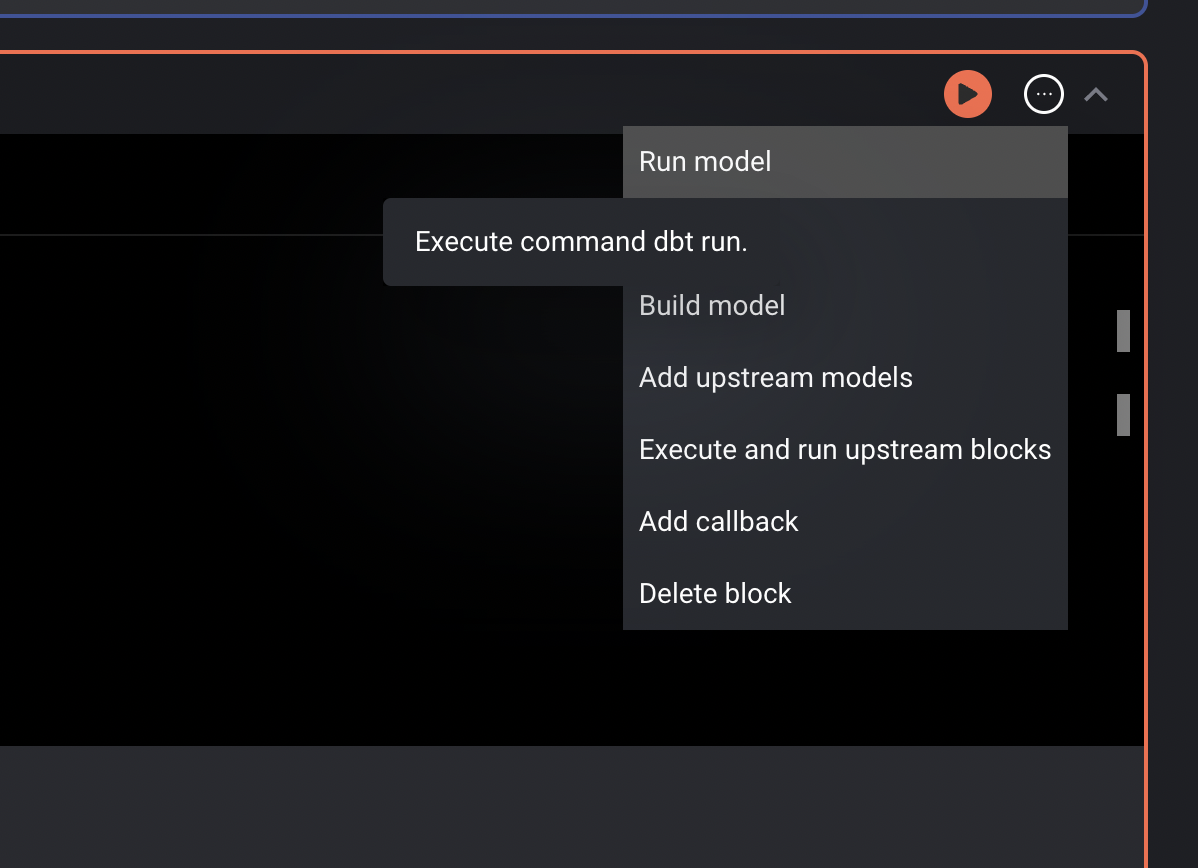
* After previewing the results, in the top right corner of the block,
click on the triple dots to reveal a dropdown menu.
* Under the dropdown menu, click the option Run model. This command
will execute the `dbt run` command and create the table in your data source.
* In the dbt block named `my_second_dbt_model`, next to the label
`Target` at the top, choose `dev` in the dropdown list. You can also
check `Manually enter target`, and enter `dev` in the input field.
* Paste the following SQL into the dbt model named `my_second_dbt_model`:
```sql theme={"system"}
SELECT
a.*
, b.*
FROM {{ ref('my_first_dbt_model') }} AS a
LEFT JOIN {{ source('mage_demo', 'dbt_demo_pipeline_load_data') }} AS b
ON 1 = 1
WHERE a.id = 1
```
> [dbt sources](https://docs.getdbt.com/docs/build/sources)
>
> When a dbt model depends on an upstream block that isn’t a dbt model, a
> source for that block is automatically added to the
> `demo_project/dbt/demo/models/mage_sources.yml` file.
>
> Read more about dbt sources in their
> [documentation](https://docs.getdbt.com/docs/build/sources).
* Run the dbt model block by pressing the play button on the top right of the
block or by pressing `Command` + `Enter`.
* You should see a preview of the query execution logs. To see the query results,
click the `Expand table` link at the bottom right corner.
* On the right side of the screen, click the tab labeled **`Terminal`**.
* Create a new dbt test file by running the following command:
```bash theme={"system"}
touch demo_project/dbt/demo/tests/test_my_second_dbt_model.sql
```
* On the left side of the page in the file browser, expand the folder
`demo_project/dbt/demo/tests/` and click the file named
`test_my_second_dbt_model.sql`. If you don’t see it, refresh the page.
* Paste the following SQL in the file:
```sql theme={"system"}
SELECT id
FROM {{ ref('my_second_dbt_model') }}
GROUP BY id
HAVING (id = 0)
```
* Read more about dbt tests in their
[documentation](https://docs.getdbt.com/docs/build/tests).
* Click the name of the pipeline in the header breadcrumbs to go back to the
detail page.
* Create a new trigger with a type `Schedule` and a Frequency `once`.
For more details, follow these
[steps](/design/data-pipeline-management#create-trigger).
* After your trigger is created, click the **`Start trigger`** button at the
top of the page.
* The pipeline will eventually fail because a dbt test failed. This means
everything is working as expected.
* Open the file `demo_project/dbt/demo/models/example/schema.yml` and remove
the tests named `unique` under both models. Your file should look like this:
```yaml theme={"system"}
version: 2
models:
- name: my_first_dbt_model
description: "A starter dbt model"
columns:
- name: id
description: "The primary key for this table"
tests:
- not_null
- name: my_second_dbt_model
description: "A starter dbt model"
columns:
- name: id
description: "The primary key for this table"
tests:
- not_null
```
* Click on the **`Failed`** button next to the pipeline run and click
**`Retry run`**. It should complete running successfully after a few
minutes.
Congratulations! You’ve created a data pipeline that orchestrates your dbt
models.