> ## Documentation Index
> Fetch the complete documentation index at: https://docs.mage.ai/llms.txt
> Use this file to discover all available pages before exploring further.
# Version control application with Git
> Authenticate with a Git provider then pull from a remote repository, push local changes to a remote repository, and create pull requests for a remote repository.
On the homepage in the left side navigation, click the link labeled Version control.
The URL could look something like this: [http://localhost:6789/version-control](http://localhost:6789/version-control).
# Mage Pro
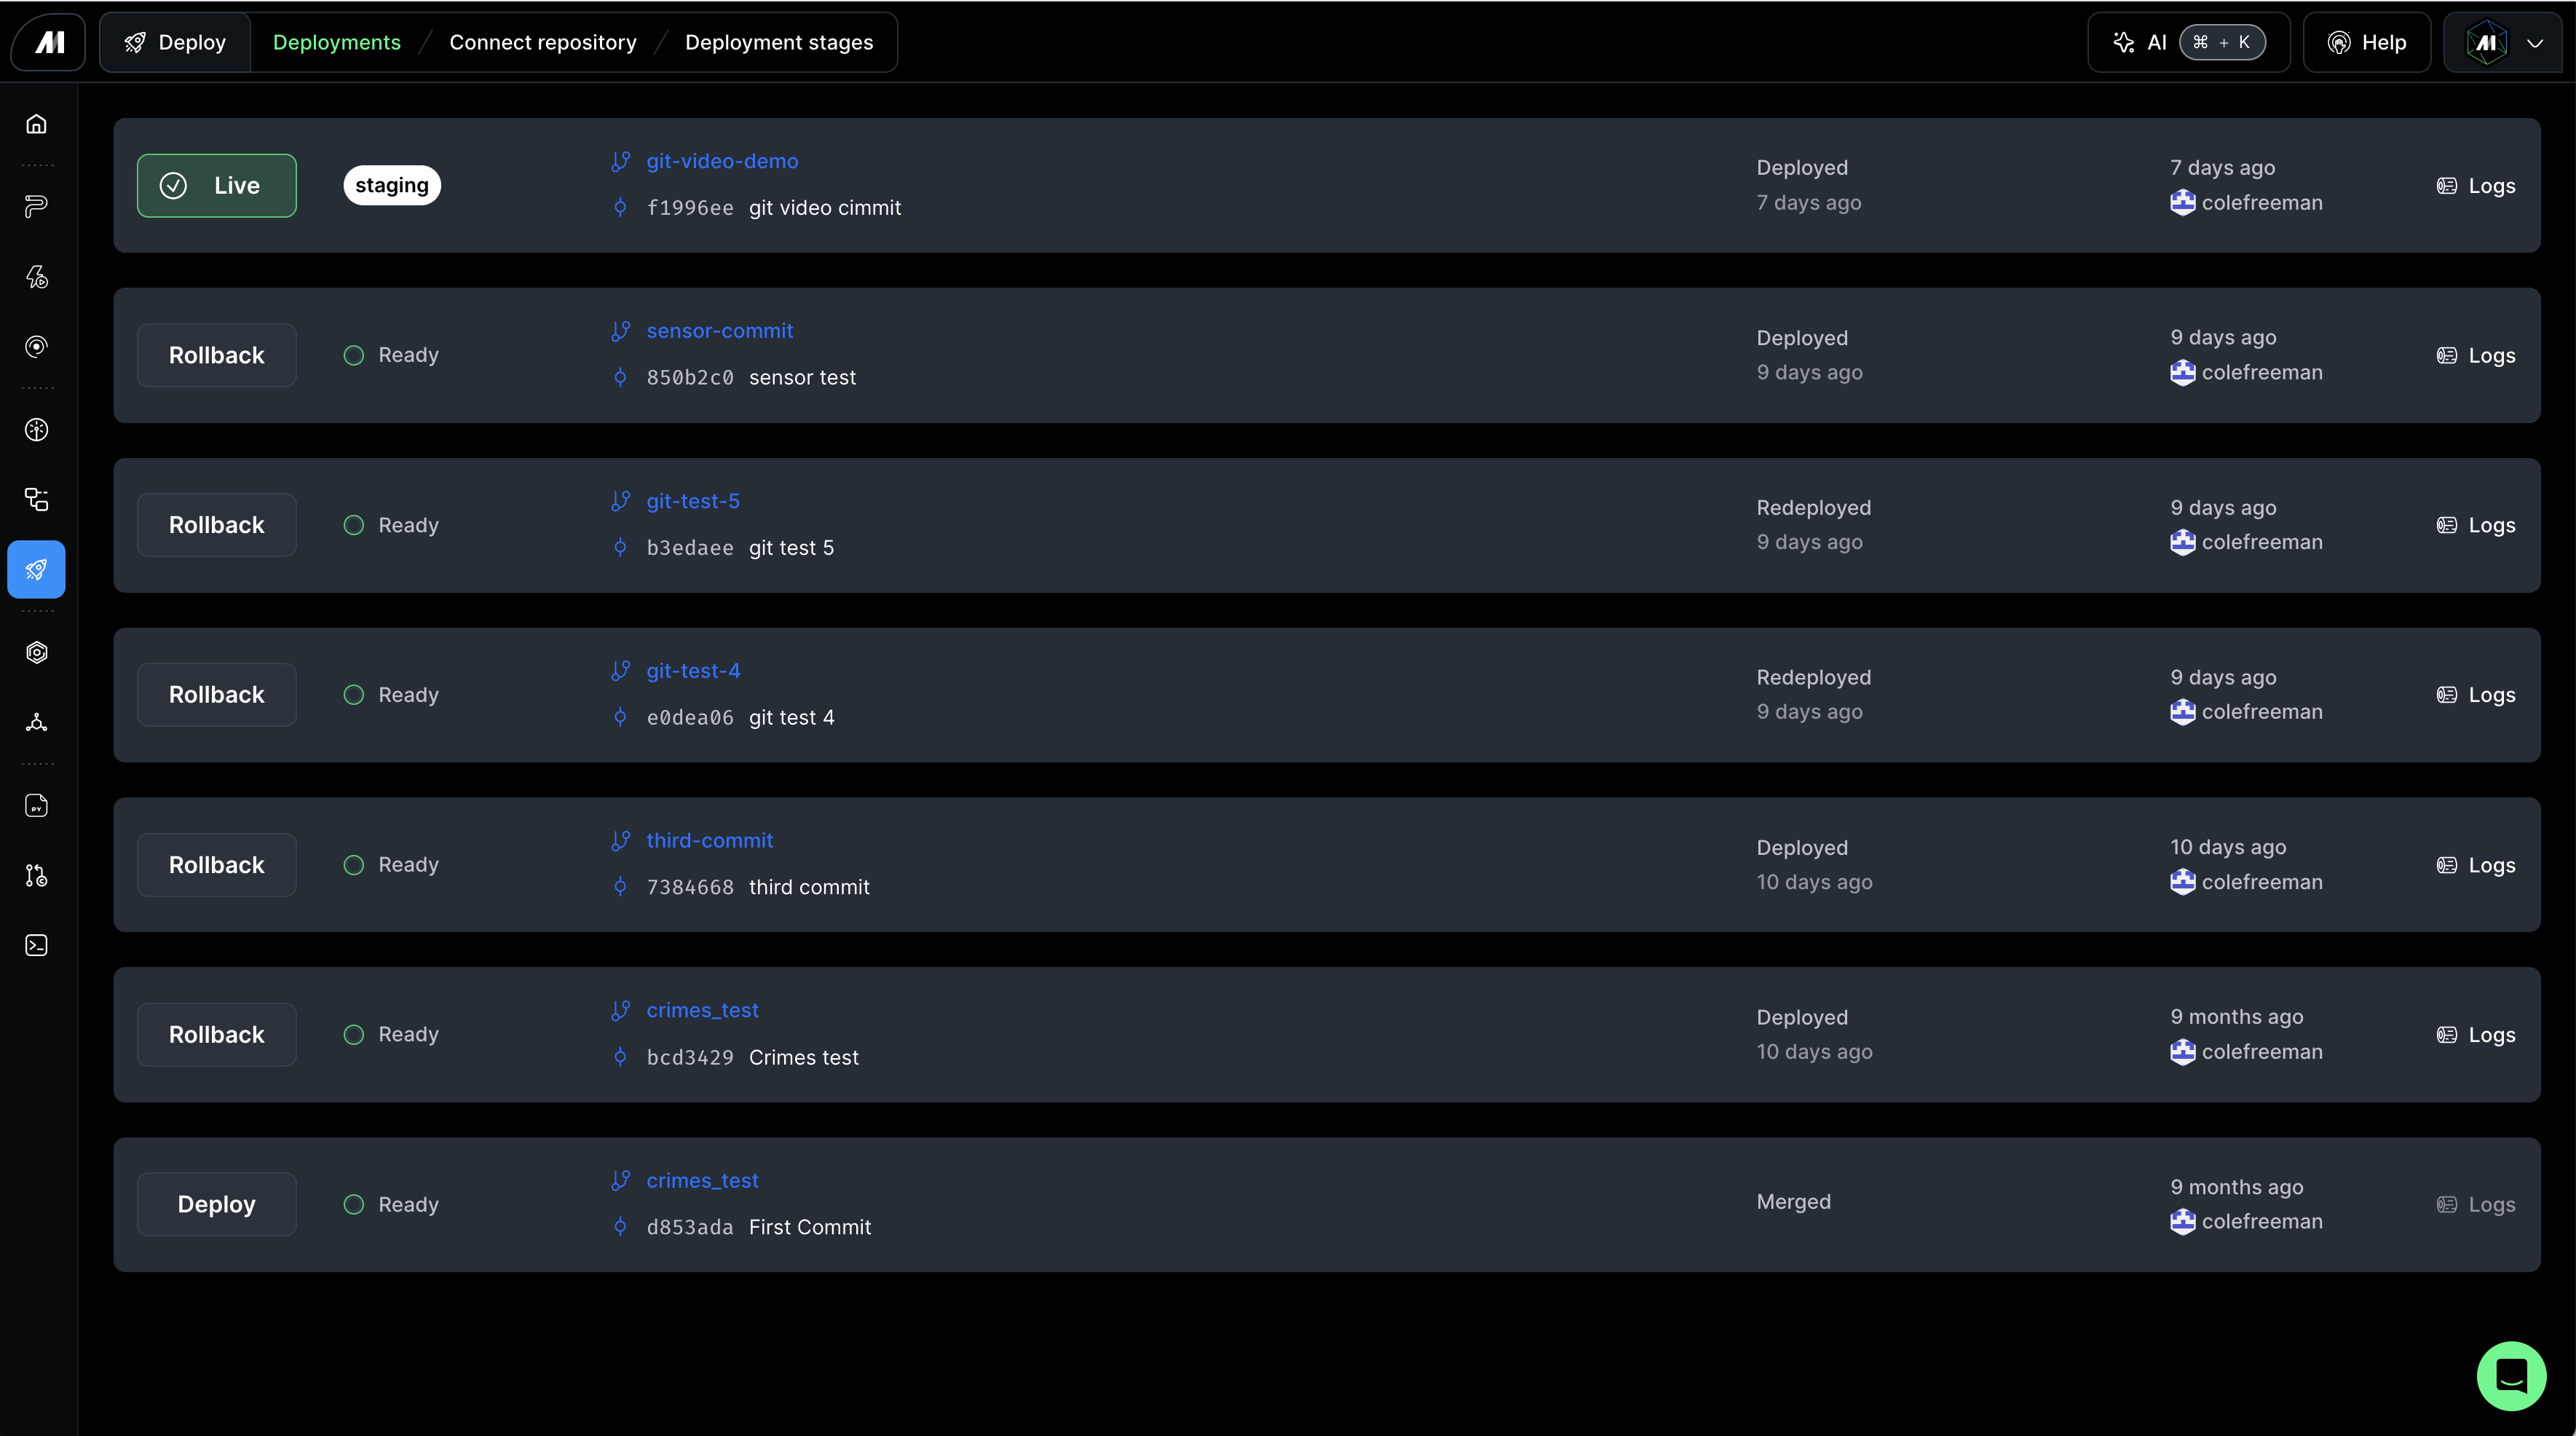
Unlock seamless version control and effortless deployments with Mage Pro!
Check out this [guide](/guides/data-sync/version-control-guide) to experience a more intuitive, user-friendly way to manage and deploy your code.
 # Open source
## Demo
## Setup
# Open source
## Demo
## Setup
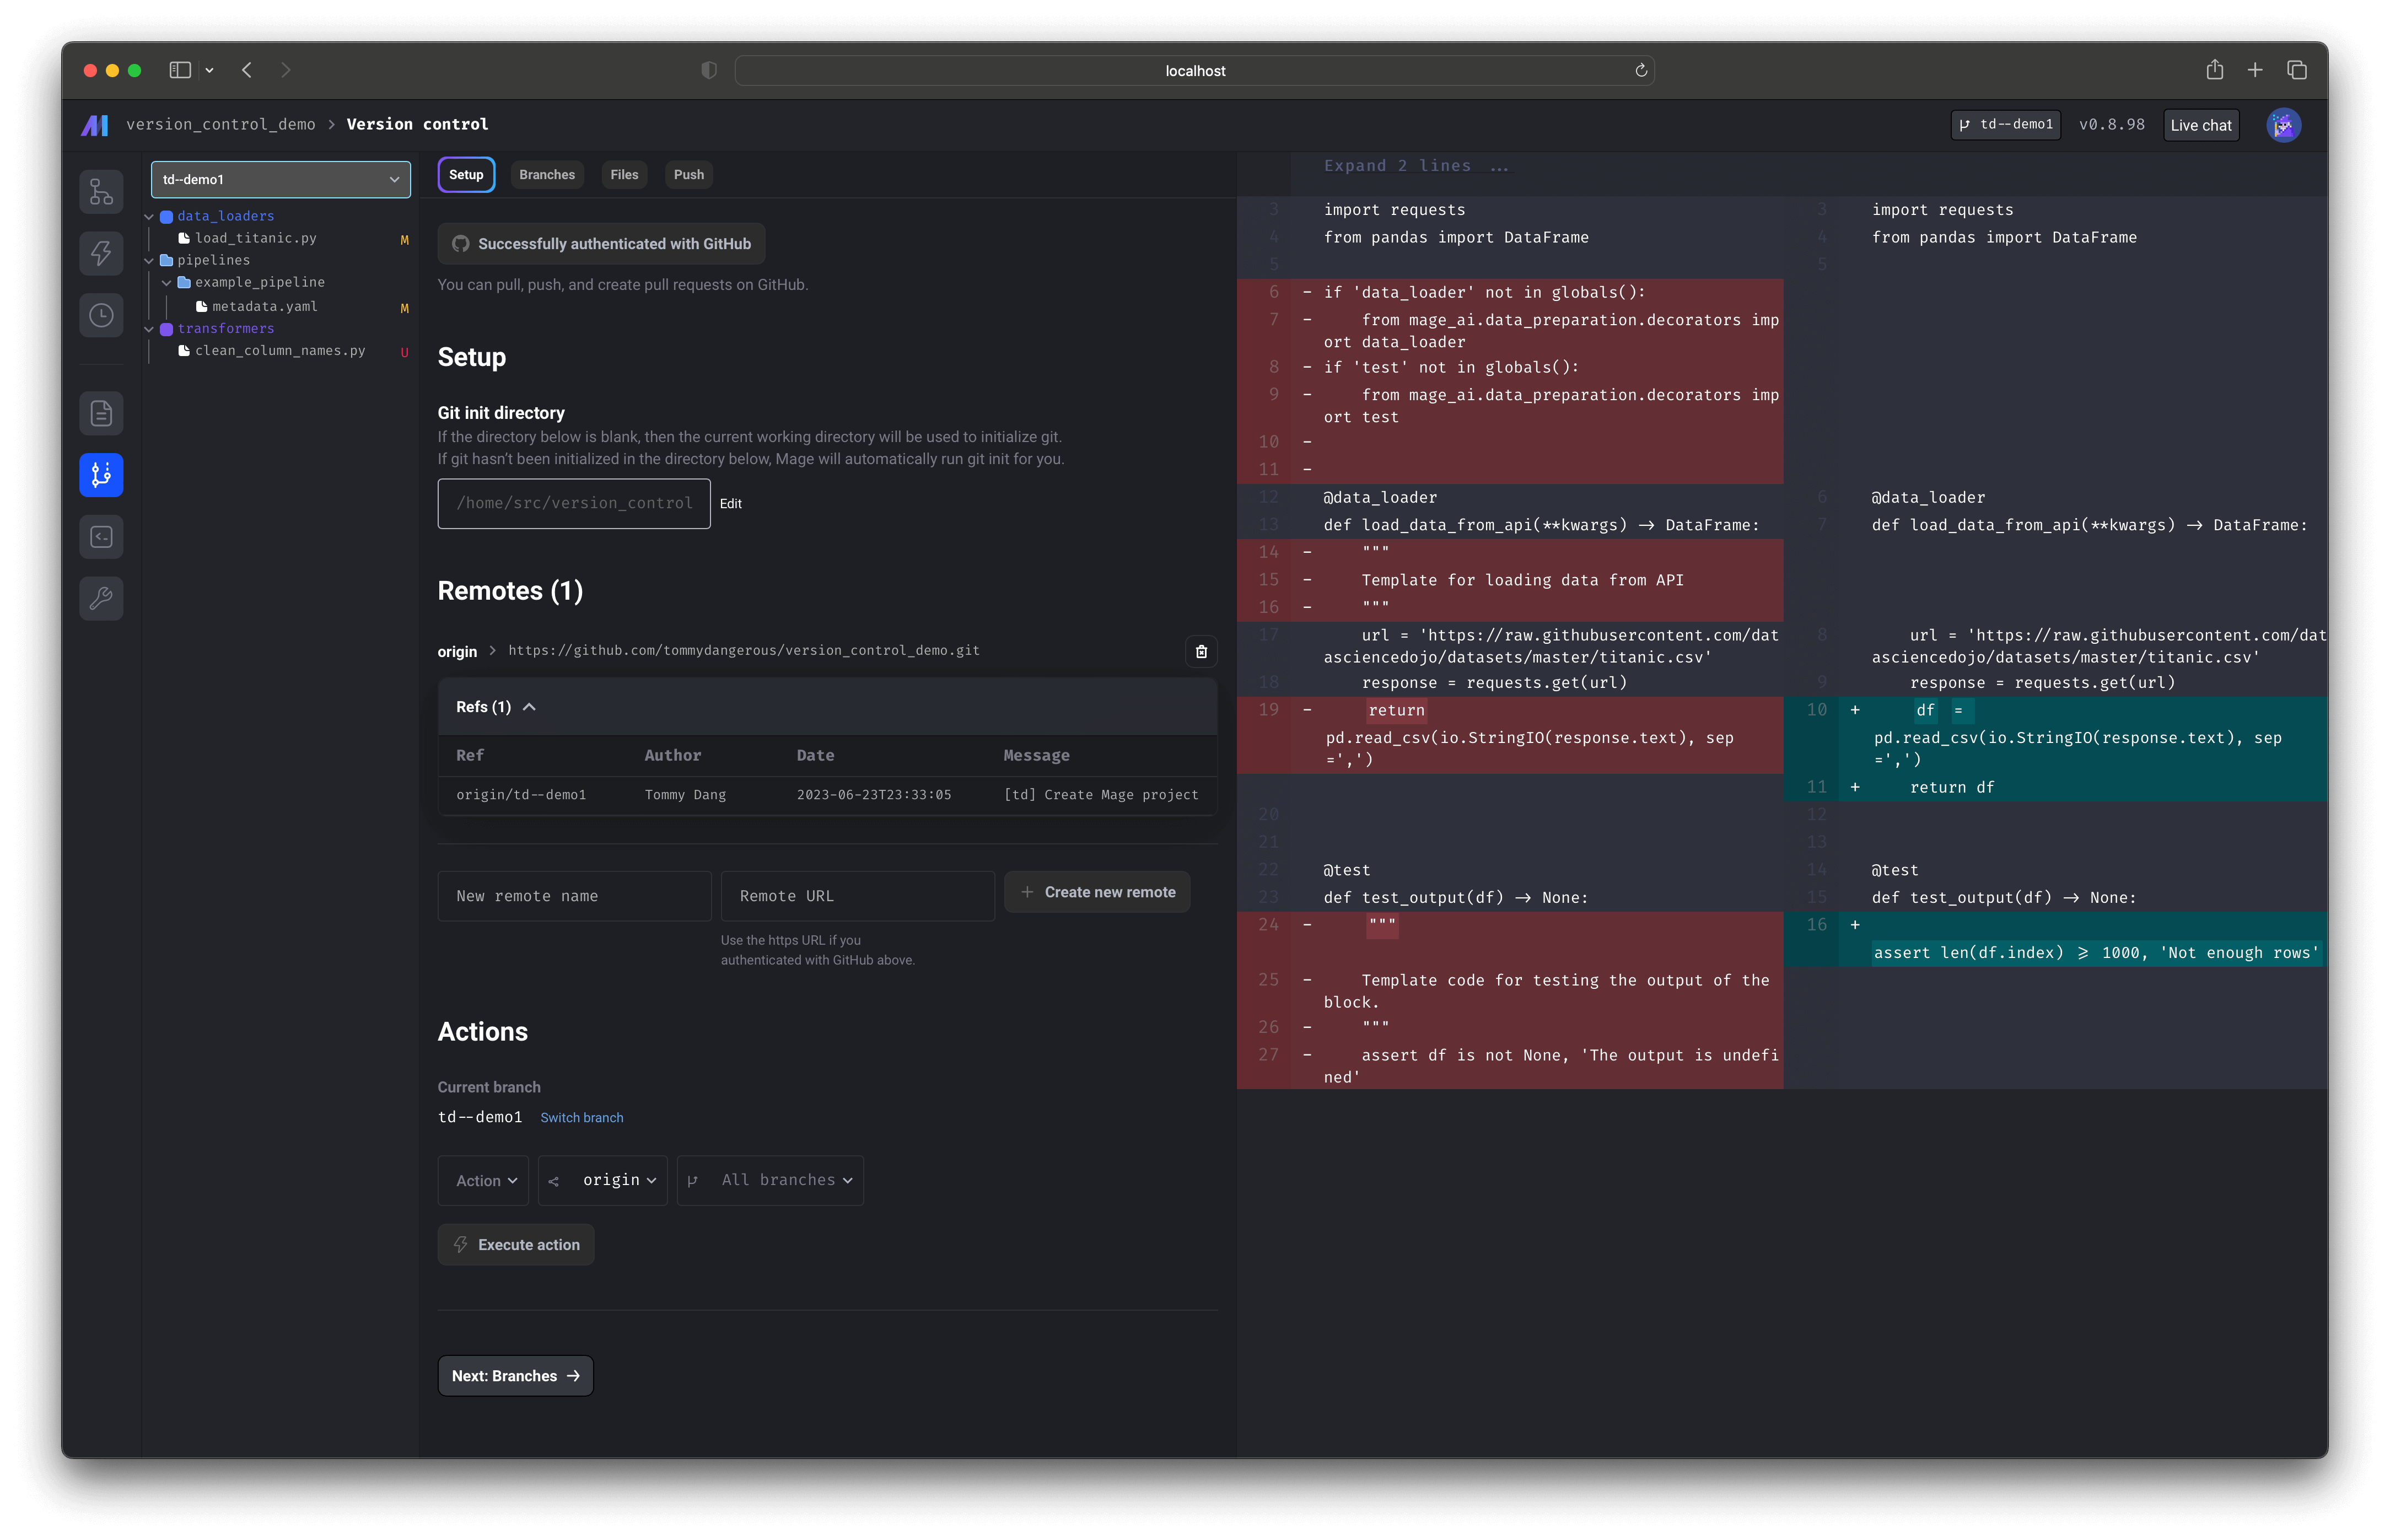 ### Set Git directory
The Git directory is the local folder that will be linked to your remote repository.
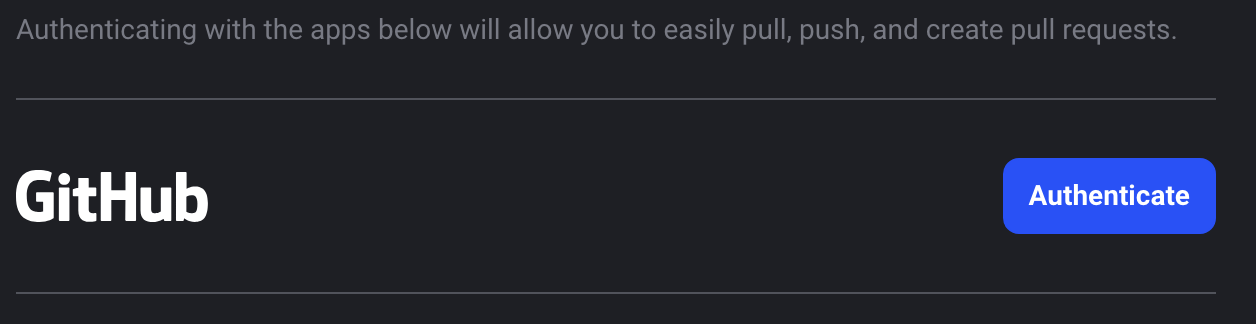
### Authentication
You will be able to authenticate with GitHub by default, but if you need to authenticate with
GitHub Enterprise (GHE) or other providers, you will need to follow the steps below. You can
authenticate with multiple git providers if you need to. Mage will attempt to use the oauth provider
based on the URL of the remote.
Mage authenticates with a default GitHub OAuth application that may not be able to access
your repository depending on the repository or organization settings. If you encounter issues
accessing your repository after authenticating with GitHub, you may need to create your own
OAuth application that has access to the repositories you want to work with. You can follow the
steps in the `Authenticate with GitHub or GHE` section below to connect Mage with your OAuth
application.
When creating the OAuth app for GHE, BitBucket, GitLab, you will need to set the authorized
callback URL to `http(s):///oauth`.
In order for Mage to authenticate with your GitHub host, you will need to add Mage as an
authorized oauth application. You can follow the steps [here](https://docs.github.com/en/enterprise-cloud@latest/apps/oauth-apps/building-oauth-apps/creating-an-oauth-app)
to set it up.
Make sure you copy the client id and client secret after the app is created.
You will need to set the following environment variables in your Mage environment:
1. GHE\_HOSTNAME: the hostname of your GitHub instance. If you’re using non-enterprise GitHub or GitHub Enterprise Cloud, you should set this to `github.com`
2. GHE\_CLIENT\_ID: the client id you retrieved in the previous step
3. GHE\_CLIENT\_SECRET: the client secret you retrieved in the previous step
You should now be able to authenticate with GitHub and follow the rest of the steps in this document.
In order for Mage to authenticate with your BitBucket, you will need to add Mage as an
OAuth consumer. You can follow the steps [here](https://support.atlassian.com/bitbucket-cloud/docs/use-oauth-on-bitbucket-cloud/)
to set it up.
Make sure you copy the key and secret after the consumer is created.
You will need to set the following environment variables in your Mage environment:
1. BITBUCKET\_OAUTH\_KEY: the key you retrieved in the previous step
2. BITBUCKET\_OAUTH\_SECRET: the secret you retrieved in the previous step
You should now be able to authenticate with Bitbucket and follow the rest of the steps in this document.
Mage will request `read_user`, `write_repository`, and `api` scopes from GitLab in order
to perform the necessary git actions.
In order for Mage to authenticate with your GitLab, you will need to add a Mage oauth application.
You can follow the steps [here](https://docs.gitlab.com/ee/integration/oauth_provider.html)
to set it up.
Make sure you copy the Application ID and Secret after the oauth app is created.
You will need to set the following environment variables in your Mage environment:
1. GITLAB\_CLIENT\_ID: the application ID you retrieved in the previous step
2. GITLAB\_CLIENT\_SECRET: the secret you retrieved in the previous step
3. GITLAB\_HOST (optional): hostname for your GitLab instance. Defaults to `https://gitlab.com`
You should now be able to authenticate with GitLab and follow the rest of the steps in this document.
First, you will need to enable the [Active Directory](https://docs.mage.ai/production/authentication/microsoft) integration in order for Mage to authenticate your user.
Once the Active Directory integration is enabled, you simply need to add your DevOps organization as an environment variable.
```bash theme={"system"}
export AZURE_DEVOPS_ORGANIZATION=`
```
You should now be able to authenticate with Azure DevOps and follow the rest of the steps in this document.
Click the Authenticate button next to your Git Provider to start the authentication process.
### Set Git directory
The Git directory is the local folder that will be linked to your remote repository.
### Authentication
You will be able to authenticate with GitHub by default, but if you need to authenticate with
GitHub Enterprise (GHE) or other providers, you will need to follow the steps below. You can
authenticate with multiple git providers if you need to. Mage will attempt to use the oauth provider
based on the URL of the remote.
Mage authenticates with a default GitHub OAuth application that may not be able to access
your repository depending on the repository or organization settings. If you encounter issues
accessing your repository after authenticating with GitHub, you may need to create your own
OAuth application that has access to the repositories you want to work with. You can follow the
steps in the `Authenticate with GitHub or GHE` section below to connect Mage with your OAuth
application.
When creating the OAuth app for GHE, BitBucket, GitLab, you will need to set the authorized
callback URL to `http(s):///oauth`.
In order for Mage to authenticate with your GitHub host, you will need to add Mage as an
authorized oauth application. You can follow the steps [here](https://docs.github.com/en/enterprise-cloud@latest/apps/oauth-apps/building-oauth-apps/creating-an-oauth-app)
to set it up.
Make sure you copy the client id and client secret after the app is created.
You will need to set the following environment variables in your Mage environment:
1. GHE\_HOSTNAME: the hostname of your GitHub instance. If you’re using non-enterprise GitHub or GitHub Enterprise Cloud, you should set this to `github.com`
2. GHE\_CLIENT\_ID: the client id you retrieved in the previous step
3. GHE\_CLIENT\_SECRET: the client secret you retrieved in the previous step
You should now be able to authenticate with GitHub and follow the rest of the steps in this document.
In order for Mage to authenticate with your BitBucket, you will need to add Mage as an
OAuth consumer. You can follow the steps [here](https://support.atlassian.com/bitbucket-cloud/docs/use-oauth-on-bitbucket-cloud/)
to set it up.
Make sure you copy the key and secret after the consumer is created.
You will need to set the following environment variables in your Mage environment:
1. BITBUCKET\_OAUTH\_KEY: the key you retrieved in the previous step
2. BITBUCKET\_OAUTH\_SECRET: the secret you retrieved in the previous step
You should now be able to authenticate with Bitbucket and follow the rest of the steps in this document.
Mage will request `read_user`, `write_repository`, and `api` scopes from GitLab in order
to perform the necessary git actions.
In order for Mage to authenticate with your GitLab, you will need to add a Mage oauth application.
You can follow the steps [here](https://docs.gitlab.com/ee/integration/oauth_provider.html)
to set it up.
Make sure you copy the Application ID and Secret after the oauth app is created.
You will need to set the following environment variables in your Mage environment:
1. GITLAB\_CLIENT\_ID: the application ID you retrieved in the previous step
2. GITLAB\_CLIENT\_SECRET: the secret you retrieved in the previous step
3. GITLAB\_HOST (optional): hostname for your GitLab instance. Defaults to `https://gitlab.com`
You should now be able to authenticate with GitLab and follow the rest of the steps in this document.
First, you will need to enable the [Active Directory](https://docs.mage.ai/production/authentication/microsoft) integration in order for Mage to authenticate your user.
Once the Active Directory integration is enabled, you simply need to add your DevOps organization as an environment variable.
```bash theme={"system"}
export AZURE_DEVOPS_ORGANIZATION=`
```
You should now be able to authenticate with Azure DevOps and follow the rest of the steps in this document.
Click the Authenticate button next to your Git Provider to start the authentication process.
 After authorizing Mage, you’ll be redirected back to the initial page and an access token will
be in the URL as a parameter. This access token is saved in your application’s database;
it never leaves your application’s database.
### Add remote
Enter a name for your new remote. For the remote URL, you must use the `https` version of the
GitHub repository (as opposed to the `SSH` version).
For example, the remote URL for Mage is `https://github.com/mage-ai/mage-ai.git`.
Note that a remote added via HTTPS/SSH authentication *will not* work— only a remote in the format above is accepted.
Once you fill in both input text fields, click the button labeled Create new remote.
### Actions
#### Clone remote repository
Cloning will copy all the files and folders from the remote repository and put them into the Git directory you specified above.
Cloning won’t automatically create a folder that is named after the remote repository.
For example, if you have a file named `magic.py` in a remote repository named `project_romeo`
then that file will be cloned here `/magic.py`
as opposed to `/project_romeo/magic.py`.
If you want to clone the content of a remote repository into a folder named after the remote repository, then change the Git init directory above to
`/[remote repository name]`
1. Under the Actions dropdown, select the option labeled Clone.
2. Under the Remote dropdown, select the name of the remote you want to clone from (e.g. origin).
#### Pull remote branch
1. Under the Actions dropdown, select the option labeled Pull.
2. Under the Remote dropdown, select the name of the remote you want to pull from (e.g. origin).
3. Under the Branch dropdown, select the name of the branch you want to pull from the remote you chose from the previous step.
***
## Branches
After authorizing Mage, you’ll be redirected back to the initial page and an access token will
be in the URL as a parameter. This access token is saved in your application’s database;
it never leaves your application’s database.
### Add remote
Enter a name for your new remote. For the remote URL, you must use the `https` version of the
GitHub repository (as opposed to the `SSH` version).
For example, the remote URL for Mage is `https://github.com/mage-ai/mage-ai.git`.
Note that a remote added via HTTPS/SSH authentication *will not* work— only a remote in the format above is accepted.
Once you fill in both input text fields, click the button labeled Create new remote.
### Actions
#### Clone remote repository
Cloning will copy all the files and folders from the remote repository and put them into the Git directory you specified above.
Cloning won’t automatically create a folder that is named after the remote repository.
For example, if you have a file named `magic.py` in a remote repository named `project_romeo`
then that file will be cloned here `/magic.py`
as opposed to `/project_romeo/magic.py`.
If you want to clone the content of a remote repository into a folder named after the remote repository, then change the Git init directory above to
`/[remote repository name]`
1. Under the Actions dropdown, select the option labeled Clone.
2. Under the Remote dropdown, select the name of the remote you want to clone from (e.g. origin).
#### Pull remote branch
1. Under the Actions dropdown, select the option labeled Pull.
2. Under the Remote dropdown, select the name of the remote you want to pull from (e.g. origin).
3. Under the Branch dropdown, select the name of the branch you want to pull from the remote you chose from the previous step.
***
## Branches
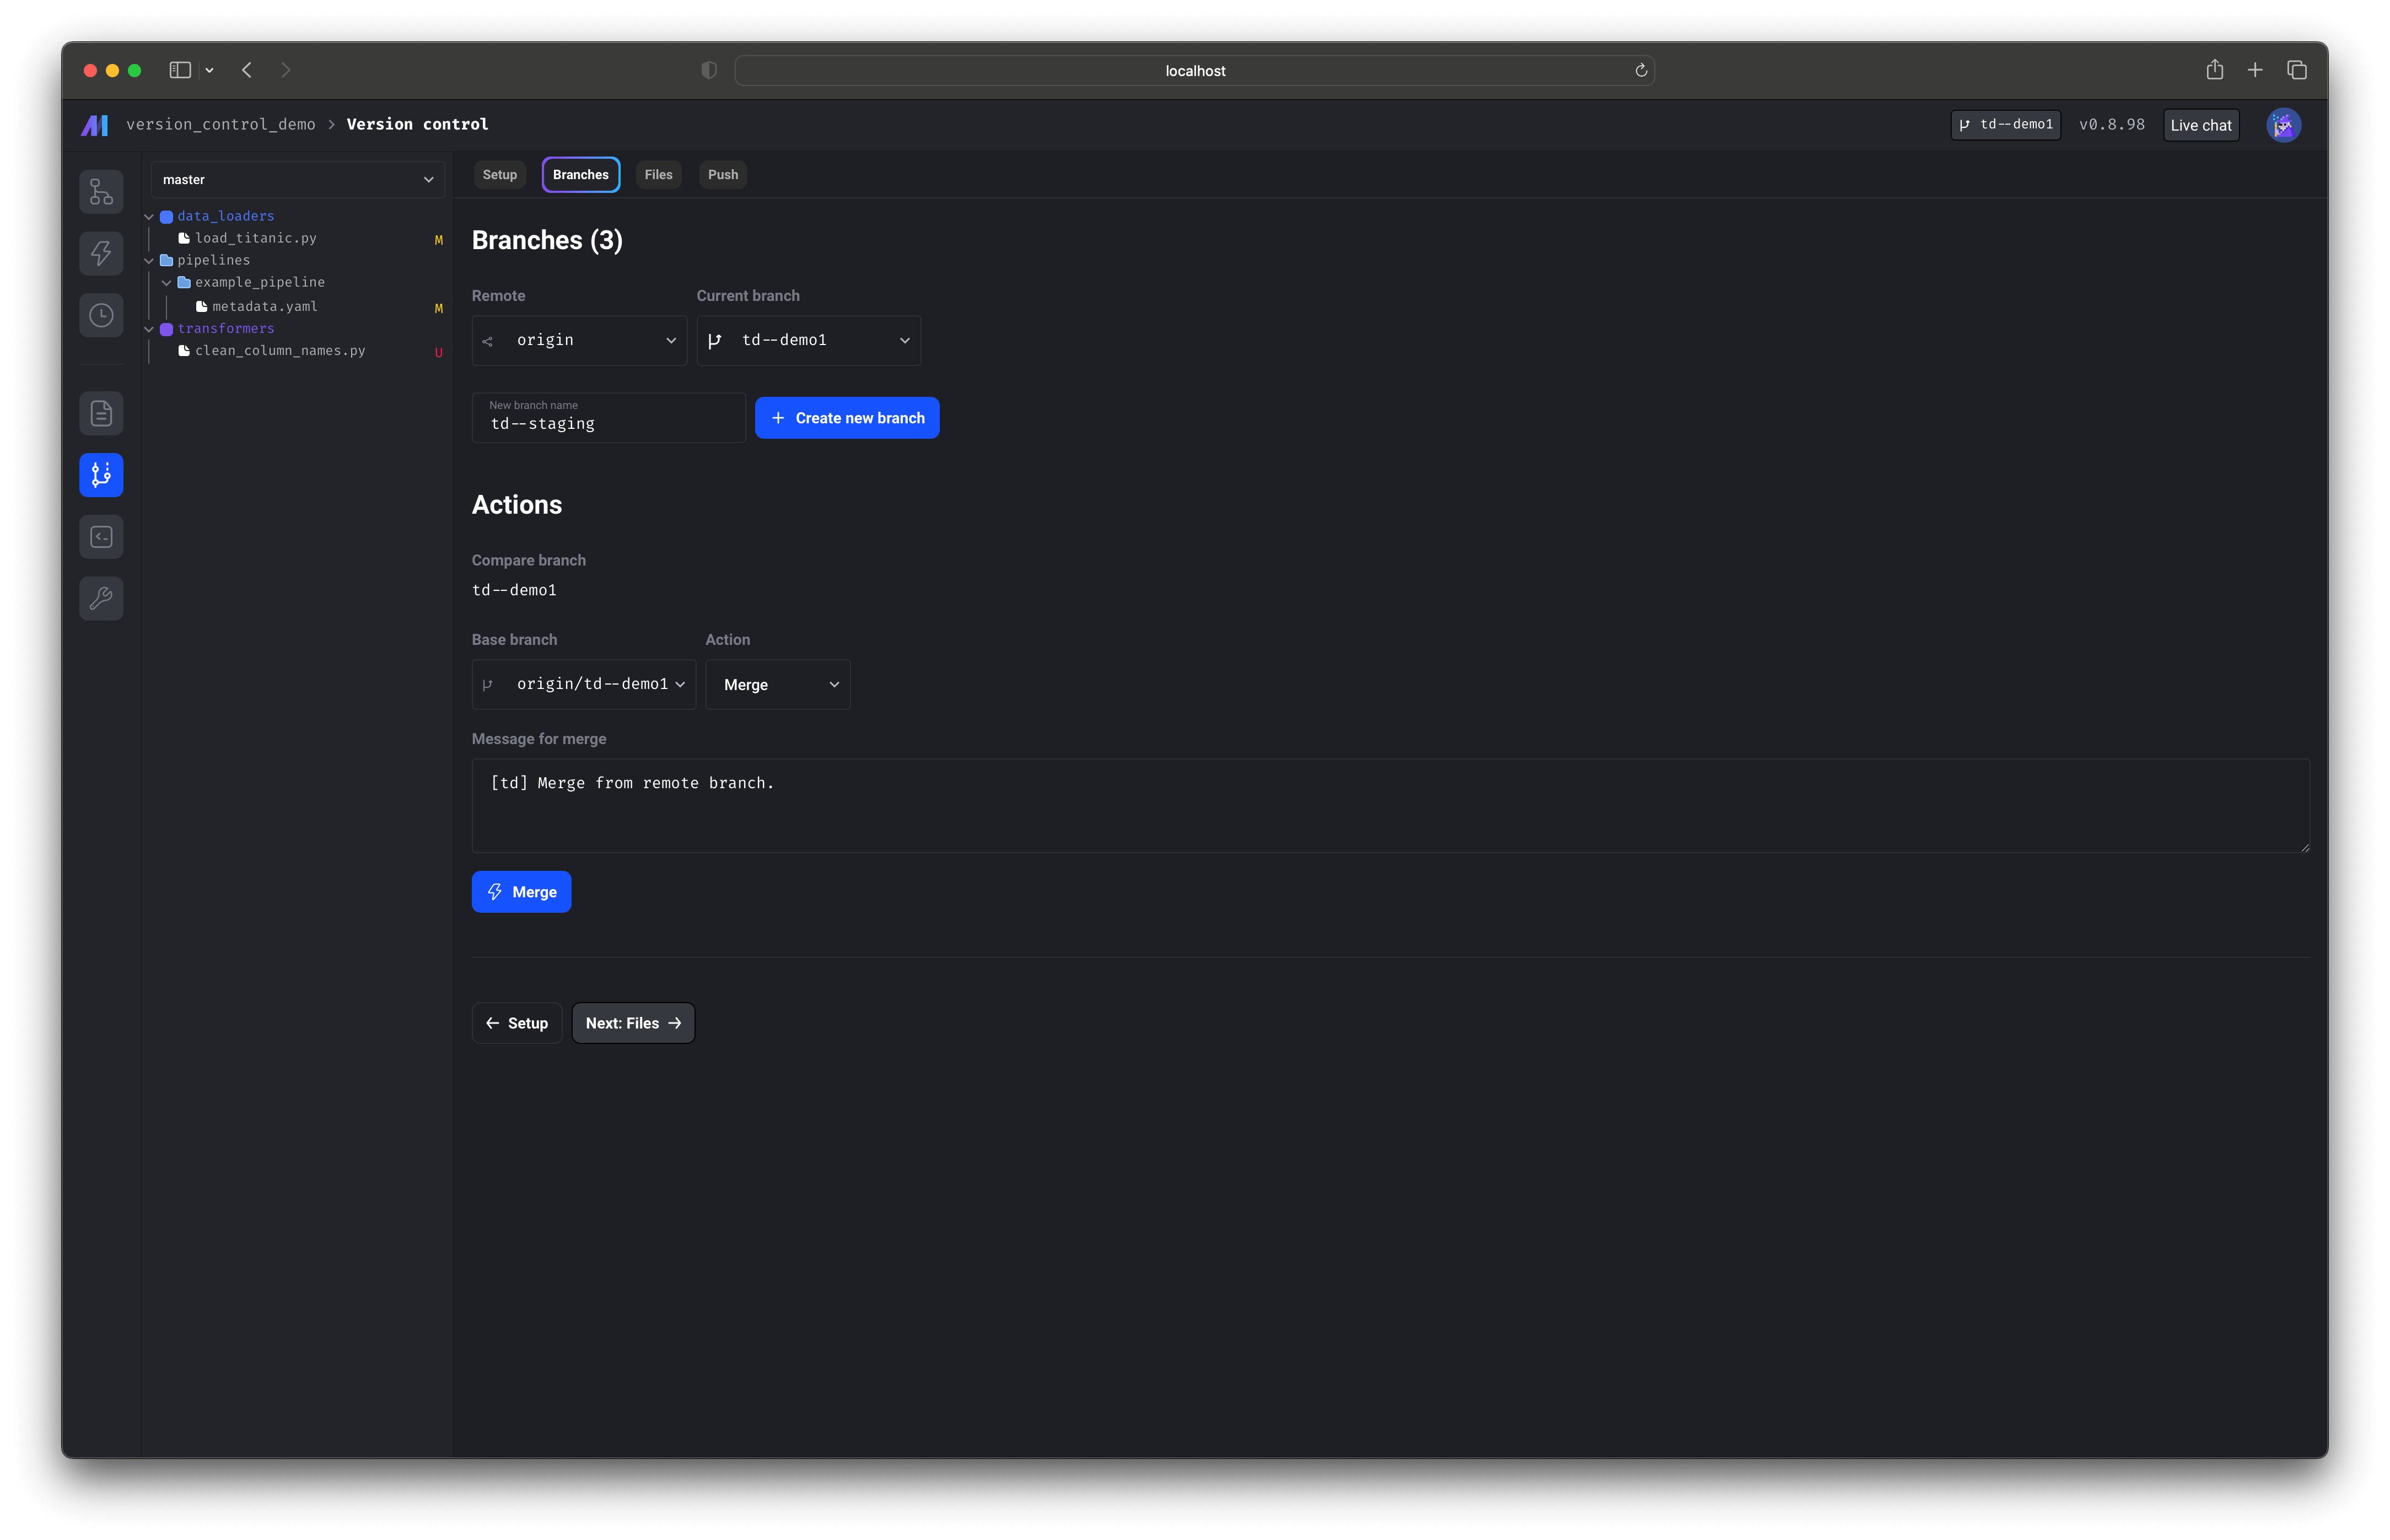 ### Switch branch
1. Under the dropdown labeled Current branch, select the name of the branch you want to change to.
2. After selecting a branch, the current branch will be updated to what you selected.
### Create branch
1. Type in the name of the new branch in the text input field.
2. Click the button labeled + Create new branch.
### Merge branch
1. Under the Base branch dropdown, select the name of the branch you want to merge into your current branch.
2. Under the Action dropdown, select the option labeled Merge.
3. Type a commit message for the merge action.
4. Click the button labeled Merge.
### Rebase branch
1. Under the Base branch dropdown, select the name of the branch you want to rebase into your current branch.
2. Under the Action dropdown, select the option labeled Rebase.
3. Type a commit message for the rebase action.
4. Click the button labeled Rebase.
### Delete branch
1. Under the Base branch dropdown, select the name of the branch you want to delete.
2. Under the Action dropdown, select the option labeled Delete.
3. Click the button labeled Delete.
4. Confirm the popup dialog box.
***
## Files
### Switch branch
1. Under the dropdown labeled Current branch, select the name of the branch you want to change to.
2. After selecting a branch, the current branch will be updated to what you selected.
### Create branch
1. Type in the name of the new branch in the text input field.
2. Click the button labeled + Create new branch.
### Merge branch
1. Under the Base branch dropdown, select the name of the branch you want to merge into your current branch.
2. Under the Action dropdown, select the option labeled Merge.
3. Type a commit message for the merge action.
4. Click the button labeled Merge.
### Rebase branch
1. Under the Base branch dropdown, select the name of the branch you want to rebase into your current branch.
2. Under the Action dropdown, select the option labeled Rebase.
3. Type a commit message for the rebase action.
4. Click the button labeled Rebase.
### Delete branch
1. Under the Base branch dropdown, select the name of the branch you want to delete.
2. Under the Action dropdown, select the option labeled Delete.
3. Click the button labeled Delete.
4. Confirm the popup dialog box.
***
## Files
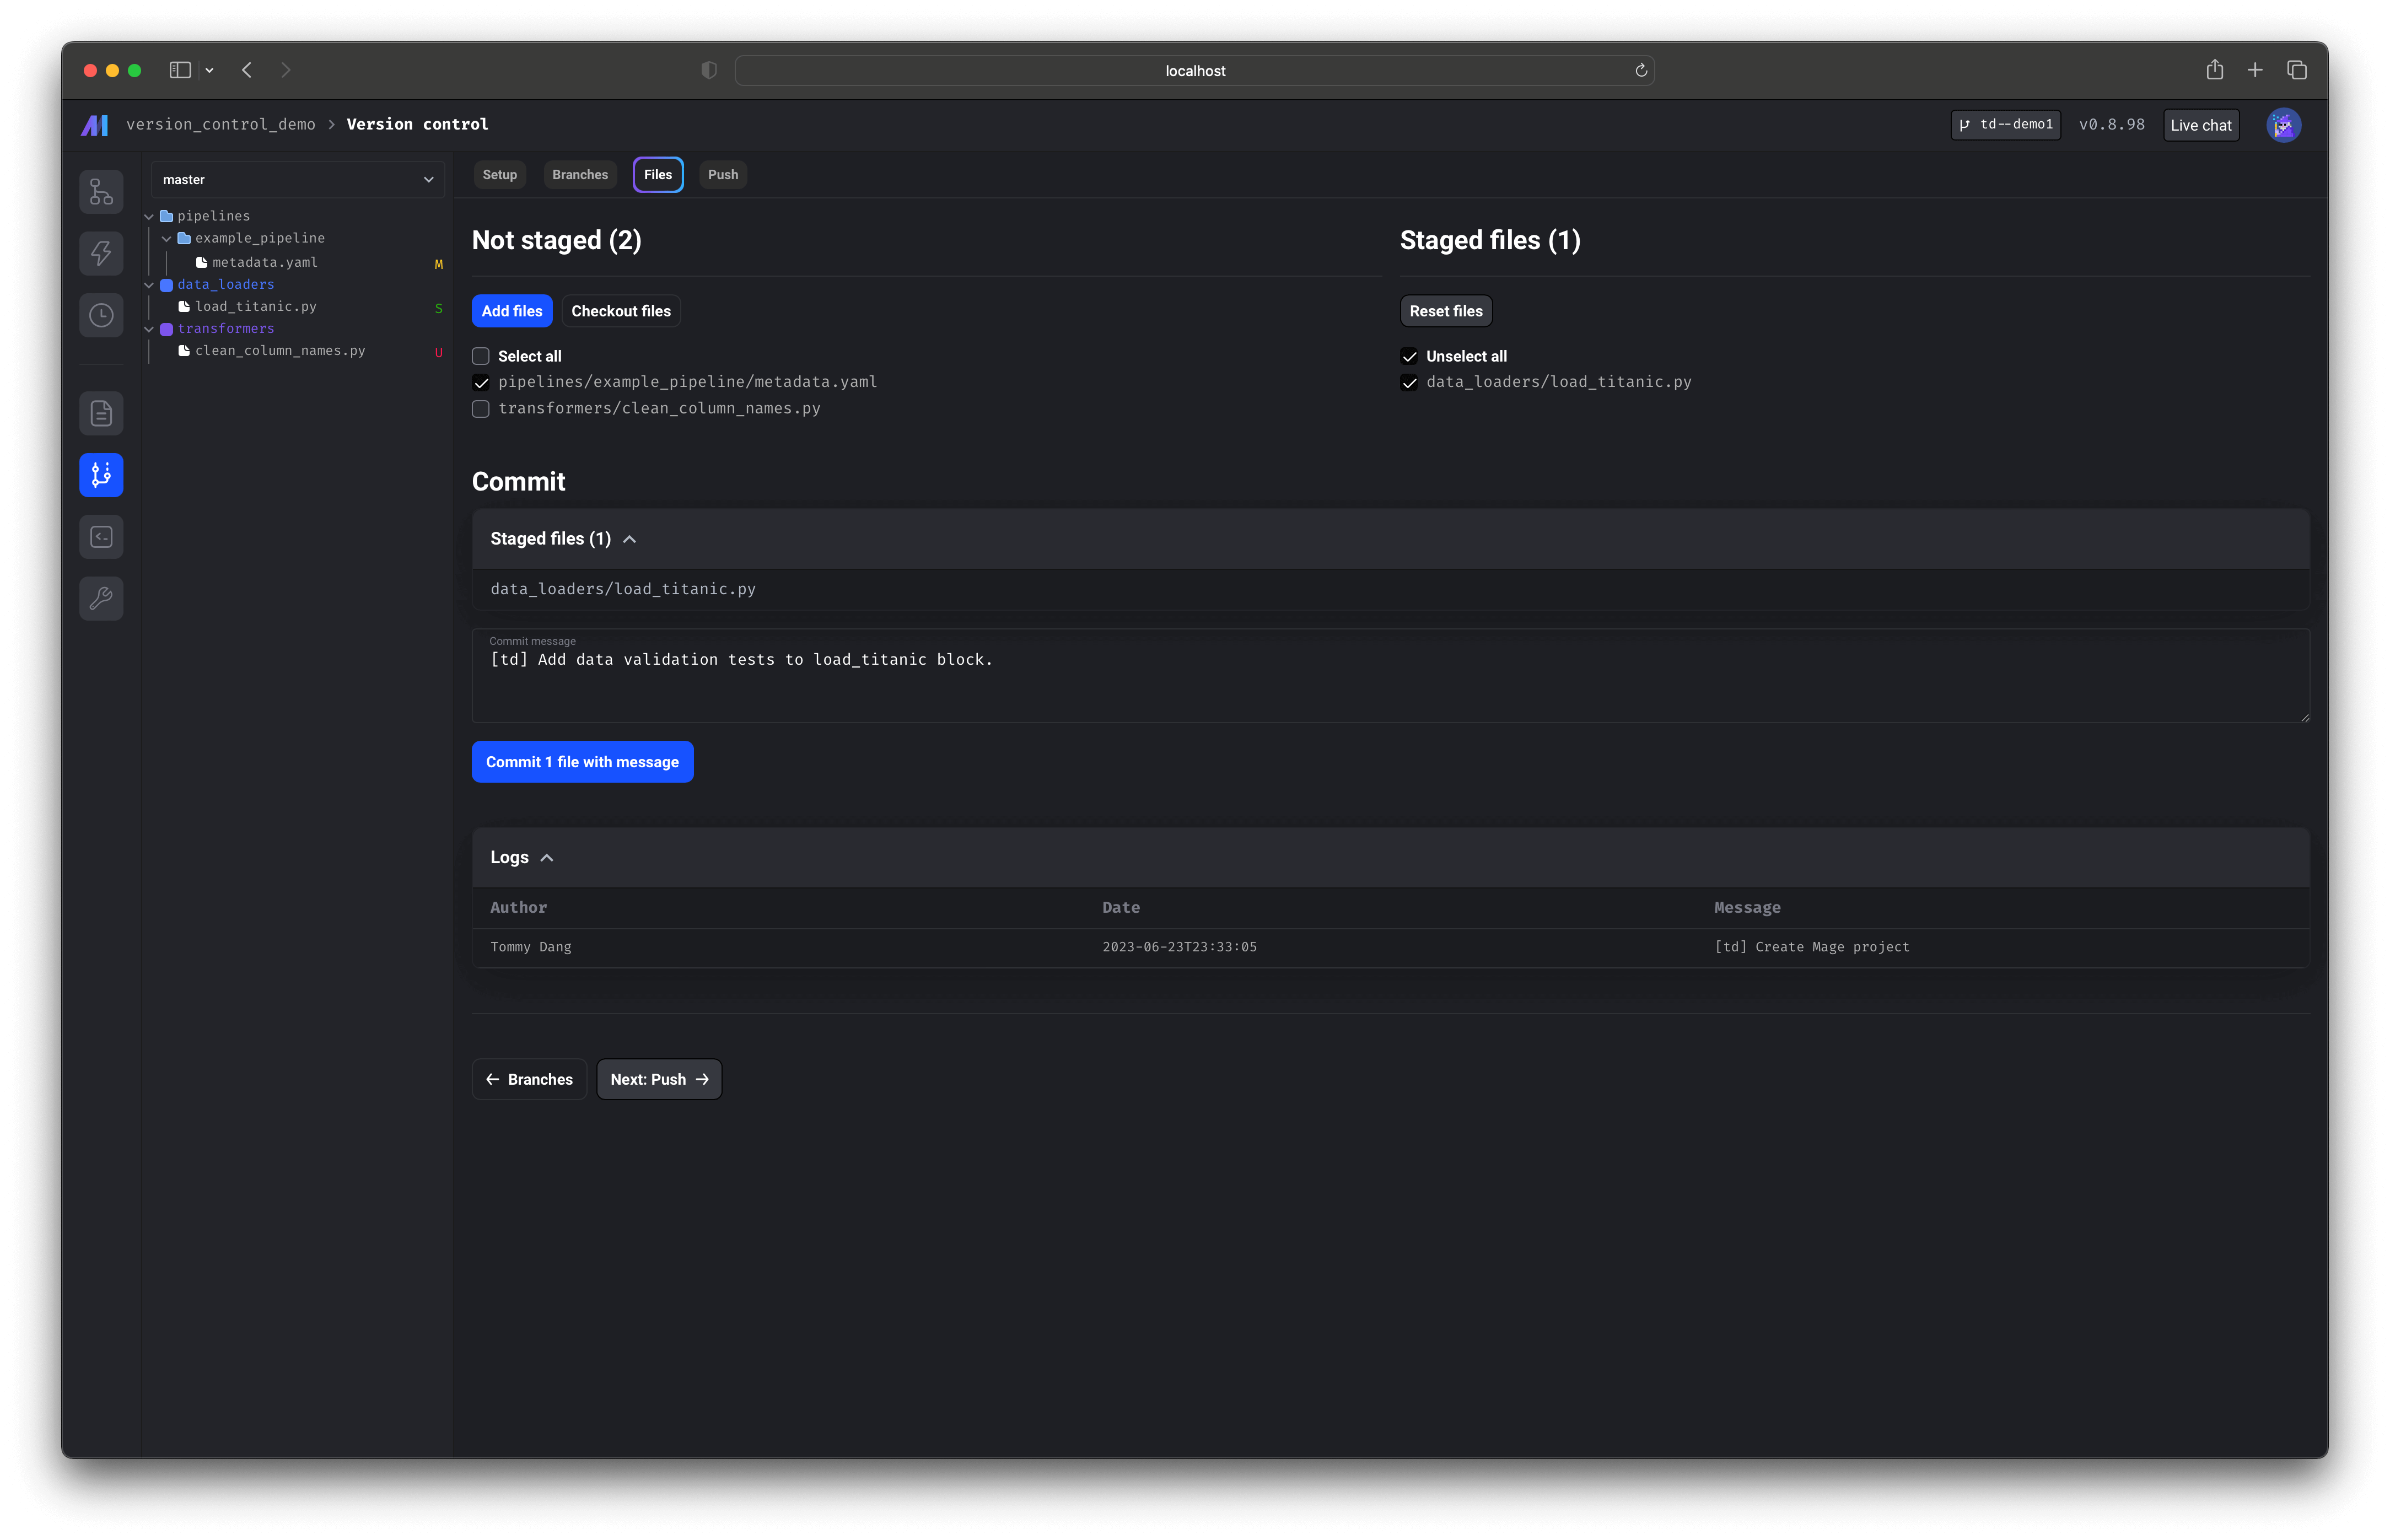 ### Add files
1. On the left side under Not staged, check the boxes next to the files you want to add.
2. Once you’re done selecting the files, click the button labeled Add files.
3. The selected files will be staged.
### Checkout files
1. On the left side under Not staged, check the boxes next to the files you want to checkout.
2. Once you’re done selecting the files, click the button labeled Checkout files.
3. Confirm the popup dialog box.
4. All changes to the selected files will be undone.
### Reset files
1. On the right side under Staged files, check the boxes next to the files you want to reset.
2. Once you’re done selecting the files, click the button labeled Reset files.
3. The selected files will be unstaged.
### Commit
1. Enter a commit message.
2. Click the button labeled Commit N files with message.
***
## Push
### Add files
1. On the left side under Not staged, check the boxes next to the files you want to add.
2. Once you’re done selecting the files, click the button labeled Add files.
3. The selected files will be staged.
### Checkout files
1. On the left side under Not staged, check the boxes next to the files you want to checkout.
2. Once you’re done selecting the files, click the button labeled Checkout files.
3. Confirm the popup dialog box.
4. All changes to the selected files will be undone.
### Reset files
1. On the right side under Staged files, check the boxes next to the files you want to reset.
2. Once you’re done selecting the files, click the button labeled Reset files.
3. The selected files will be unstaged.
### Commit
1. Enter a commit message.
2. Click the button labeled Commit N files with message.
***
## Push
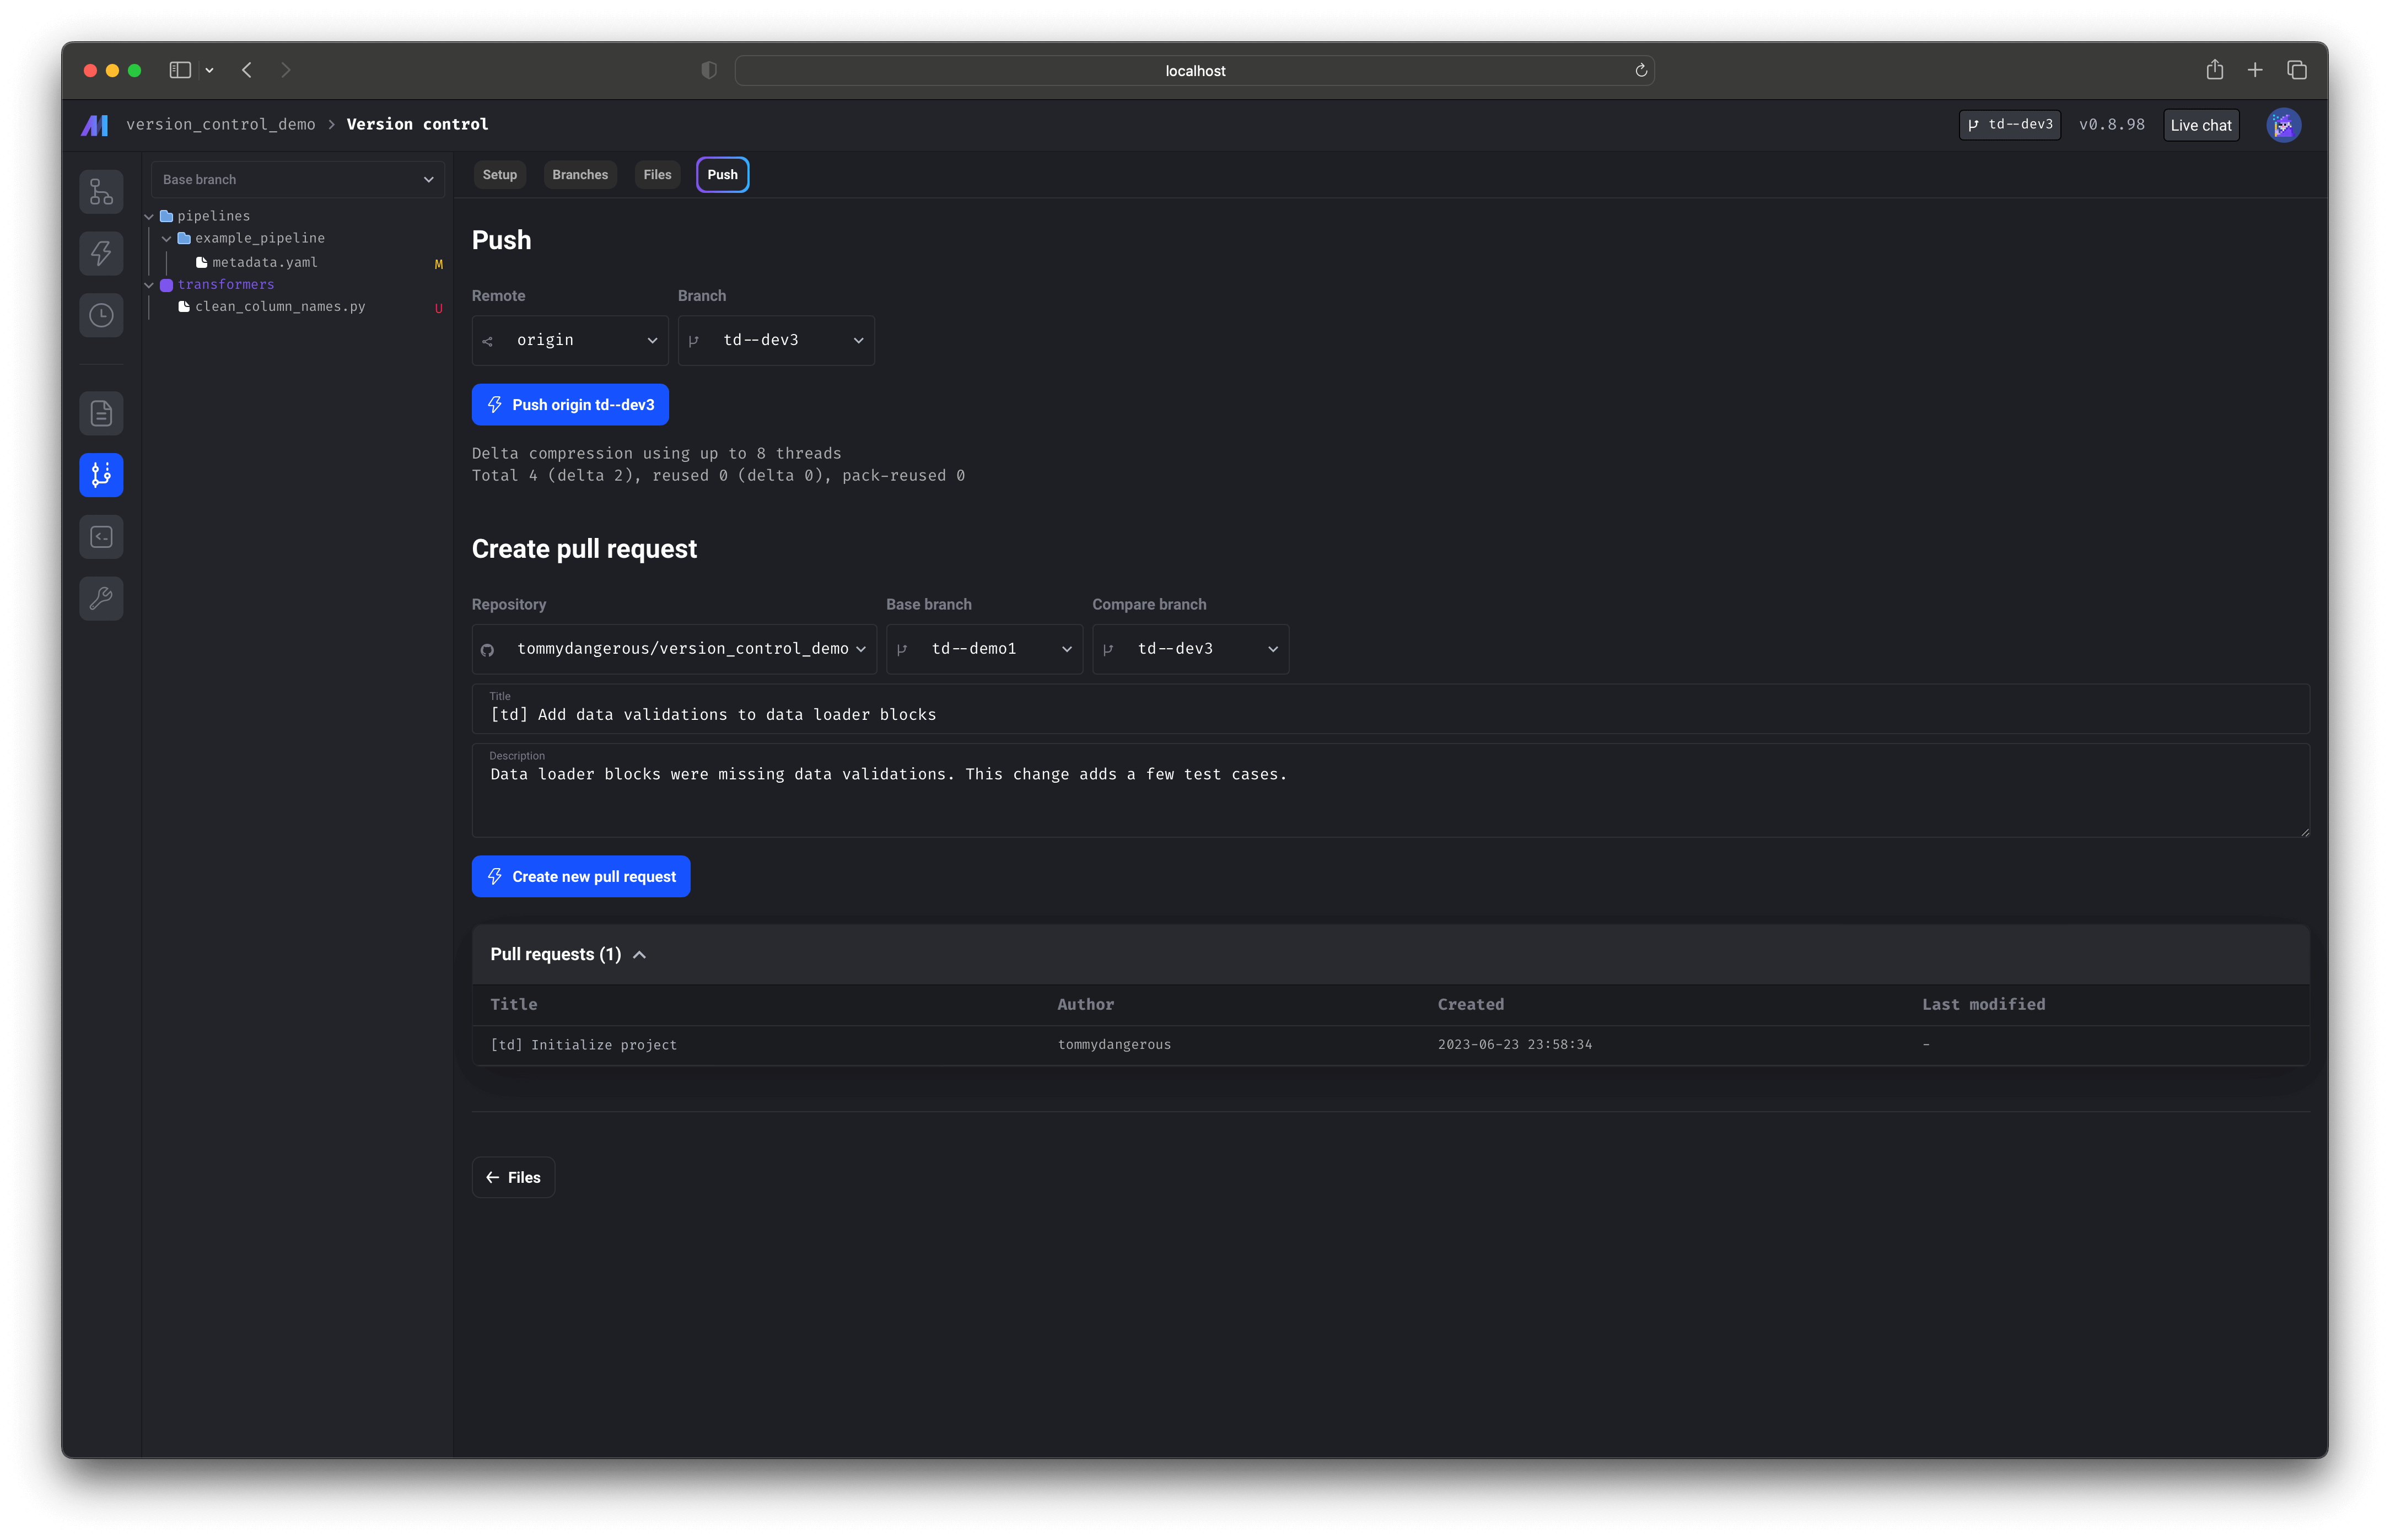 ### Push local changes
1. Under the Remote dropdown, select the name of the remote you want to push to (e.g. origin).
2. Under the Branch dropdown, select the name of the branch you want to push.
3. Click the button labeled Push \[remote] \[branch].
### Create pull request
1. Under the Repository dropdown, select the name of the repository you want to create a pull request for.
2. Under the Base branch dropdown, select the name of the branch you want your pull request to compare against (e.g. main).
3. Under the Compare branch dropdown, select the name of the branch you want your pull request to be for (e.g. feature branch).
4. Type the title of the pull request in the text input field labeled Title.
5. Type the description of the pull request in the text input field labeled Description.
### Push local changes
1. Under the Remote dropdown, select the name of the remote you want to push to (e.g. origin).
2. Under the Branch dropdown, select the name of the branch you want to push.
3. Click the button labeled Push \[remote] \[branch].
### Create pull request
1. Under the Repository dropdown, select the name of the repository you want to create a pull request for.
2. Under the Base branch dropdown, select the name of the branch you want your pull request to compare against (e.g. main).
3. Under the Compare branch dropdown, select the name of the branch you want your pull request to be for (e.g. feature branch).
4. Type the title of the pull request in the text input field labeled Title.
5. Type the description of the pull request in the text input field labeled Description.
