> ## Documentation Index
> Fetch the complete documentation index at: https://docs.mage.ai/llms.txt
> Use this file to discover all available pages before exploring further.
# Mage Pro pipeline trigger
> Trigger your first Mage Pro data pipeline
Pipeline automation is a critical component of production data workflows It ensures consistent and reliable execution without manual intervention. Mage Pro provides comprehensive orchestration capabilities through its trigger UI or YAML conde configuration, which initiates pipeline execution based on predefined conditions or external events.
Mage supports two primary orchestration patterns for pipeline automation:
**1. Schedule-Based Orchestration**
Schedule triggers provide time-based automation capabilities with flexible configuration options:
* **Continuous Execution**: Maintains persistent pipeline runs for real-time data processing scenarios
* **Interval-Based Execution**: Configures pipelines to run at specified intervals (hourly, daily, weekly, etc.)
* **One-Time Execution**: Schedules pipelines for single execution at a designated time
* **Custom Timeline Configuration**: Enables complex scheduling patterns with custom cron expressions
* **Deadline Management**: Sets completion time constraints to ensure pipelines finish within specified windows
This method is optimal for batch processing workflows, ETL operations, and scenarios requiring predictable execution patterns.
**2. API-Driven Orchestration**
API triggers enable event-driven pipeline execution through HTTP endpoints:
* **RESTful Integration**: Exposes pipeline execution through standardized POST requests
* **External System Integration**: Allows third-party applications to trigger pipeline runs
* **Programmatic Control**: Enables dynamic pipeline orchestration through application logic
This approach is ideal for real-time processing scenarios, webhook integrations, and microservice architectures requiring on-demand pipeline execution.
**Let’s create a new schedule based trigger:**
**Step 1**: From the pipeline editor page hover over the left popout navigation menu and select triggers.
**Step 2**: Once on the triggers page click the green “New trigger” button
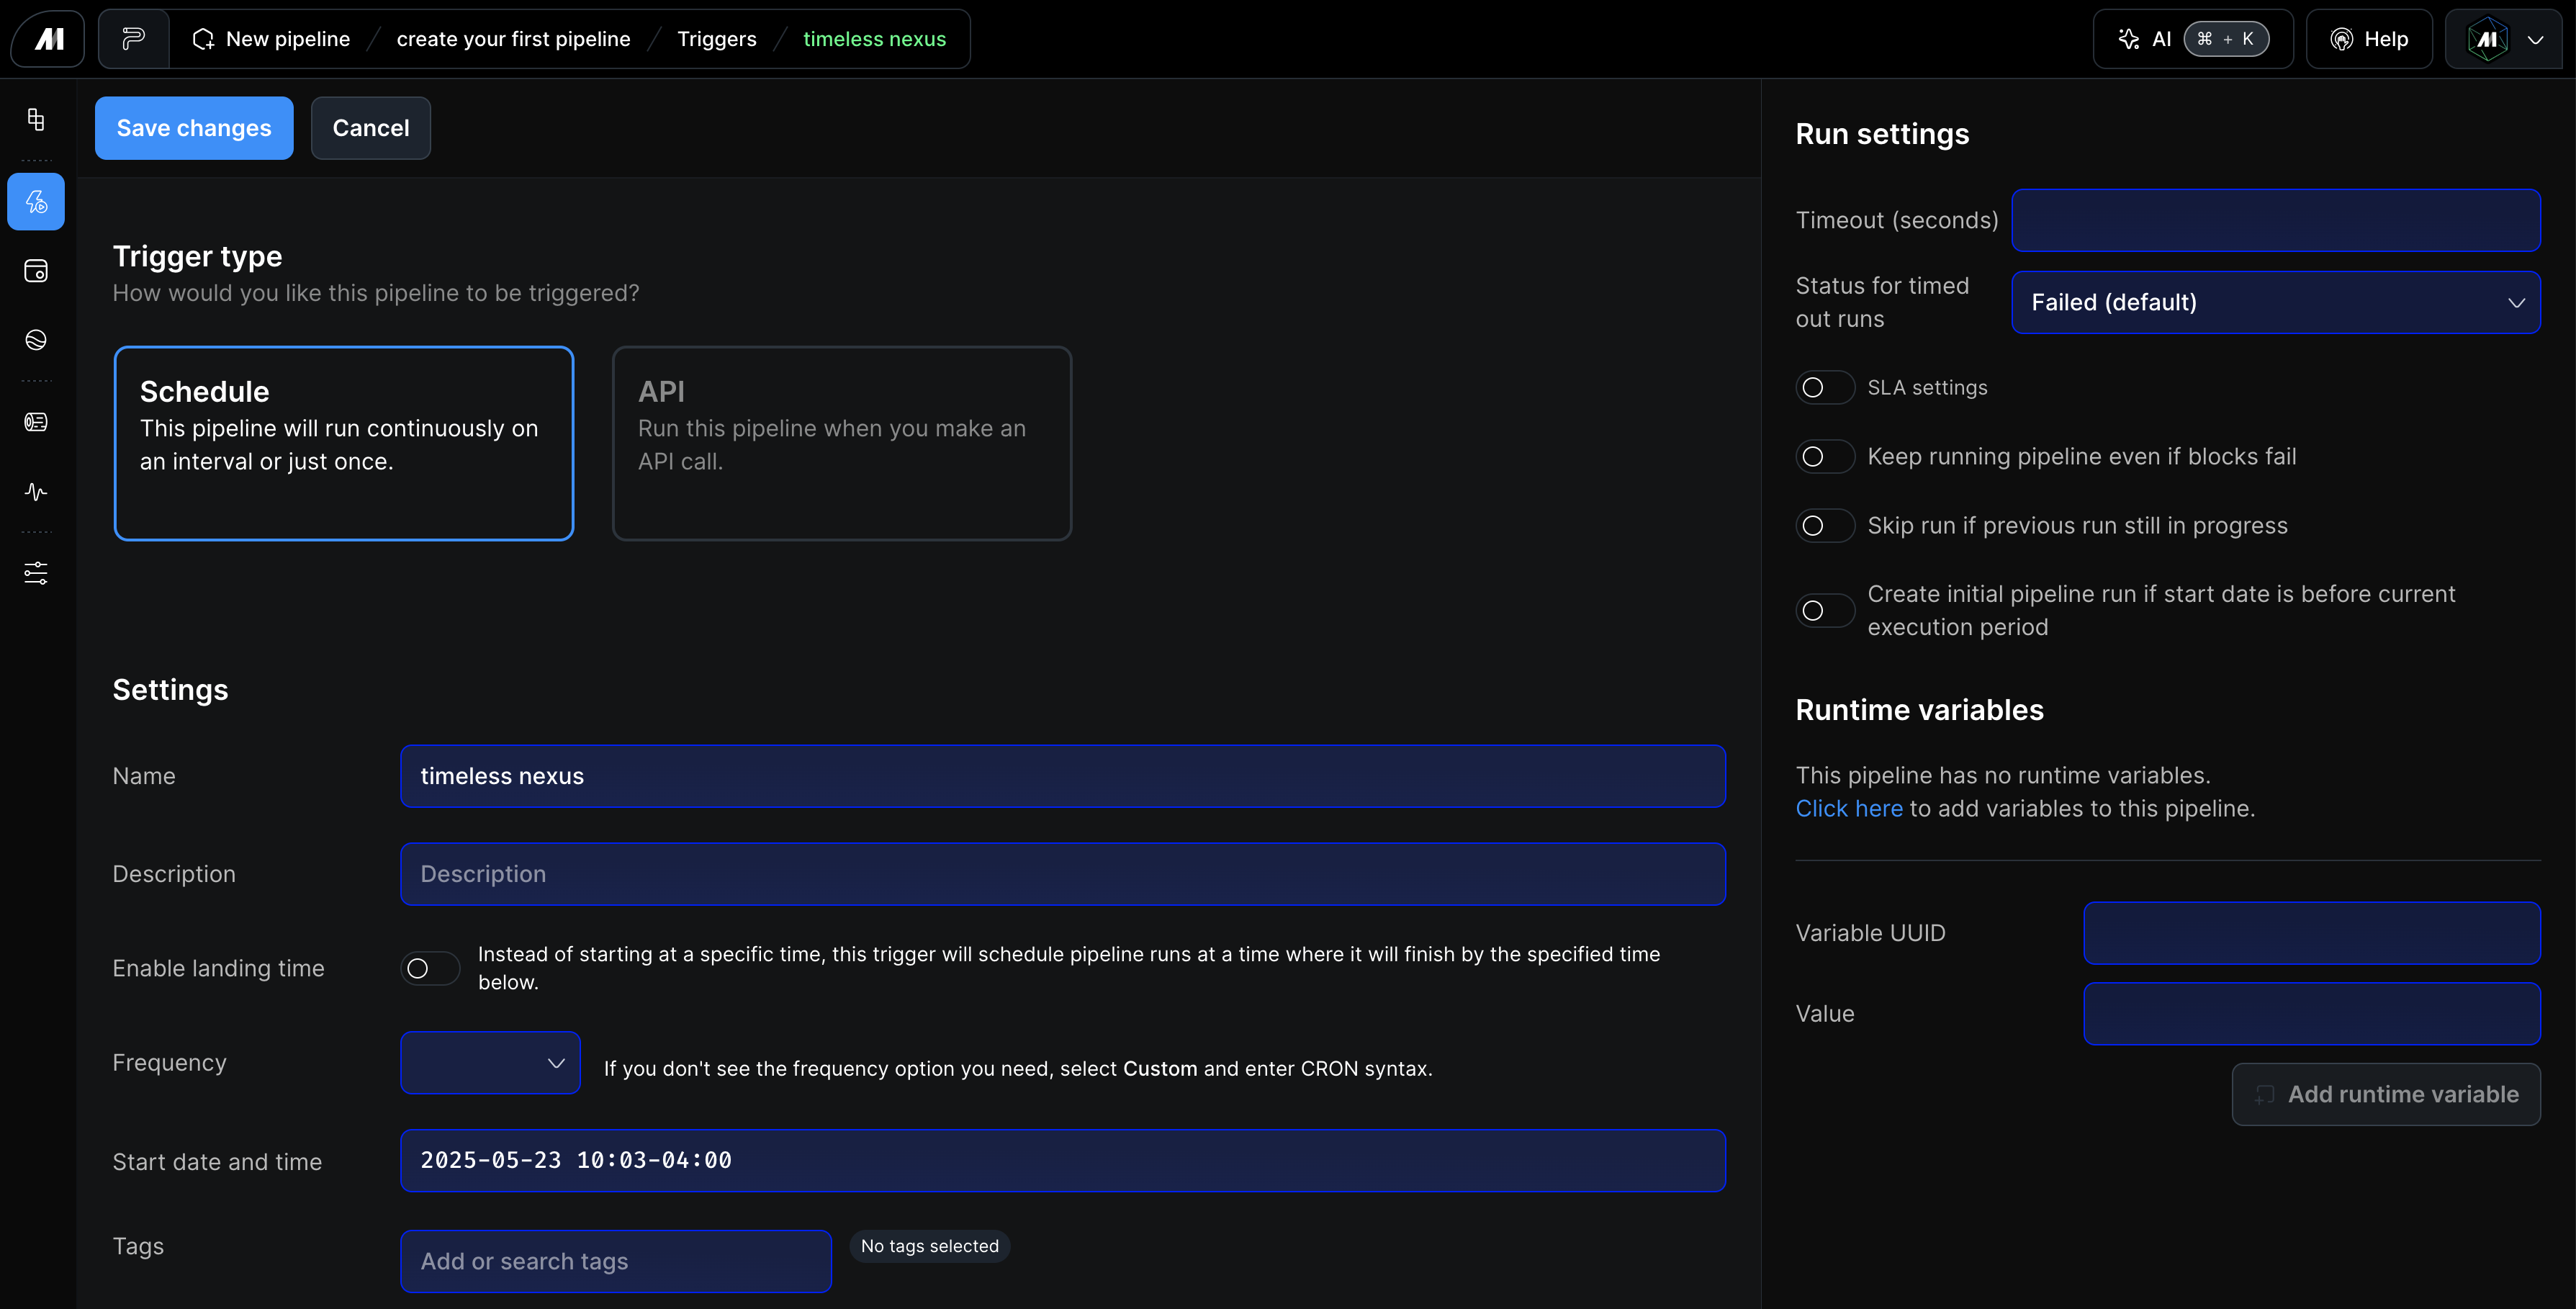
 **Step 3**: After clicking “New Trigger,” you will be taken to a screen where you can create a trigger. Select the “Schedule” option and the UI pictured below ill populate.
**Step 4**: Complete the text fields below to configure your trigger based on the workflows requirements. You can also configure Run settings, SLA requirements, and Runtime variables in this UI.
**Step 5**: Click Save changes to save your trigger.
**Step 3**: After clicking “New Trigger,” you will be taken to a screen where you can create a trigger. Select the “Schedule” option and the UI pictured below ill populate.
**Step 4**: Complete the text fields below to configure your trigger based on the workflows requirements. You can also configure Run settings, SLA requirements, and Runtime variables in this UI.
**Step 5**: Click Save changes to save your trigger.
 **Step 6**: After saving your changes you will be taken to a new screen where you can enable your trigger. Once enabled, the trigger will begin to run based on your previous configuration.
**Step 7**: Click the “Save trigger in code” button to save your trigger to a YAML file.
**Step 6**: After saving your changes you will be taken to a new screen where you can enable your trigger. Once enabled, the trigger will begin to run based on your previous configuration.
**Step 7**: Click the “Save trigger in code” button to save your trigger to a YAML file.
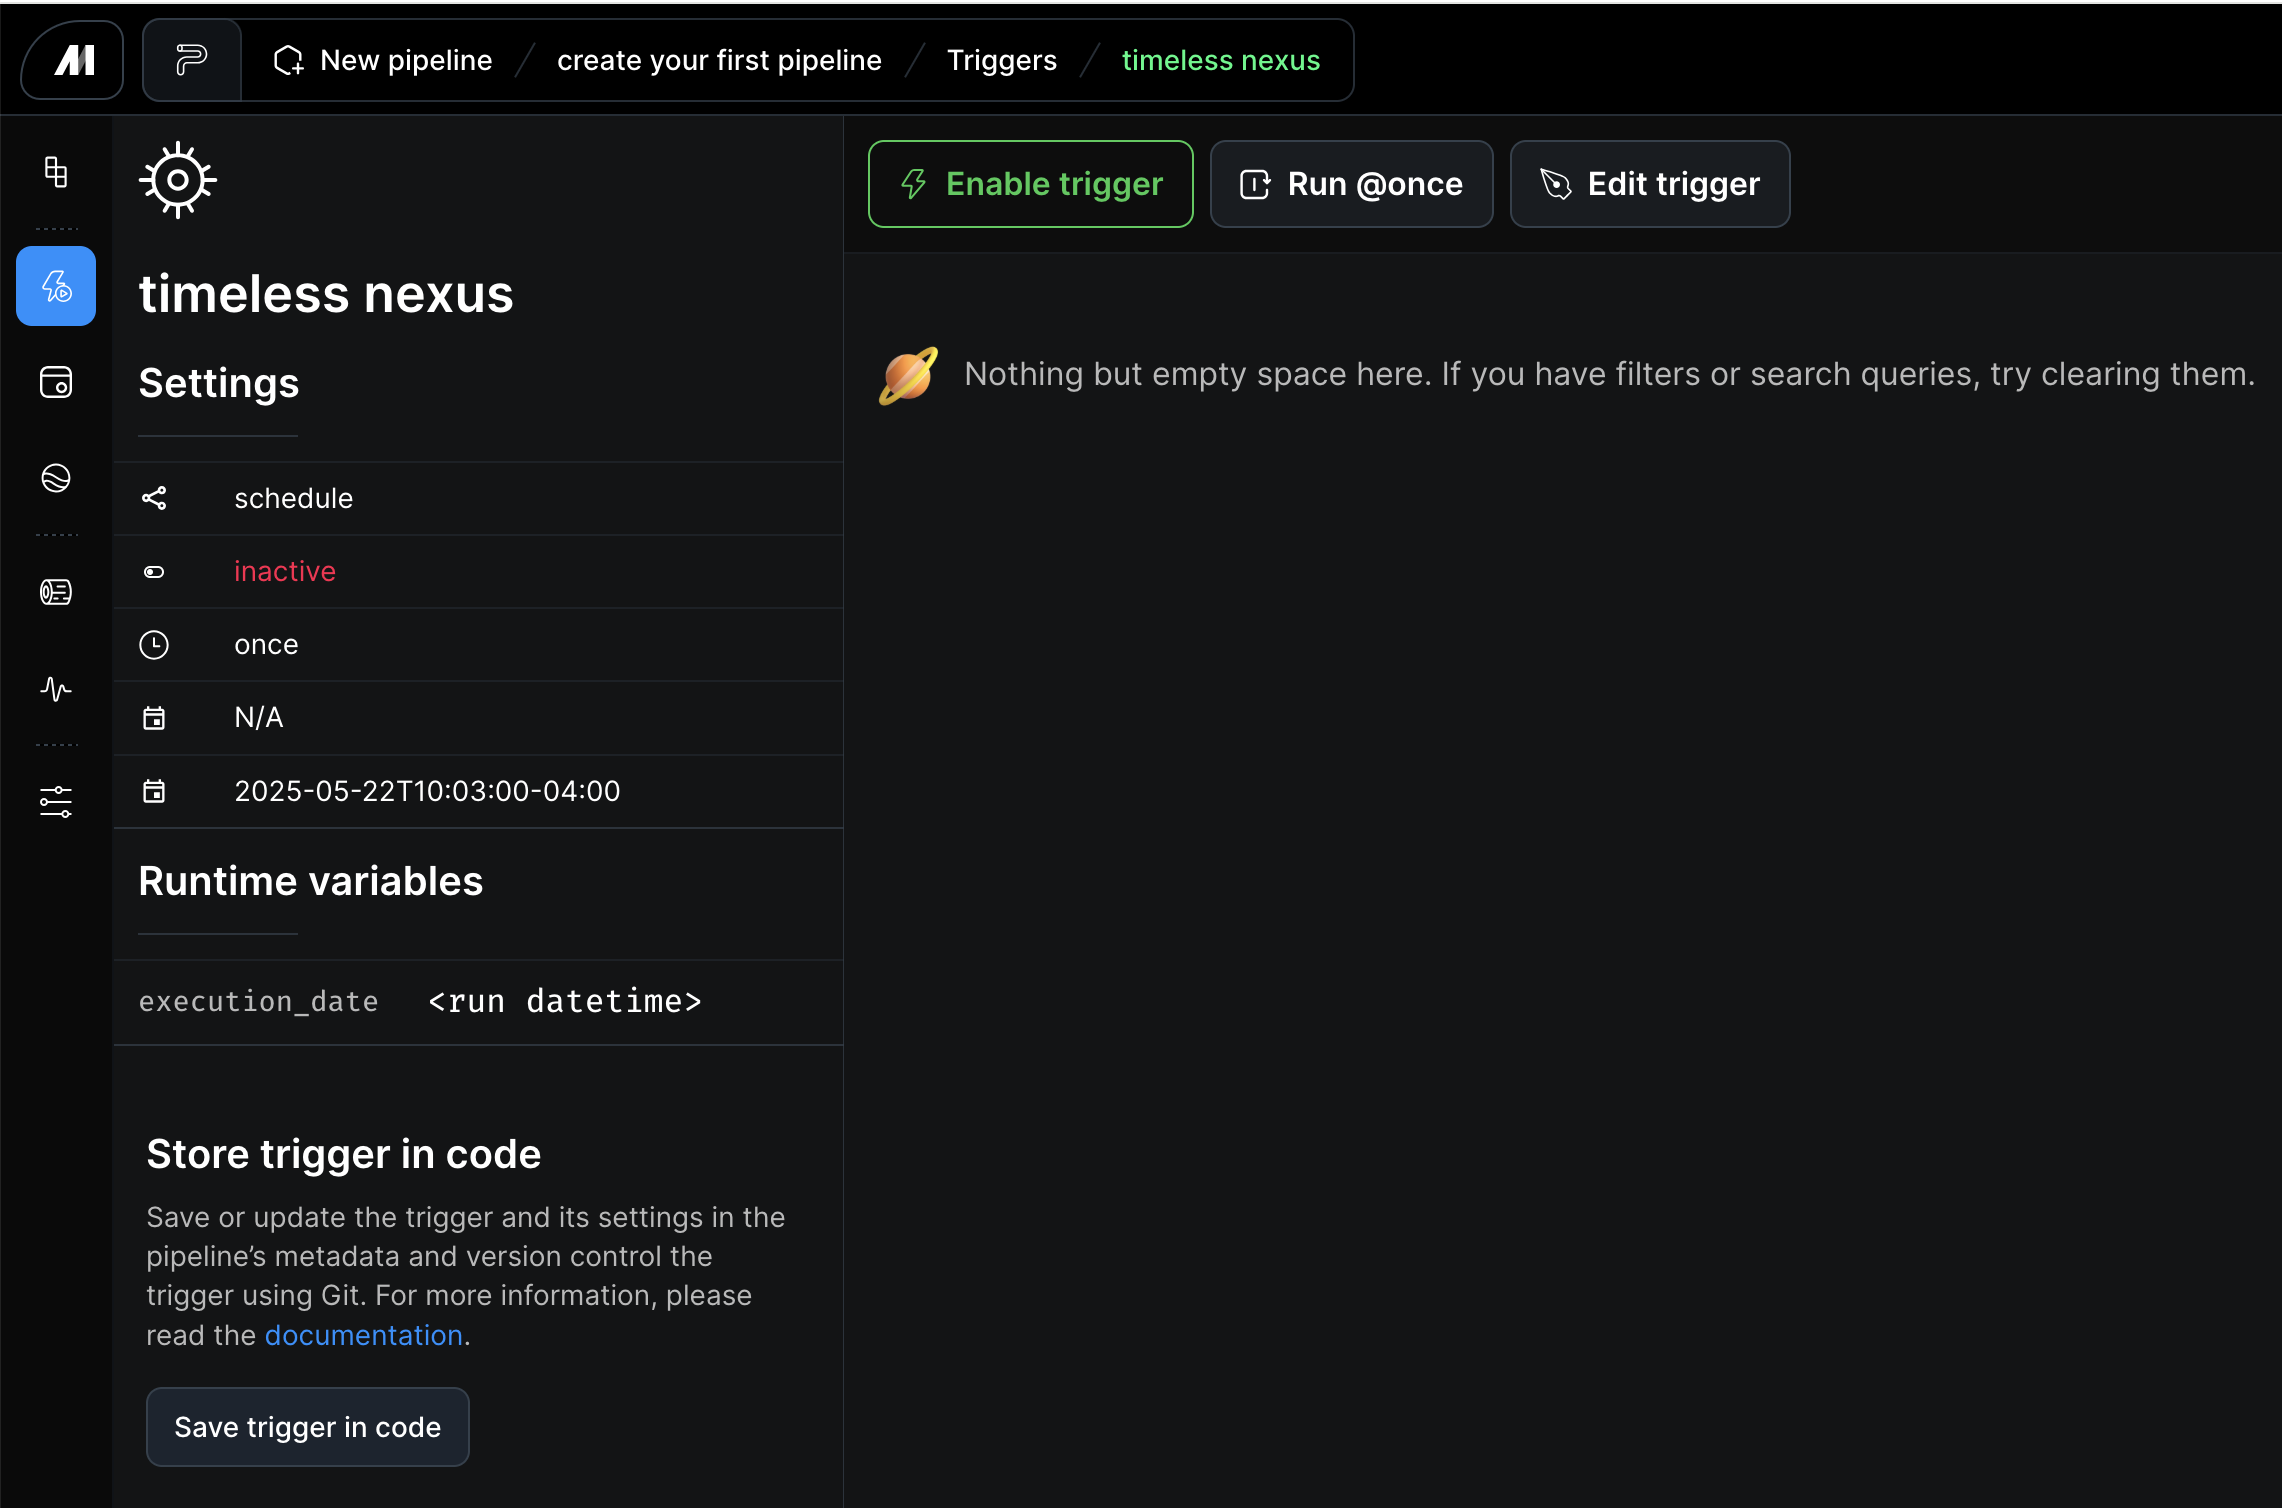 Once your trigger is enabled, if you set a past date in the “Start date and time” field your trigger will automatically run the pipeline. If you chose a date further out it will start to run on the schedule you provided in the Frequency and Start date and time fields.
You have successfully automated your first Mage pipeline. This foundational automation capability enables consistent, reliable data processing without manual intervention. You can now apply these same principles to build additional automated workflows for your data infrastructure.
Once your trigger is enabled, if you set a past date in the “Start date and time” field your trigger will automatically run the pipeline. If you chose a date further out it will start to run on the schedule you provided in the Frequency and Start date and time fields.
You have successfully automated your first Mage pipeline. This foundational automation capability enables consistent, reliable data processing without manual intervention. You can now apply these same principles to build additional automated workflows for your data infrastructure.